Category: Uncategorized

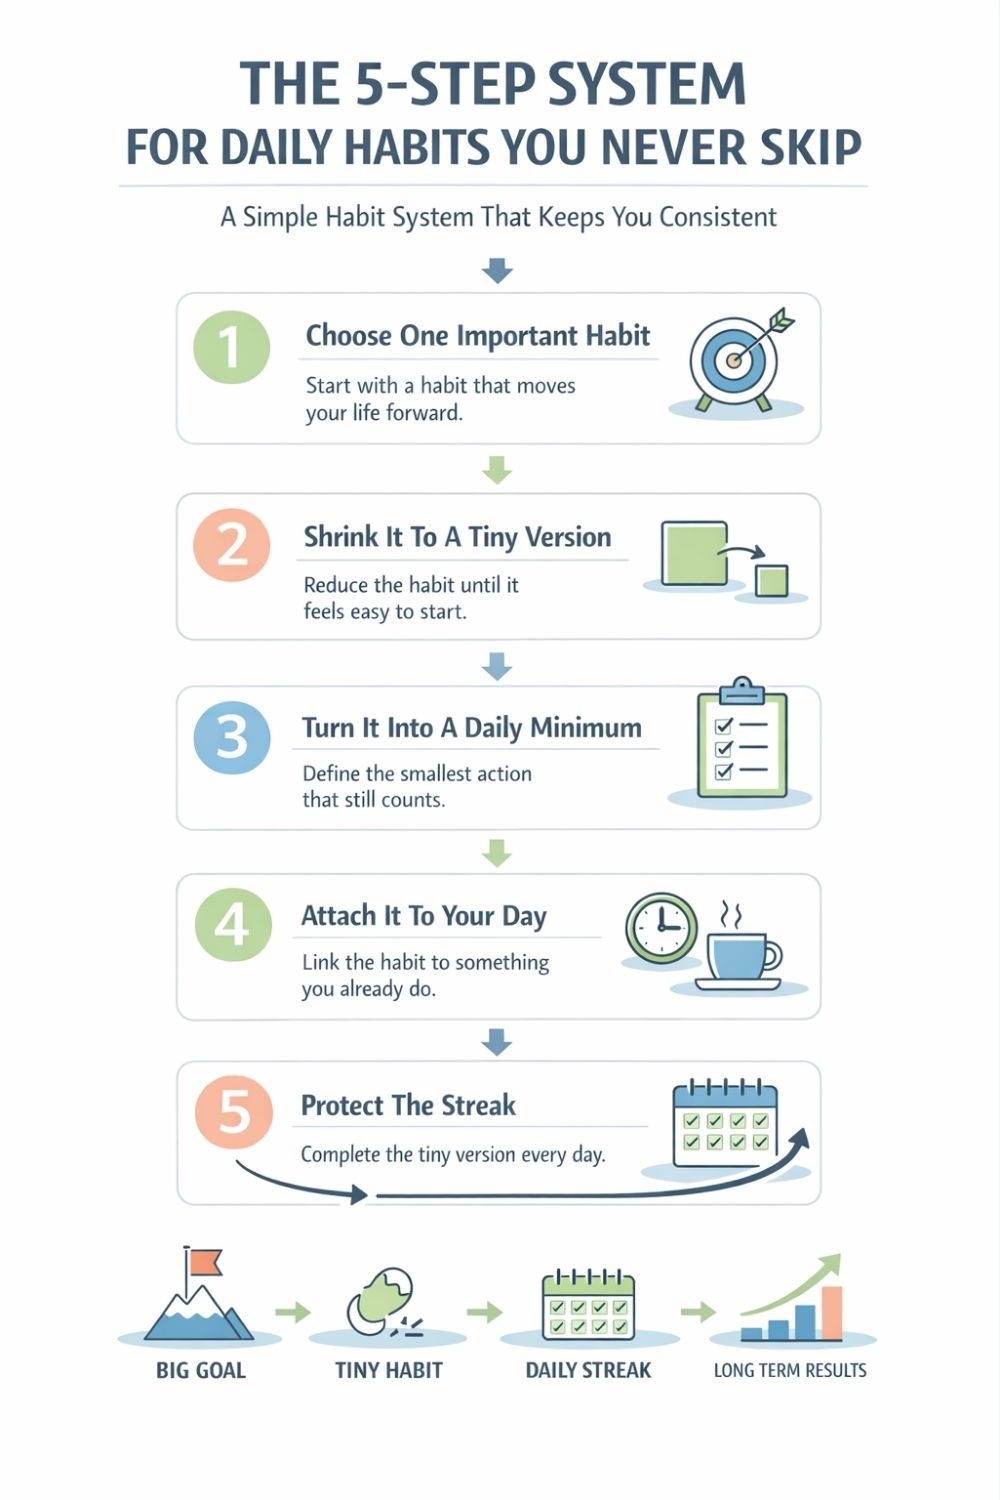
  • One-Tiny-Task Promise: How to Start Anything by Finishing the Smallest Possible Task

    One-Tiny-Task Promise: How to Start Anything by Finishing the Smallest Possible Task


    Some days the hardest part of productivity isn’t the work itself. It’s starting.

    When a task feels big, complicated, or mentally heavy, the brain tends to delay it. You might open a document, stare at it, and suddenly feel the urge to check email, scroll your phone, or reorganize your desk instead.

    This isn’t laziness. It’s friction.

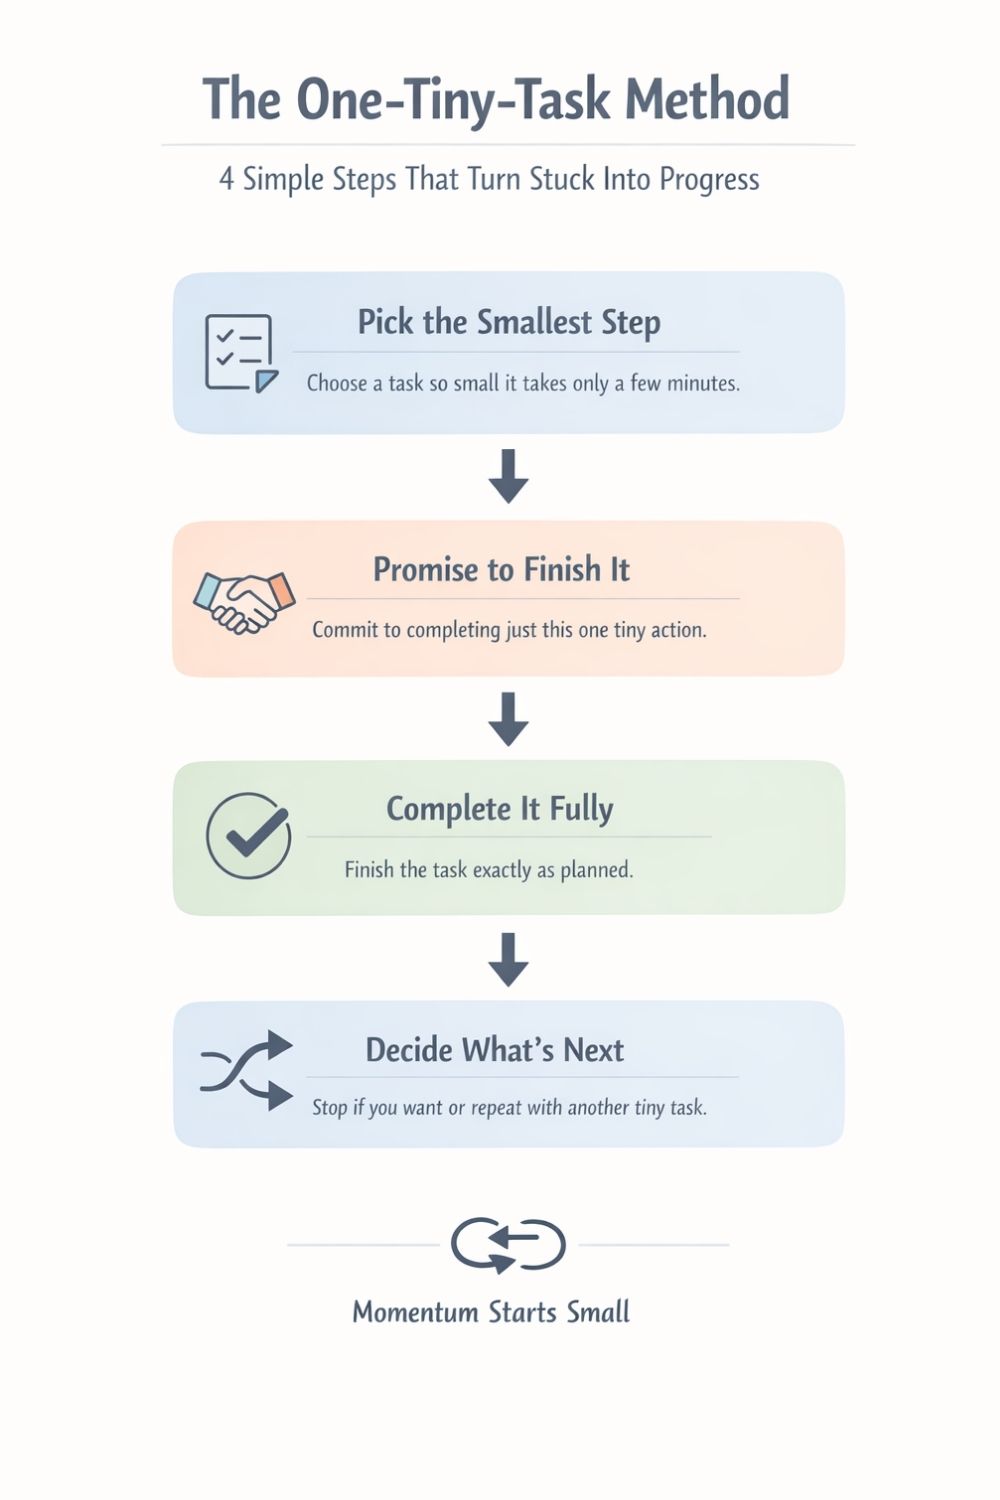
    The One-Tiny-Task Promise is a simple framework designed to reduce that friction. Instead of trying to complete a full project or even a full work session, you commit to finishing just one extremely small task.

    Not ten tasks.
    Not an hour of work.
    Just one tiny step.

    This works because the brain responds strongly to completion. Finishing something—even something small—creates a feeling of progress that can break the mental freeze that stops many people from starting.

    The beauty of this method is that it works even on low-energy days. When motivation is low and your focus feels scattered, a tiny task is still manageable.

    Once the first task is complete, you can decide whether to continue. Sometimes momentum kicks in and you keep going. Other times you stop, and that’s still a success because you kept your promise.

    Over time, this approach builds something powerful: self-trust. When you repeatedly follow through on small promises to yourself, starting becomes easier.

    Instead of relying on motivation, you rely on a simple system.

    And that system begins with choosing the smallest possible step.

    Define the Smallest Possible Task

    The first step of the One-Tiny-Task Promise is choosing a task so small that resistance almost disappears.

    Most productivity struggles happen because people start with tasks that are still too large. “Work on the project” or “clean the office” sounds manageable on paper, but the brain interprets these as big commitments.

    The solution is to shrink the task dramatically.

    Shrink the task until it feels almost trivial: Take the larger goal and reduce it to a single tiny action. Instead of “write the report,” your first step might be opening the document and writing one sentence.

    Small tasks remove the emotional weight that normally blocks action.

    Make the step finishable in five minutes or less: A tiny task should have a very short time horizon. When the brain knows the task will end quickly, it’s far easier to begin.

    Even something as small as writing three bullet points can work.

    Choose a step with a clear finish line: Vague tasks create hesitation. Instead of “review notes,” choose something concrete like highlighting three key ideas or organizing one section.

    Clear endings help the brain recognize progress.

    Write the task in simple, specific language: When the task is written clearly, it becomes easier to start. A note that says “draft one paragraph” feels much more actionable than “work on writing.”

    The goal of this stage isn’t productivity yet.

    The goal is simply removing the barrier to starting.

    Once the task is small enough, beginning no longer feels overwhelming.

    Make a Simple Promise to Finish One Task

    The power of this framework comes from the promise itself.

    Instead of telling yourself that you will “work hard today” or “be productive,” you make a single clear commitment: you will finish one tiny task.

    This dramatically reduces pressure.

    Commit to completing only one small action: Your responsibility is limited to the one step you selected. You are not committing to an hour of work or finishing the entire project.

    The promise stays intentionally small.

    Remove the expectation that you must continue: This is one of the most important parts of the method. You are allowed to stop after completing the task.

    Knowing that continuation is optional lowers resistance.

    Start immediately once the promise is made: Avoid preparing or overthinking the step. As soon as the task is chosen, begin working on it.

    Momentum begins with action, not planning.

    Treat the promise as meaningful: Even though the task is small, finishing it still matters. Every time you follow through on a promise to yourself, you reinforce the habit of execution.

    Many people struggle with productivity because they make promises that are too large to keep.

    The One-Tiny-Task Promise solves that problem by making the commitment extremely achievable.

    Keeping small promises consistently builds confidence.

    And confidence makes future tasks easier to start.

    Finish the Task Completely

    Once you start the tiny task, the next step is simple: finish it fully.

    Completion is what creates the psychological reward that fuels momentum.

    When the brain experiences a finished action, it releases a sense of progress and closure. That small reward often encourages you to keep going.

    Focus on finishing exactly what you promised: Avoid expanding the task or adding extra steps. If the promise was to write one sentence, then writing one sentence is the goal.

    The power of the method comes from finishing.

    Remove distractions for a few minutes: Since the task is short, give it your full attention. Silence notifications, close extra tabs, and complete the action without interruption.

    This helps the task finish quickly.

    Mark the task as complete: Crossing something off a list or checking a box reinforces the feeling of accomplishment. Visual confirmation strengthens the sense of progress.

    Even tiny completions matter.

    Pause briefly to acknowledge the win: Many people rush straight to the next task without noticing the completion. Taking a moment to recognize the finished step reinforces motivation.

    This small recognition helps the brain associate action with reward.

    The goal here isn’t perfection or productivity.

    The goal is completion.

    Finishing even the smallest task tells your brain something important: progress is happening.

    And once progress begins, it becomes easier to continue.

    Decide Whether to Continue or Stop

    After completing the tiny task, you reach an important moment: the decision point.

    This is where the One-Tiny-Task Promise becomes powerful.

    Because you only promised to finish one step, everything after that is optional.

    Check in with your energy and focus: Ask yourself whether you feel like doing another tiny task. Sometimes the answer is yes because momentum has started to build.

    Other times the answer will be no.

    Both outcomes are fine.

    Choose another small step if you want to continue: If you decide to keep going, simply repeat the same process. Select another tiny task and complete it fully.

    Momentum often grows naturally when tasks stay small.

    Allow yourself to stop without guilt: If you finish the task and feel done, you can stop. You kept your promise.

    That alone is a win.

    Use momentum when it appears: On many days, the hardest part of work is simply beginning. Once you’ve started, it becomes easier to continue.

    You may find yourself completing several tiny tasks in a row.

    The method works either way.

    Even one completed task creates forward movement.

    And forward movement is how momentum begins.

    Turning the One-Tiny-Task Promise Into a Daily Habit

    Once you start using this framework, it can easily become part of your daily routine.

    Instead of waiting for motivation, you simply return to the same starting point: one tiny task.

    This creates consistency without requiring large bursts of energy.

    Begin your day with one small completion: Starting the day with a quick win can create early momentum. Even a simple action like outlining a few notes can help shift your brain into work mode.

    The goal is to start moving.

    Use the method whenever you feel stuck: When you notice procrastination or hesitation, return to the One-Tiny-Task Promise. Choose a small step and complete it.

    This resets your focus.

    Apply the system to different goals: The framework works for writing, learning, organizing, planning, or creative work. Any large project can be broken into tiny starting points.

    The method adapts to almost any situation.

    Track your tiny wins over time: Keeping a small list of completed actions can reveal how much progress comes from small steps. Over weeks and months, those tiny tasks accumulate into meaningful results.

    Consistency matters more than intensity.

    And the easiest way to stay consistent is to make starting simple.

    Examples of One-Tiny-Task Promises

    Understanding what counts as a tiny task can make the system easier to apply.

    The key idea is simple: reduce the starting step until it feels quick and achievable.

    Writing project: Write one sentence or create three bullet points outlining your idea.

    Even this small step begins the writing process.

    Email inbox: Reply to one email instead of trying to clear the entire inbox.

    A single reply creates progress.

    Work project: Open the project file and list the next three actions needed.

    This small step clarifies what comes next.

    Learning something new: Read one paragraph of a book or watch a two-minute portion of a tutorial.

    Short learning sessions can still move knowledge forward.

    Organization task: Clear one small area of your desk rather than cleaning the entire workspace.

    Tiny improvements still count as progress.

    These examples show how almost any task can be reduced to a small, manageable starting point.

    Once the first action is complete, the next step often feels easier.

    And sometimes, that one tiny task is all it takes to get momentum moving again.

    The post One-Tiny-Task Promise: How to Start Anything by Finishing the Smallest Possible Task appeared first on Life Coach Hub.


    Source link

  • Minimum Viable Day: The Tiny Baseline That Keeps You Consistent

    Minimum Viable Day: The Tiny Baseline That Keeps You Consistent


    How You Can Overcome Your Procrastination

    Discover four tips that will help you overcome your procrastination and free you from its heavy burden.


    Read More


    Source link

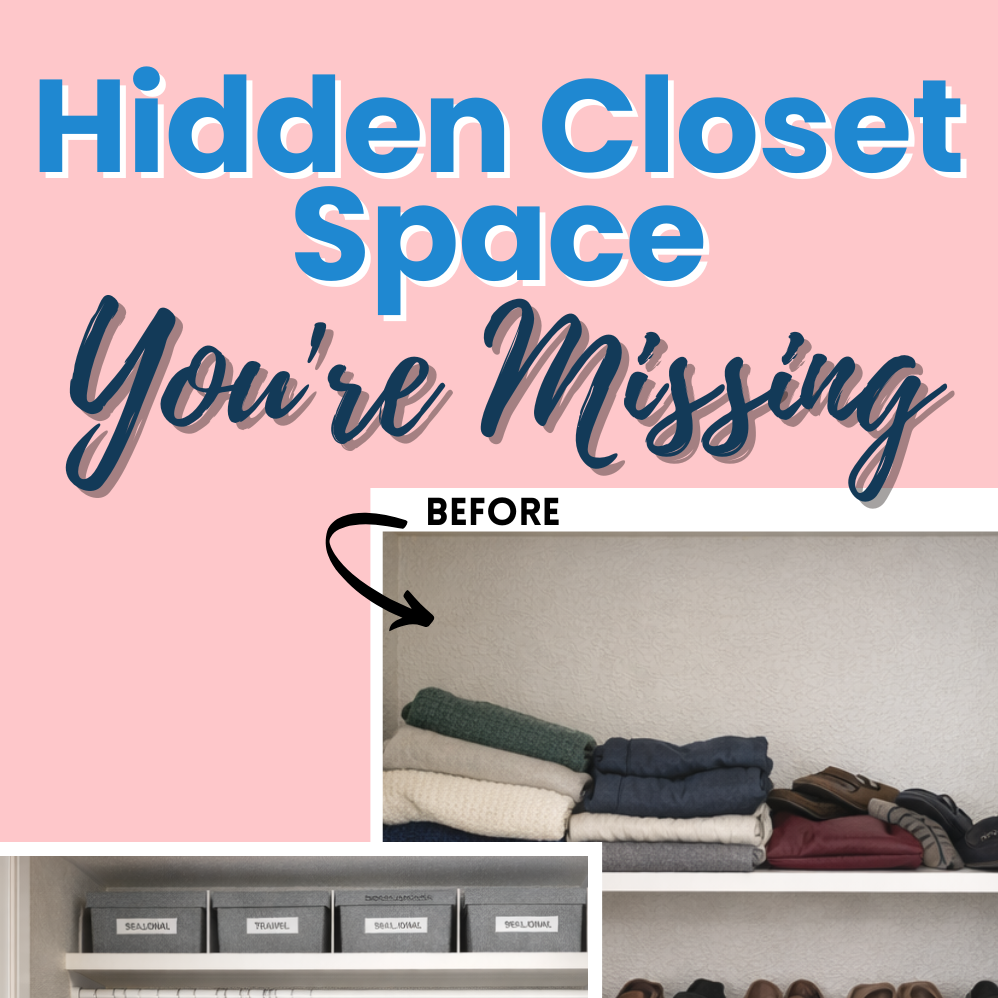
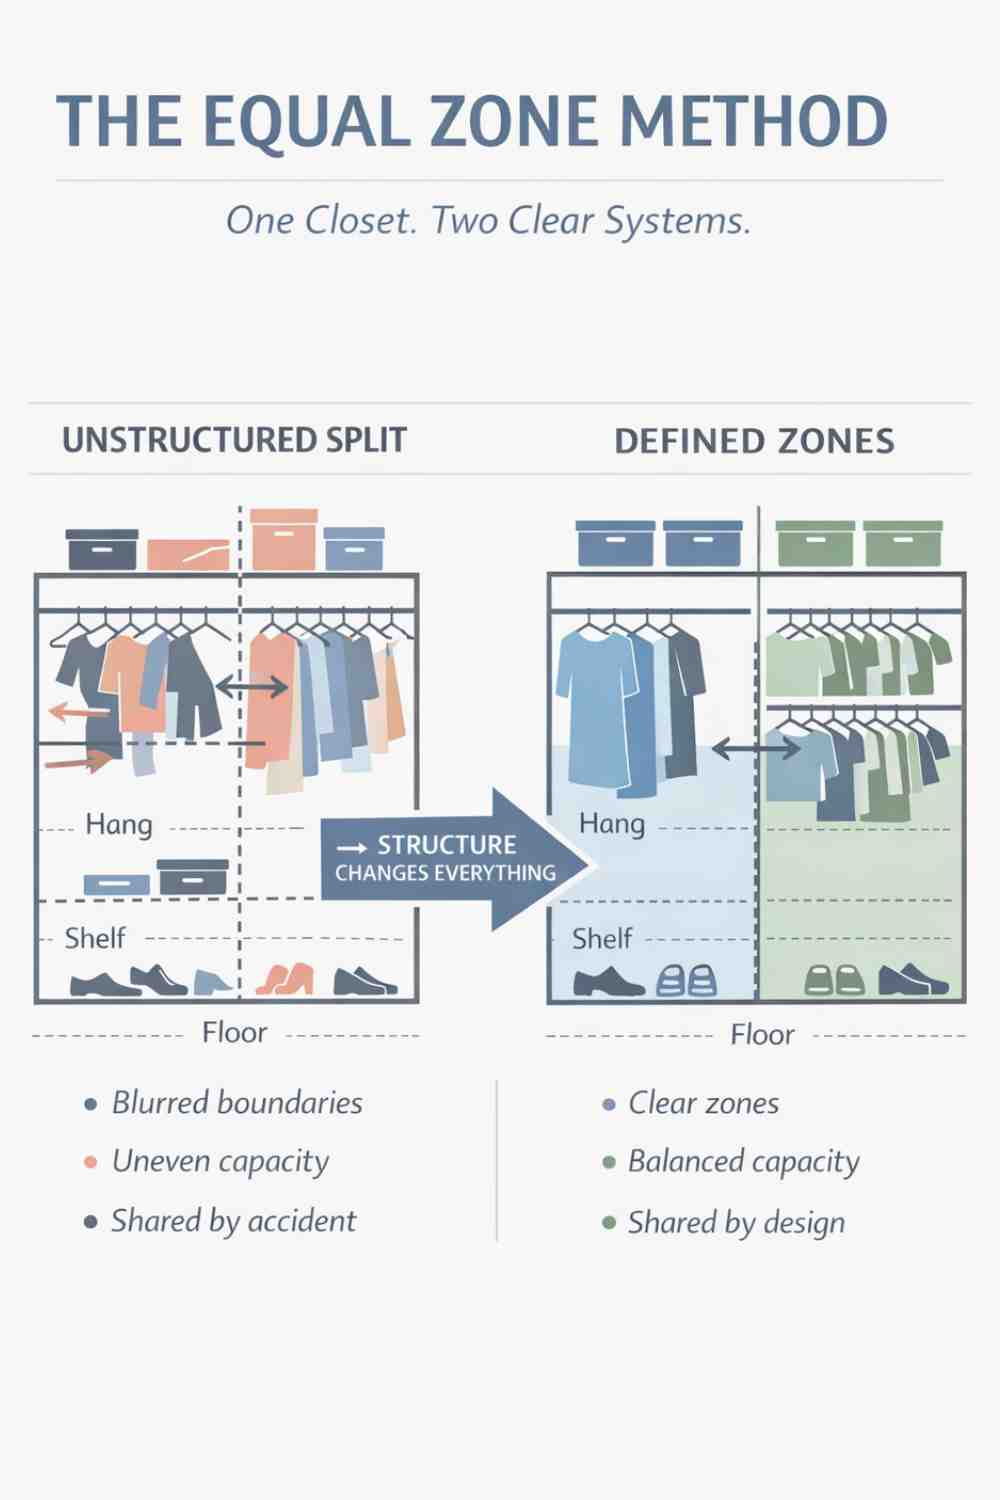
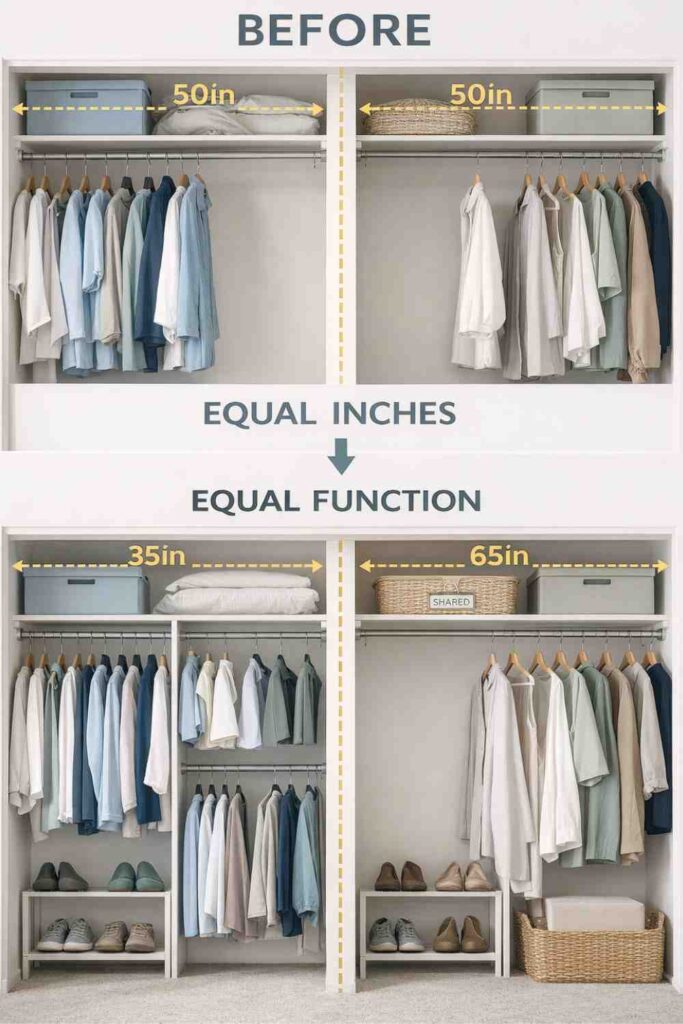
  • 8 Small Closet Fixes That Instantly Create More Space

    8 Small Closet Fixes That Instantly Create More Space


    Which Thanksgiving Tablescape Matches Your Personality? Vintage, Modern, Simple, or Elegant

    Are you all about style, decor and organization? Download a copy of our Decluttering Workbook. **** Thanksgiving is more than a meal—it’s a gathering of personalities, stories, and traditions. The […]


    Read More


    Source link

  • 30 Digital Products Ideas for Selling Online

    30 Digital Products Ideas for Selling Online


    If you want to make money selling something online but you don’t want the hassle of inventory, shipping and everything that goes along with selling physical products there is an alternative.

    Selling digital products is a no-muss, no-fuss way to make money online. A LOT of money.

    And, best of all, it is one of the best passive income ideas, which means you do a little work up-front, and then you don’t have to do much while the money keeps rolling in.

    You create something once and sell it over and over to customers around the world.

    Digital products are non-physical items like ebooks, templates, courses, and printables that you deliver electronically through email or download.

    Pretty much anyone can start this small business, especially if you have some knowledge or experience to share (which everyone does!)

    The best part about selling digital products is how easy it is to get started. You don’t need a big budget or a warehouse.

    You just need an idea and the tools to create it. Or even better, someone you can pay to create it.

    Whether you want to earn extra income with a side hustle or build a full business, digital products give you flexibility and freedom with your own home business.

    This guide will walk you through the best digital products ideas as well as everything you need to know about creating and selling digital products.

    You’ll learn what makes a product profitable, explore different product types across various industries, and discover how to market what you make.

    We’ll cover practical ideas you can start working on today to turn your skills into income.

    What Are Digital Products?

    macbook pro beside white and blue plastic cupmacbook pro beside white and blue plastic cup

    Digital products are items that exist entirely in electronic format and can be sold repeatedly without physical inventory or shipping.

    These products range from educational materials like online courses to creative assets like templates, and they offer sellers high profit margins with minimal overhead costs.

    Definition and Types of Digital Products

    Digital products are goods that exist only in digital format. You can download them, access them through email, or view them on gated platforms.

    Common types include ebooks, online courses, videos, music files, and digital art. You’ll also find software programs, mobile apps, and website themes in this category.

    Printable digital products let your customers download designs and print them at home for personal use.

    Templates and tools make up another major category. You can sell resume templates, graphic design files, or filters for programs like Photoshop.

    Digital memberships and subscription content have grown popular too. Your customers pay for ongoing access to exclusive materials, community forums, or premium libraries of content.

    Related reading:

    Benefits of Selling Digital Goods

    Selling digital products gives you low overhead costs since you don’t need to hold inventory or pay for shipping.

    You can achieve profit margins around 90% after fees because recurring costs stay minimal.

    The process can be automated. Orders deliver instantly through apps or gated platforms without your direct involvement. You create the product once and sell it to unlimited customers.

    Digital goods give you flexibility in pricing and delivery. You can offer free products to build your email list, paid one-time purchases, or monthly subscriptions.

    The e-learning market alone is expected to reach $848 billion by 2030.

    In addition, these products also have a lower carbon footprint than physical items. You avoid manufacturing waste and shipping emissions entirely.

    Top Digital Products To Sell Online

    Digital products offer flexibility and profit potential because you create them once and sell them repeatedly.

    From written content to visual resources and educational materials, these digital products ideas meet different customer needs and skill levels.

    1. Ebooks

    person holding black tablet computer during daytimeperson holding black tablet computer during daytime

    Ebooks are a profitable digital product to sell. You can write about topics you know well, from cooking to business advice to self-help.

    The startup costs are low. You just need writing software and maybe a design tool for the cover.

    Of course, AI tools can help make the process faster, but AI can all sound the same so you do need to be heavily involved with real writing. You can also hire a ghost writer to write the ebook for you.

    You can sell ebooks directly from your website or through platforms like Amazon Kindle Direct Publishing to reach more readers.

    Popular ebook topics include how-to guides, fiction stories, business strategies, and personal development.

    Keep your ebook focused on solving one specific problem or teaching one clear skill. This makes it more valuable to buyers.

    Price your ebooks based on length and value. Shorter ebooks work well at $7-15, while longer, more detailed books can sell for $20-50 or more.

    2. Downloadable Guides

    Downloadable guides give your customers quick answers to specific problems. These are usually shorter than ebooks and focus on actionable steps.

    You can create guides as PDFs that customers download right after purchase. Common types include beginner’s guides, step-by-step tutorials, and resource lists.

    For example, a freelancer might sell a guide on finding clients, while a designer could offer a guide on color theory.

    Make your guides visual and easy to scan. Use bullet points, checklists, and images to break up text. This format works well for people who want fast information they can use right away.

    Guides typically sell for $5-25 depending on the topic and detail level. Bundle several related guides together to create more value and charge higher prices.

    3. Templates and Design Assets

    Templates save your customers time by giving them ready-made formats they can customize.

    Business templates, presentation templates, and social media templates are always in demand.

    And, you can use an easy tool like Canva to create these. There are actually a ton of Canva digital products ideas for a business.

    Popular template types include:

    • Resume templates for job seekers
    • Proposal templates for freelancers
    • Notion templates for productivity
    • Canva templates for social media
    • Website templates for small businesses

    You can create templates using tools like Canva, Google Docs, or Notion. Digital templates work well because customers in every industry need them.

    A small business owner might buy invoice templates while a content creator purchases social media post layouts.

    Design assets like fonts, icons, and graphics are also profitable. These help other creators build their own projects without starting from scratch. You can sell individual assets or bundle them into themed packs.

    Price templates between $5-50 based on complexity. Template bundles with multiple files can sell for $50-200.

    4. Online Courses and Video Lessons

    Woman working on a laptop in front of a chalkboard.Woman working on a laptop in front of a chalkboard.

    Online courses let you teach your skills at scale. Video courses are especially popular because students learn by watching and following along.

    You can create courses on almost any topic where you have expertise. Business skills, creative hobbies, fitness routines, and technical tutorials all sell well. Break your course into short video lessons that students complete at their own pace.

    Keep your video lessons focused and actionable. Each lesson should teach one specific skill or concept. Add worksheets, checklists, or practice exercises to increase the value.

    You don’t need expensive equipment to start. A smartphone camera and basic editing software work fine for your first courses. Focus on clear audio and good lighting.

    Price courses based on the transformation you provide. Short mini-courses might sell for $27-97, while comprehensive programs can charge $200-500 or more.

    5. Audiobooks

    Audiobooks reach customers who prefer listening over reading. You can turn existing written content into audio format or create original audio products.

    Record yourself reading your ebook or create new audio content like meditations, affirmations, or storytelling.

    Many people listen while commuting, exercising, or doing chores. This makes audiobooks convenient for busy buyers.

    Sound quality matters more than perfect narration. Use a decent microphone and record in a quiet space. You can hire voice actors if you don’t want to record yourself.

    Children’s audiobooks, business books, and self-help content perform especially well in audio format. Bundle audiobooks with the text version to give customers options.

    6. Children’s Books

    Children’s books work as both ebooks and printable digital downloads. Parents and teachers constantly look for new stories and educational content for kids.

    You can create illustrated storybooks, coloring books, activity pages, or educational workbooks.

    Printable games, puzzles, and worksheets also sell well to parents and educators. These products don’t require fancy illustrations. Simple, colorful designs often work best.

    Focus on specific age groups and learning goals. A counting book for toddlers needs different content than a reading workbook for first graders. Bundle related materials together to create activity packs.

    Sell on your own website or platforms like Etsy where parents shop for printable resources. Children’s digital products typically range from $3-15 for single items and $15-40 for bundles.

    Downloadable Printables

    Printables are digital files that customers download and print at home. They work well because you create them once and sell them unlimited times without handling inventory or shipping.

    When it comes to digital products ideas, downloadable printable are very popular and there are a lot of options.

    7. Personal Finance Templates

    Budget trackers and financial planners are super popular printables because people want to manage their money better.

    You can create monthly budget sheets with pre-made categories for rent, groceries, and savings.

    Debt payoff trackers help buyers visualize their progress toward becoming debt-free.

    Expense tracking sheets work well when you include clear instructions and example entries. Some sellers bundle multiple templates together, like a complete financial starter pack with budgets, savings goals, and bill tracking sheets.

    The key is making these templates easy to use right away. Include simple formulas if you’re selling spreadsheet versions, or keep PDF versions clean with fillable fields.

    Your buyers want something they can start using within minutes of downloading. You can even use Canva to create items like this yourself.

    8. Planners

    planner open on a desk with pensplanner open on a desk with pens

    Daily and weekly planners sell consistently throughout the year. You can design planners for specific purposes like fitness tracking, habit building, or content creation.

    A well-designed planner includes dated or undated pages depending on your target audience’s needs.

    Focus planners work well for students and remote workers who need to organize tasks by priority.

    Meal planning pages combined with grocery lists create a complete system buyers appreciate.

    You might also create niche planners for specific groups like teachers, freelancers, or new parents.

    Your planner design should balance functionality with visual appeal. Too much decoration makes pages hard to use.

    Too little makes them feel boring. Test your layouts by printing them yourself first to check spacing and usability.

    9. Calendars

    Printable calendars remain steady sellers, especially when you design them around specific needs or aesthetics.

    Monthly view calendars with large date boxes give people room to write appointments and reminders. Annual calendars work as wall art or quick reference sheets.

    Seasonal and holiday calendars sell best when you release them a few months early. Academic year calendars targeting students and teachers should launch in summer.

    You can create themed versions with specific color schemes or add motivational quotes to each month.

    Try offering your calendars in multiple sizes like letter, A4, or poster dimensions. This flexibility helps buyers print them however works best for their space and printer capabilities.

    10. Coloring Books

    Adult coloring books and printable coloring sheets offer relaxation and creative expression. You can focus on specific themes like mandalas, nature scenes, or inspirational quotes surrounded by decorative patterns.

    Each page should have enough detail to be engaging without becoming frustratingly complex.

    Children’s coloring pages sell well when tied to learning activities or popular themes. Alphabet coloring sheets, number practice pages, or simple animal designs appeal to parents and teachers.

    Holiday-themed coloring pages like Valentine’s Day or Christmas designs see seasonal spikes in sales.

    Your line work needs to be clean and clear when printed. Avoid lines that are too thin or designs that are too intricate for standard home printers.

    Test print your coloring sheets before selling to ensure the quality meets buyer expectations.

    11. Workbooks

    Educational workbooks and skill-building exercises create value for learners of all ages. You might design math practice sheets, handwriting workbooks, or language learning exercises.

    Business workbooks for goal setting, brand development, or marketing planning appeal to entrepreneurs.

    Each workbook page should guide users through specific exercises or prompts. Include answer keys when relevant, and add helpful tips or examples throughout.

    Structure your workbook with a logical progression so buyers can work through it step by step.

    Workbooks perform better when they promise a specific outcome. “30-Day Social Media Planning Workbook” is clearer than “Marketing Workbook.”

    Your buyers want to know exactly what they’ll accomplish by completing your product.

    12. Meal Plans

    Meal planning printables help busy people organize their weekly cooking and shopping.

    You can create blank meal planning templates with sections for breakfast, lunch, dinner, and snacks. Add accompanying grocery list pages that organize items by store section.

    Themed meal plans work well too, like vegetarian meal prep, family-friendly dinners, or budget-conscious eating plans.

    Include recipe cards as bonus content or create matching shopping lists that correspond to specific meal combinations. Some sellers offer seasonal meal plans that use ingredients at their peak freshness.

    Your meal planning templates should be simple enough to customize. Leave space for notes about prep time or serving sizes.

    Try creating versions for different household sizes or dietary preferences to expand your potential buyer base.

    Creative and Artistic Digital Products

    Creative digital products let you turn your artistic skills into income streams that sell repeatedly.

    These products range from visual assets like digital art and stock photos to audio files like music tracks and sound effects.

    These digital product ideas are best for serving creators and businesses who need ready-made content.

    13. Digital Art

    abstract art paintingabstract art painting

    Digital art includes illustrations, paintings, and designs created using software like Procreate, Adobe Illustrator, or Photoshop.

    You can sell original artwork as downloadable files for customers to use as wallpapers, prints, or decorative pieces.

    Many artists create themed collections, such as botanical illustrations or abstract patterns, to appeal to specific audiences.

    Try offering your digital art in multiple formats and sizes to increase value. NFTs have opened new markets for digital artists, though the market fluctuated to $504 million in 2025.

    You can also create printables like wall art, greeting cards, or printable coloring sheets that customers download and print at home.

    Bundle related pieces together to create higher-value products. Seasonal collections or niche themes tend to perform well because they solve specific customer needs.

    14. Stock Photos and Photography Presets

    Stock photos provide businesses and content creators with professional images they can license for websites, marketing materials, and social media posts.

    The stock photography market reached $5.09 billion in 2025 and is expected to grow to $7.27 billion by 2030.

    Focus on filling gaps in the market by photographing underserved subjects or styles. You can sell individual photos or bundle them into themed collections.

    Protect your work with watermarks until purchase.

    Photography presets and Photoshop presets are editing filters that help photographers achieve consistent looks across their images.

    These presets save time and appeal to both amateur and professional photographers. LUTs (lookup tables) serve a similar purpose for video editors, allowing them to apply color grading quickly to footage.

    You can create preset packs for different moods, seasons, or photography styles. Include before-and-after examples to show customers the transformation your presets provide.

    15. Stock Videos

    Just like selling stock photography, another way to make money is from selling stock videos.

    Stock videos, including footage, animations, and video transitions, serve the growing demand for visual content in marketing and social media.

    Content creators, businesses, and video editors buy stock videos to enhance their projects without filming from scratch.

    Popular categories include nature scenes, business settings, abstract backgrounds, and lifestyle footage.

    You can also create specialized content like drone footage, time-lapses, or motion graphics that command higher prices.

    License your videos through your own store or marketplaces, though some platforms take up to 50% commission. Higher-quality 4K and specialized footage typically earns more than standard clips.

    16. Fonts and Typography

    Custom fonts and typography assets help designers create unique branding and visual identities.

    You can design complete font families with multiple weights and styles, or create specialty display fonts for specific uses like logos or headlines.

    Each font should include all necessary characters, numbers, and punctuation marks. Provide your fonts in multiple file formats like OTF and TTF to ensure compatibility across different software.

    Hand-lettered fonts, script styles, and modern sans-serif options remain popular. Try creating font bundles that pair well together for better value and higher sales. Include examples showing your fonts in use to help customers visualize applications.

    17. Music Tracks, Sound Effects, and Loops

    black condenser mic with stand and headphonesblack condenser mic with stand and headphones

    Music tracks provide background audio for videos, podcasts, presentations, and games.

    You can compose original pieces in various genres and moods, from upbeat corporate music to ambient soundscapes. Offer different lengths and variations of each track to increase versatility.

    Sound effects are individual audio clips like footsteps, door slams, or nature sounds that content creators layer into their projects.

    Music loops are short, repeatable segments that play seamlessly when connected end-to-end, perfect for background music that needs to run continuously.

    All of these audio products are great digital products ideas for selling online.

    Price your audio products based on licensing terms. Royalty-free licenses typically cost more upfront but allow unlimited use, while limited licenses restrict how customers can use your content.

    18. Licensed Music and Songs

    Licensed music includes complete songs with vocals and full production that businesses and creators can use legally in their projects.

    This differs from simple background tracks by offering more complex arrangements and often featuring lyrics.

    You maintain copyright ownership while granting customers specific usage rights through licensing agreements.

    Define clearly whether licenses cover commercial use, how many projects customers can use the music in, and any attribution requirements.

    This product works well if you’re a musician or composer with finished songs. Consider offering different license tiers at various price points based on usage scope.

    19. Presentation Templates

    Presentation templates for PowerPoint, Google Slides, and Keynote help professionals create polished slide decks quickly.

    Your templates should include pre-designed layouts for common slide types like title slides, content slides, charts, and image galleries.

    Create templates for specific industries or purposes, such as business pitch decks, educational lectures, or marketing presentations.

    Include multiple color schemes and font pairings within each template package.

    Provide templates with editable elements so customers can customize colors, fonts, and layouts to match their branding.

    Include instructions or a guide showing how to use and customize your templates effectively.

    Digital Tools and Interactive Assets

    Digital tools and interactive assets give other creators and businesses ready-made solutions they can use right away.

    These products range from full software platforms to small design elements that make someone’s work easier and faster.

    These are probably the most difficult digital products ideas to sell just because creating them is so much more involved and requires specialized knowledg.e

    20. SaaS Solutions

    SaaS tools are software programs that people access through the internet instead of downloading to their computer.

    You charge users a monthly or yearly fee to keep using your tool. This creates steady income that keeps coming in month after month.

    Popular SaaS products solve specific problems for businesses or creators. You might build a social media scheduling tool, a project management system, or an email marketing platform. The key is finding a problem that people will pay to solve.

    You can start small with a simple tool that does one thing really well. As you get more users, you can add features based on what they ask for.

    Many successful SaaS products started as basic tools that grew over time. AI prompt packs have become popular SaaS offerings, giving users pre-written prompts for AI tools like ChatGPT.

    21. Mobile Apps

    iphone in hand with apps on screeniphone in hand with apps on screen

    Mobile apps live on smartphones and tablets. These are very profitable digital products ideas to sell.

    People use them every day for everything from tracking their fitness to managing their money. You can sell apps through the Apple App Store or Google Play Store.

    The best mobile apps solve problems people face when they’re on the go. Think about tools for productivity, entertainment, health, or learning.

    You might create a fitness app, a language learning tool, or a budgeting helper.

    You can make money from apps in several ways. Some apps charge a one-time purchase price.

    Others are free to download but offer in-app purchases or subscriptions for extra features. Ad-supported apps let users access everything for free while you earn from advertisers.

    22. Website Themes and Templates

    Website themes and templates give people ready-made designs for their websites.

    Instead of starting from scratch, they can install your theme and customize it with their own content and colors.

    WordPress themes are especially popular since millions of websites use WordPress.

    You can create themes for different types of websites. E-commerce themes help people sell products online.

    Blog themes work for writers and content creators. Portfolio themes showcase creative work for designers and photographers.

    Good themes are easy to customize and work well on phones and tablets. They should load quickly and look professional.

    Many theme creators offer different versions at different price points. A basic version might cost $30 while a premium package with extra features could sell for $100 or more.

    23. Plugins and Extensions

    Another digital marketing product ideas to sell are plugins and extensions which complement a website.

    Plugins and extensions add new features to existing software or websites. WordPress plugins are very popular because they let website owners add things like contact forms, SEO tools, or security features without coding.

    Browser extensions work inside web browsers like Chrome or Firefox. They might block ads, help manage passwords, or make it easier to save articles to read later. These small tools can become very popular if they solve annoying problems.

    You can offer free versions with basic features and charge for premium versions with more capabilities.

    Many plugin creators make good money this way. The key is creating something that fills a real gap in what’s currently available.

    24. Software

    Software products are programs people download and install on their computers.

    This includes design tools, video editors, accounting programs, and productivity apps. Unlike SaaS tools, people usually pay once to own the software forever.

    Desktop software often has more power than web-based tools. Creative professionals use software like this for video editing, 3D modeling, and graphic design.

    Business software helps with tasks like invoicing, inventory management, or customer relationship management.

    You can sell software directly from your website or through platforms like the Mac App Store. Some developers offer both a one-time purchase option and a subscription model.

    Updates and customer support become important when you sell software since users expect the program to keep working as operating systems change.

    25. Icons, Fonts, and 3D Models

    Design assets like icons, fonts, and 3D models save designers and developers hours of work. Instead of creating these elements from scratch, they can buy your pre-made assets and use them in their projects.

    Icon packs include dozens or hundreds of icons in a consistent style. These might be for websites, apps, or presentations.

    Fonts give designers new typography options for branding and design work. Custom fonts can sell for anywhere from $20 to several hundred dollars depending on the number of weights and styles included.

    3D models serve game developers, architects, and visual effects artists. You might create furniture models, character designs, or building elements.

    The 3D modeling market keeps growing as more industries use 3D visualization. You can sell these assets individually or in themed bundles that offer better value for buyers.

    Memberships, Bundles, and Subscription Products

    Subscription-based digital products create steady recurring passive income by delivering ongoing value to your customers.

    These products work well because people pay you monthly or yearly instead of just once.

    26. Membership Sites and Recurring Revenue Models

    Membership sites give you recurring revenue and passive income when customers pay monthly or yearly fees.

    You can offer exclusive content, community access, or tools that members can’t get anywhere else.

    Your membership might include video lessons, downloadable resources, or live coaching sessions.

    Some creators combine all three to add more value. You could also build a community where members connect with each other.

    The key is delivering fresh content regularly. Members need to feel they’re getting their money’s worth each month.

    You might release new materials weekly or give members early access to your products.

    Popular membership types include fitness coaching programs, business training communities, and creative resource libraries.

    Pick a topic you know well and can create content about consistently.

    27. Product Bundles and Digital Packs

    Bundles combine multiple digital products into one package at a lower price than buying each item separately. This helps you sell more products while giving customers better value.

    You might bundle digital planners with matching workbooks and goal-setting templates.

    Creative template bundles could include fonts, graphics, and design templates together. The products should make sense as a group.

    Bundles work well for seasonal offerings or themed collections. A wedding planning bundle might include checklists, budget spreadsheets, and vendor contact lists.

    A fitness bundle could combine workout plans, meal plans, and progress trackers.

    Price your bundle to save customers at least 20-30% compared to individual purchases. This discount encourages people to buy the whole package instead of just one item.

    28. Premium Newsletters

    Premium newsletters charge subscribers for exclusive content delivered to their inbox. Unlike free newsletters, these provide insider information, detailed analysis, or specialized knowledge.

    You might send weekly investment tips, industry news breakdowns, or expert interviews.

    Some creators share personal stories and advice their free audience never sees. The content needs to be worth paying for though!

    Successful premium newsletters focus on specific niches. Topics like investing, marketing strategies, or career advice work well. Your readers pay because they can’t find this information elsewhere.

    Set clear expectations about delivery frequency and content type. Most premium newsletters cost between $5 and $50 per month. You can offer annual subscriptions at a discount to lock in longer commitments.

    29. Email Courses

    Email courses teach a specific skill or topic through a series of emails sent over several days or weeks. Each email builds on the previous one to create a complete learning experience.

    Your course might teach photography basics in 7 days or social media marketing in 30 days. Break your topic into logical lessons that students can complete quickly. Include action steps or exercises in each email.

    People like email courses because they arrive automatically and don’t require logging into a platform.

    Students learn at their own pace without feeling overwhelmed. You can charge one-time fees or include courses as membership benefits.

    Good topics include practical skills like writing, cooking techniques, or productivity systems. Keep lessons focused and actionable so students see results quickly.

    30. Study Guides

    Study guides help students prepare for tests, learn new subjects, or master specific skills. You can create guides for academic subjects, professional certifications, or hobby-related knowledge.

    Your study guide might include practice questions, key concepts, cheat sheets, and memory aids.

    Add visual elements like diagrams or charts to explain complex topics. Many creators also include answer keys and explanations.

    Popular study guides cover standardized tests, professional licenses, language learning, and college courses.

    You could also make guides for travel (like travel guides with key phrases and cultural tips) or parenting guides with age-specific advice.

    Sell study guides individually or bundle them by subject or difficulty level. Students often buy multiple guides when preparing for big exams.

    Update your guides regularly to keep information current and accurate.

    Selling and Marketing Your Digital Products Online

    Once you create your digital product, you need the right platform and tools like with any new business.

    Your success depends on choosing tools that fit your needs, focusing on marketing and writing clear product listings, setting smart prices, and building an email list to drive sales.

    Choosing the Right E-Commerce Platform

    You have several options for where to sell digital products online. Each platform offers different features and fees.

    Shopify lets you build a complete online store with built-in tools for selling digital downloads. You control your branding and customer experience. The platform charges monthly fees but takes lower commission rates than marketplaces.

    WooCommerce works as a free plugin for WordPress sites. You pay for hosting and domain costs but avoid monthly platform fees. This option gives you full control over your store.

    Gumroad makes it simple to sell digital products with minimal setup. The platform handles payment processing and file delivery. You pay higher transaction fees but skip monthly costs.

    Etsy connects you with shoppers already looking for digital products like templates and printables. The marketplace charges listing fees and takes commission on sales. You get access to built-in traffic but compete with many other sellers.

    Pick a platform based on your technical skills, budget, and whether you want to build your own brand or tap into existing marketplace traffic.

    Setting Up Your Product Listings

    Your product listings need clear descriptions that show buyers exactly what they get. Write specific details about file formats, sizes, and what customers can do with your product.

    Use high-quality preview images or mockups. Show your digital product in use so buyers can picture themselves using it. For templates or printables, display examples of the finished result.

    Include these elements in every digital product listing:

    • File types and sizes
    • Number of files included
    • Software requirements
    • License terms and usage rights
    • Delivery method and timing

    Customer reviews build trust with new buyers. Ask early customers to leave honest feedback. Display these reviews prominently on your product pages and landing pages.

    Create dedicated landing pages for your most popular products. These focused pages convert better than general store pages because they speak directly to one audience need.

    Pricing and Launch Strategies

    Research what similar digital products cost before setting your price. Check competitor pricing on multiple platforms to find the right range for your market.

    Digital products typically have profit margins around 90% after platform fees. You can price lower than physical products while still earning good profits.

    Start with competitive pricing to build sales momentum and customer reviews.

    Pre-sales help validate your product idea before you finish creating it. Offer early-bird pricing to your email list or social media followers. This approach brings in revenue and proves demand.

    Consider these pricing models:

    • One-time purchase: Single payment for lifetime access
    • Tiered pricing: Basic, premium, and deluxe versions at different price points
    • Bundles: Multiple products packaged together at a discount
    • Subscriptions: Monthly or yearly access to your product library

    Test different price points to see what converts best. You can always adjust pricing based on sales data and customer feedback.

    Marketing and Email Campaigns

    Email marketing drives consistent sales for digital products. Build your email list from day one using a free lead magnet – a smaller digital product you give away in exchange for email addresses.

    Popular lead magnets include:

    • Mini ebooks or guides
    • Template samples
    • Checklists
    • Video tutorials
    • Resource lists

    Set up email marketing automation to welcome new subscribers and introduce them to your paid products. Send a series of helpful emails that build trust before asking for a sale.

    Your email campaigns should mix valuable content with product promotions. Share tips related to your niche, success stories, and case studies showing how customers use your products. Include product offers every 3-4 emails.

    Use email templates to save time creating campaigns. Most email platforms offer pre-built templates you can customize with your branding and message.

    Send regular emails to stay connected with your audience. Weekly or bi-weekly emails work well for most digital product sellers.

    Track open rates and click rates to improve your messages over time.

    How to Find Profitable Digital Product Ideas to Sell

    Finding the right digital product to sell starts with understanding what people want to buy, what trends are gaining momentum, and what you’re capable of creating well.

    Validating Market Demand

    You need to check if people actually want your digital product idea before spending time creating it.

    Start by searching online marketplaces like Etsy, Udemy, or Amazon to see if similar products exist and how they’re selling. Look at the number of reviews and ratings to gauge interest.

    Check social media platforms and forums where your target audience hangs out. Pay attention to the questions people ask and problems they mention repeatedly.

    These pain points often reveal gaps in the market.

    Use keyword research tools to see how many people search for terms related to your product idea. High search volume with low competition is a good sign.

    You can also create a simple landing page describing your product and run a small ad campaign to test interest before building the full product.

    Ask potential customers directly through surveys or polls on your email list or social media. Their honest feedback will tell you if they’d actually pay for what you want to create.

    Researching Trending Niches

    Google Trends helps you spot rising interest in specific topics over time. Type in keywords related to your digital product ideas and check if the trend line is moving up.

    Compare different ideas to see which ones show stronger growth patterns.

    Browse bestseller lists on platforms like Amazon, Etsy, and Gumroad to identify what’s selling well right now.

    Notice patterns in the types of products that appear frequently across multiple platforms.

    Join online communities in niches you’re interested in. Reddit, Facebook groups, and Discord servers often reveal emerging needs before they become mainstream.

    Watch what content creators in your niche are talking about and what their audiences are requesting.

    Look at what digital products influencers and experts in various fields are promoting. Their recommendations often indicate where the market is headed.

    Subscribe to industry newsletters to stay informed about shifts in consumer interests.

    Assessing Your Skills and Interests

    Your most profitable digital products will combine what you’re good at with what you enjoy doing.

    Make a list of your professional skills, hobbies, and areas where people already ask you for advice. These are your strongest starting points.

    Think about your past work experience and any specialized knowledge you’ve gained. Even skills you think are basic might be valuable to beginners in your field.

    Teaching something you find easy can be a great digital product opportunity.

    Match your skills against the market demand you’ve researched. The sweet spot is where your abilities overlap with what people want to buy.

    You don’t need to be the world’s top expert, just knowledgeable enough to help your target audience solve their problems.

    Think about which topics you could create content about consistently without burning out. Sustainable digital product businesses come from genuine interest, not just chasing trends.

    Challenges and Solutions in the Digital Market

    You face competition from free alternatives for many digital products. Your customers can often find similar content at no cost through blogs, YouTube videos, or free downloads.

    To stand out, you need a clear unique selling proposition. Position yourself as an expert in your niche or promise deeper content than free options provide.

    Well-written product descriptions help demonstrate your product’s superior value.

    Piracy poses another challenge. Your digital files can be copied and shared more easily than physical goods.

    Use watermarks on images and videos to protect your work. Consider using secure delivery platforms that limit unauthorized sharing.

    Some marketplaces charge up to 50% commission on each sale. You can avoid these fees by building your own online store where you control pricing and keep more revenue.

    Frequently Asked Questions About Digital Products to Sell

    Starting a digital product business raises many questions about product ideas, market research, pricing strategies, and production methods. These answers will help you launch your online business with confidence.

    What are some creative digital product ideas for launching an online business?

    Digital planners and journals work well for people who want to organize their lives. You can create monthly planners, habit trackers, or goal-setting worksheets that buyers download and use on their devices.

    Stock photography and video footage offer another creative option. You can sell your images to bloggers, marketers, and content creators who need visual content for their projects.

    Printable art and wall decor let buyers download designs and print them at home. This includes motivational quotes, nursery art, and seasonal decorations.

    Website templates and themes help business owners set up their sites quickly. You can design templates for different platforms or industries based on your skills.

    How can I identify profitable digital product niches for my online store?

    Look at your own skills and knowledge first. The best digital products come from expertise you already have, whether that’s graphic design, writing, coding, or teaching.

    Research online communities where your target customers gather. Facebook groups, Reddit forums, and Discord servers reveal what problems people want to solve.

    Check existing marketplaces like Etsy, Gumroad, or Creative Market to see what’s selling. Pay attention to products with many reviews and high ratings.

    Use keyword research tools to find what people search for online. This shows you the demand for specific topics and helps you spot gaps in the market.

    Survey your email list or social media followers about their biggest challenges. Their answers give you direct insight into products they would actually buy.

    What digital product examples have shown success in the online market recently?

    Notion templates have grown popular as more people use this productivity tool. These templates help users organize projects, track habits, or manage content calendars.

    Online courses continue to perform well across many topics. People pay for structured learning in areas like marketing, photography, personal finance, and creative skills.

    Digital stickers and graphics for content creators sell consistently. Social media users buy these for Instagram stories, YouTube thumbnails, and digital planning.

    Ebooks about specific problems or skills remain profitable. Short, focused guides often outperform longer books because they deliver quick solutions.

    Subscription-based content like premium newsletters or member communities generate recurring revenue. This model works when you provide ongoing value to subscribers.

    Could you suggest some beginner-friendly digital products to start selling online?

    Checklists and simple templates require minimal design skills to create. You can make these in Google Docs or Canva and save them as PDFs.

    Printable worksheets for planning, learning, or tracking work well for beginners. Parents, teachers, and professionals buy these to solve everyday problems.

    Curated resource lists or directories take research skills rather than technical abilities. You compile useful links, tools, or recommendations into an organized document.

    Simple graphics like social media templates or quote cards need basic design knowledge. Free tools like Canva provide templates you can customize and sell.

    Short guides or how-to documents let you package your knowledge without writing a full ebook. Focus on solving one specific problem in 5-10 pages.

    What are the steps to create and market a digital product from home?

    Start by choosing a product idea that matches your skills and audience needs. Research similar products to understand what works and what’s missing from the market.

    Create your product using tools you already have or free software. Google Docs works for written content, Canva handles graphics, and screen recording software creates video tutorials.

    Set up a way to sell and deliver your product. Platforms like MailerLite, Gumroad, or Payhip handle payments and automatically send download links to buyers.

    Build an email list before you launch. Offer a free related resource to collect addresses, then share valuable content that builds trust with subscribers.

    Create a simple sales page that explains what your product does and why it helps. Include clear descriptions, preview images, and customer benefits.

    Promote your product through the channels where your audience already spends time. This might include your email list, social media, blog posts, or online communities.

    How do I price my digital products competitively while ensuring profitability?

    Research competitor pricing for similar products in your niche. Look at both low-end and premium options to understand the price range buyers expect.

    Consider your product’s depth and value rather than just production time. A short guide that solves a major problem can command higher prices than a longer but less focused product.

    Start with a lower price point to build reviews and social proof. You can increase prices once you have customer testimonials and proven demand.

    Factor in platform fees and payment processing costs when setting prices. Many platforms charge between 5-10% plus payment processor fees of around 3%.

    Test different price points to see what converts best. You might find that a slightly higher price actually increases sales by positioning your product as more valuable.

    Offer bundle pricing or tiered options to increase average order value. Buyers often choose mid-tier options when presented with multiple choices.


    Source link

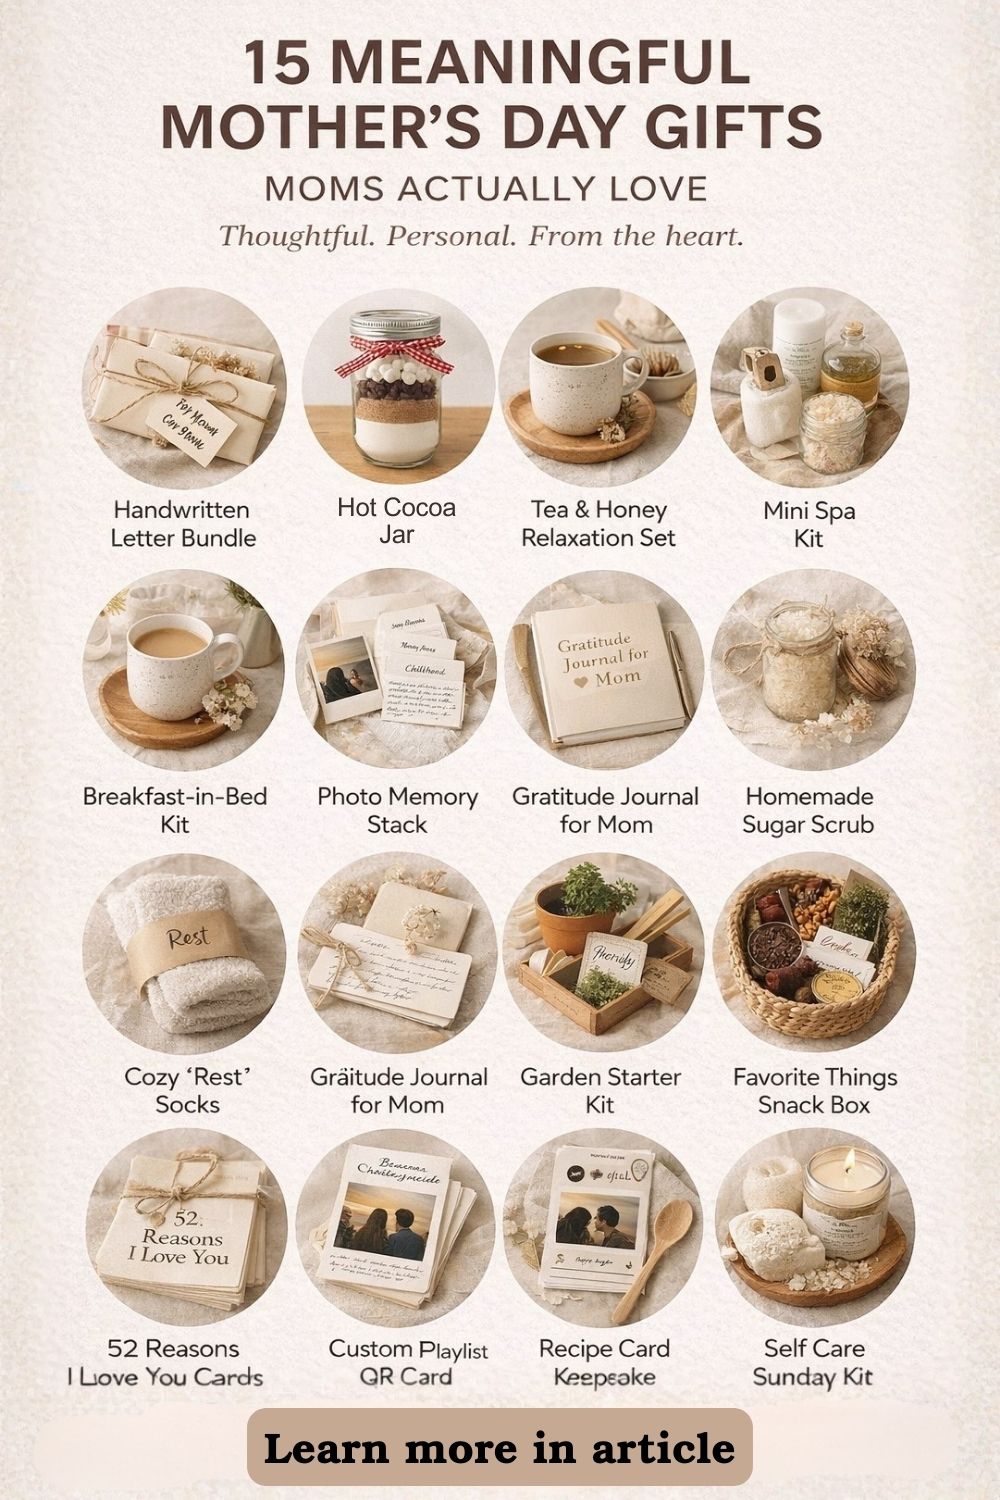
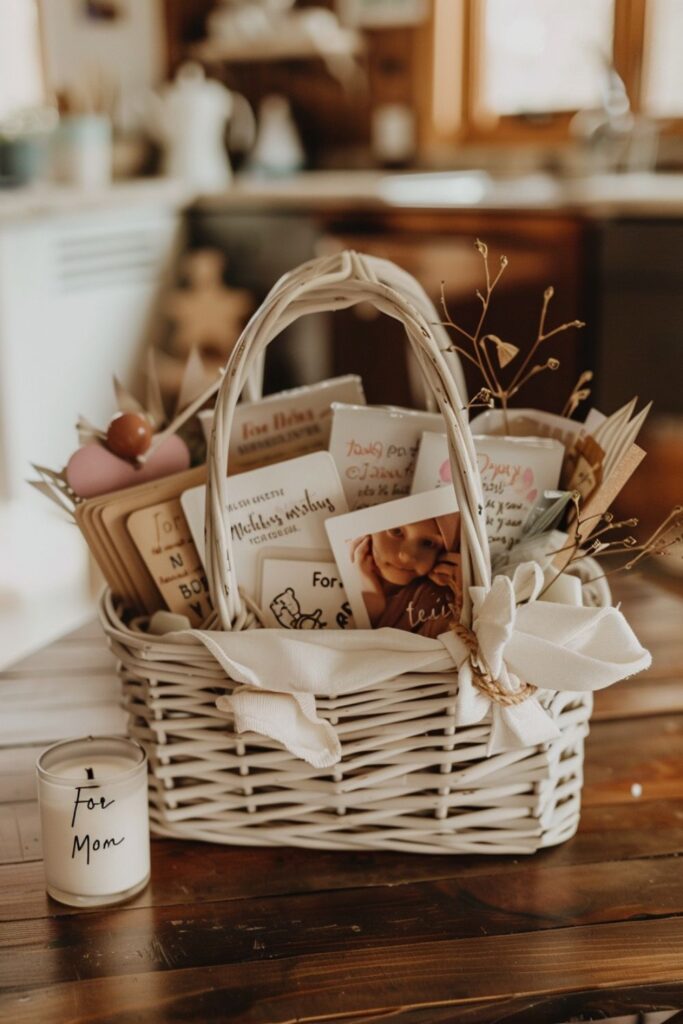
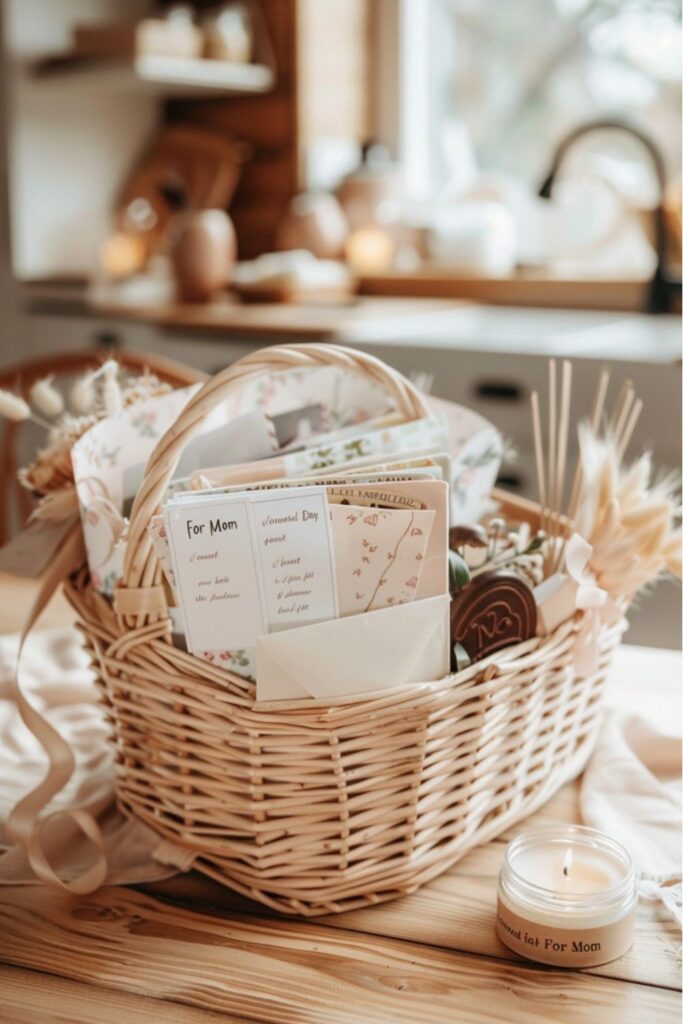
  • The “Memory Lane” Basket: A Sentimental Mother’s Day Idea She’ll Keep Forever

    The “Memory Lane” Basket: A Sentimental Mother’s Day Idea She’ll Keep Forever


    If you love the idea of a keepsake gift but want something cleaner and more modern than a basket, this version is for you.

    Instead of building upward inside a container, you build outward across a surface.

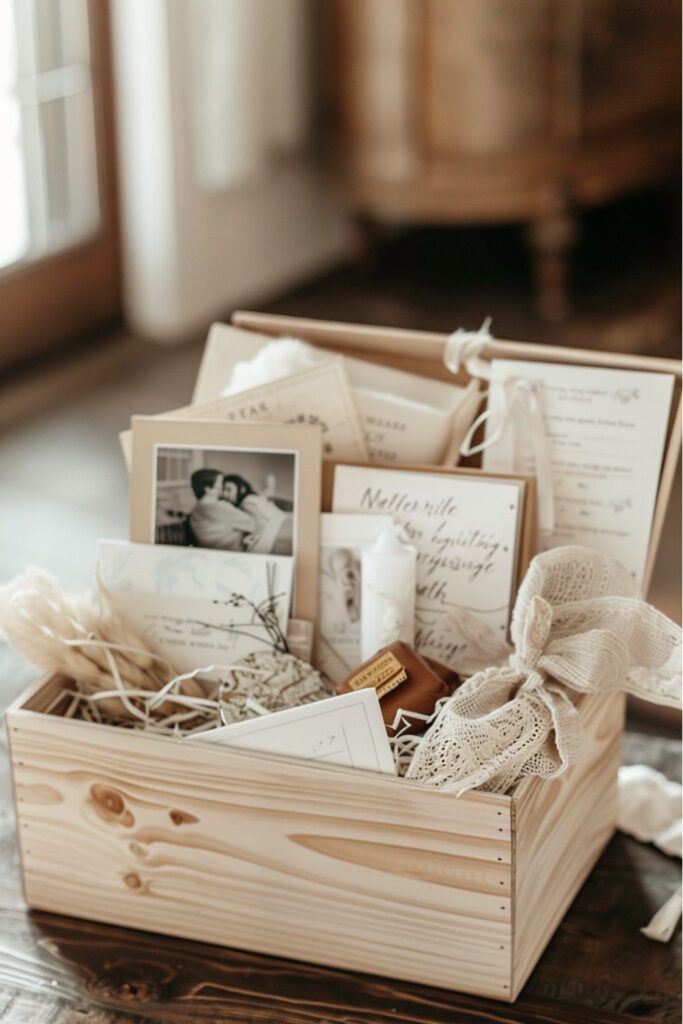
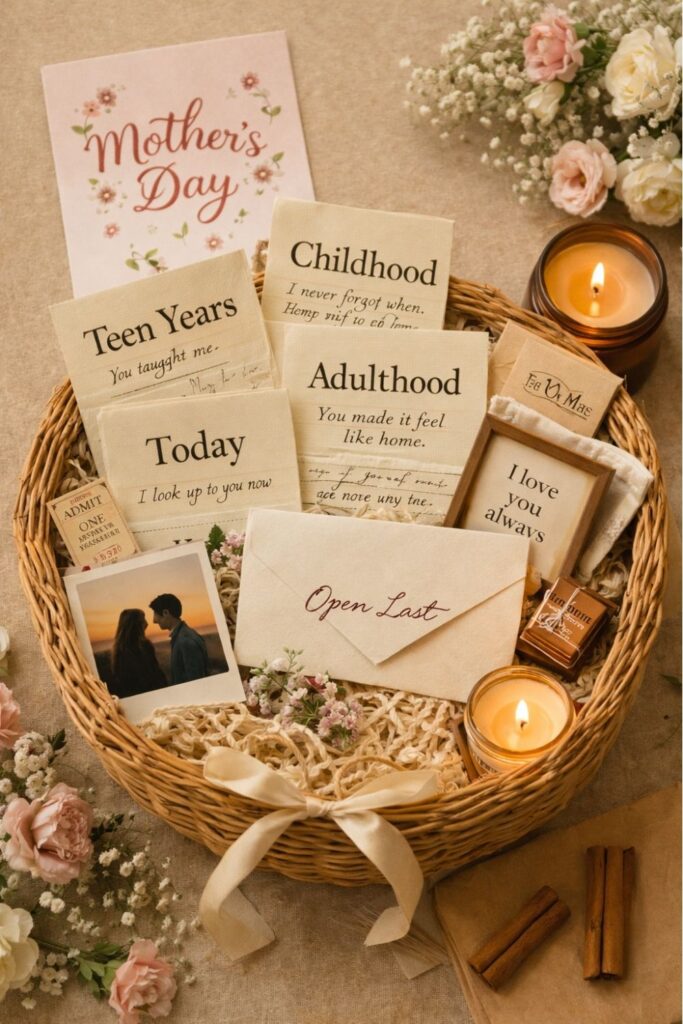
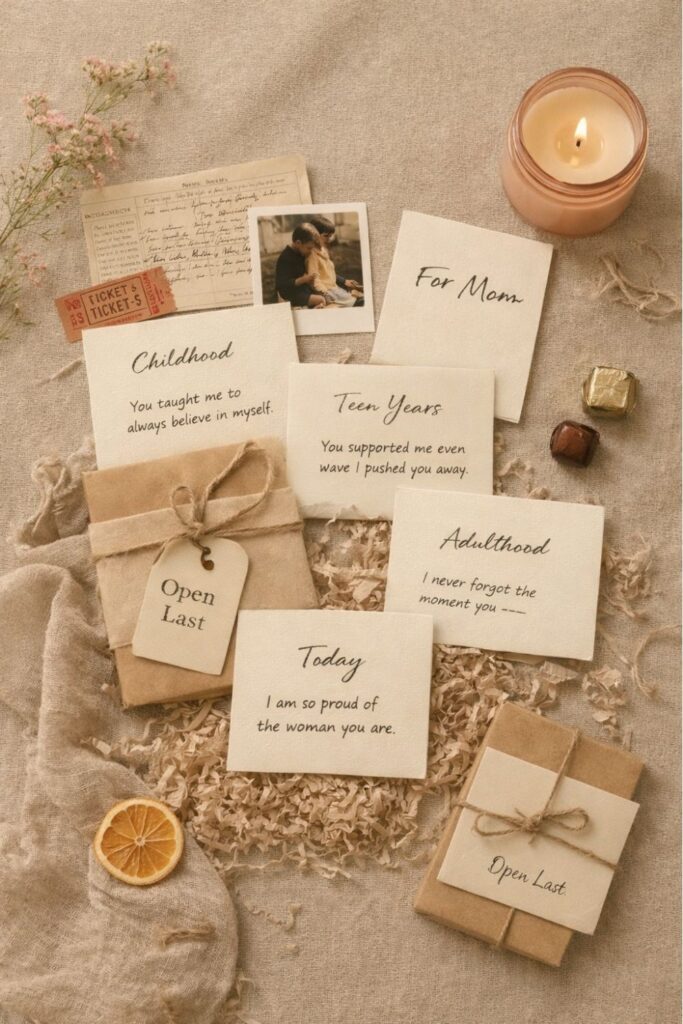
    A Memory Lane flat lay turns photos, notes, and meaningful objects into a visual timeline she can see all at once before she even picks anything up. It feels intentional. Editorial. Almost like something from a magazine spread — but deeply personal.

    If you’re searching for Cute Mom Gifts that feel thoughtful rather than store-bought, this is a Mother Day Idea that feels intimate and elevated at the same time.

    Here’s how to build it step by step.

    Need some relationship guidance? Drop on by our directories choc full of relationship coaches and dating coaches to help make your love life the best it can be.  Or click here to have us match you to the best.

    1. Plan the Layout Before You Place Anything

    Flat lays look effortless — but the secret is structure.

    Choose a clean background with intention: Use a neutral table, linen fabric, craft paper, or a soft throw blanket. Lighter tones help photos and handwritten notes stand out while keeping the overall look cohesive.

    Map your timeline visually first: Before arranging real items, lightly sketch or imagine the flow. You might create a left-to-right timeline (childhood to now), a circular story layout, or a centered focal point with memories radiating outward. Decide where the “Today” section will sit so it feels like the emotional anchor.

    Think in visual balance, not symmetry. If one side has two photos and a recipe card, the opposite side might need a thicker object like a small book or framed quote to balance the weight.

    Planning first prevents the layout from looking scattered. This is what separates a random arrangement from one of those Cute Mothers Day Gifts that feels styled and meaningful.

    2. Build the Memory Timeline With Layered Anchors

    Now you’ll bring in the heart of the gift — the memories themselves.

    Select 5–8 meaningful touchpoints: These could include printed childhood photos, a photocopy of a recipe she always made, a handwritten note from you, a milestone card (“First Home,” “The Hardest Year,” “The Year You Taught Me Strength”), or a small object tied to a shared hobby.

    Layer with subtle depth: Even in a flat lay, dimension matters. Slightly overlap photos. Tuck handwritten cards halfway under images. Angle one or two items gently rather than keeping everything perfectly straight. These tiny shifts make it feel organic and lived-in.

    Keep spacing intentional. White space is powerful. It allows each memory to breathe rather than compete.

    The goal isn’t to overwhelm her with quantity. It’s to create a visual story she can absorb slowly — one section at a time.

    3. Add a Present-Day Gift Element That Grounds It

    A timeline feels complete when it lands in the present.

    Create a “Today” focal point: This could be a handwritten letter in an envelope labeled “Open Last,” a framed quote that reflects who she is now, or a card that says, “This is who you are to me today.”

    Include one small tangible gift: Because this still counts among Cute Mom Gifts, anchor the sentiment with something physical she can keep using. A favorite chocolate bar, a beautiful candle, a book she mentioned wanting, or a cozy pair of socks folded neatly into the layout.

    Position this present-day item slightly closer to her when she approaches the table so it feels like the emotional landing point.

    This balance between nostalgia and now is what makes this more than just a collage. It becomes an experience.

    Make It Look Intentional, Not Crafty

    Flat lays can easily tip into “scrapbook chaos” if you’re not careful.

    Stick to one color palette: Choose two or three main tones. For example: black and white photos with cream paper and a soft blush accent. Or warm neutrals with twine and muted greenery. Consistency makes everything feel elevated.

    Repeat one design element: Wrap twine around multiple cards. Use matching envelopes. Print all timeline cards in the same font style. These small repeated details create cohesion.

    Lighting matters too. If you’re presenting this in person, place it near natural light. If you plan to photograph it before gifting, shoot from directly above to capture the full visual story.

    The difference between cluttered and curated is usually just restraint.

    Ways to Deepen the Emotional Impact

    Need some relationship guidance? Drop on by our directories choc full of relationship coaches and dating coaches to help make your love life the best it can be.  Or click here to have us match you to the best.

    Once your flat lay is built, you can elevate it even further.

    Add Voice to the Experience

    Create a private audio message: Generate a small QR code that links to a voice memo or short video. Place it subtly in the “Today” section so she discovers it at the end.

    Write one honest sentence you’ve never said aloud: Sometimes the most powerful line is simple. “I didn’t understand how much you carried until I grew up.” That kind of truth turns this from decorative into unforgettable.

    When gifts carry vulnerability, they become keepsakes.

    Invite the Future Into the Layout

    Memory is beautiful. But hope completes the circle.

    Add a “Next Chapter” card: Write about something you’re looking forward to doing together — a trip, a weekly coffee ritual, a milestone yet to come.

    Leave one blank card for her: Label it “One of My Favorite Memories of You.” Let her add to the story. That turns the gift into something shared rather than one-sided.

    The Memory Lane flat lay works because it slows everything down.

    She doesn’t just open it — she takes it in.

    It honors the years behind her and the present she’s standing in now.

    And that’s what makes it one of those Cute Mothers Day Gifts she’ll never forget — basket or not.

    The post The “Memory Lane” Basket: A Sentimental Mother’s Day Idea She’ll Keep Forever appeared first on Life Coach Hub.


    Source link

  • Budget-Friendly Mother’s Day Gift Baskets That Look High End

    Budget-Friendly Mother’s Day Gift Baskets That Look High End


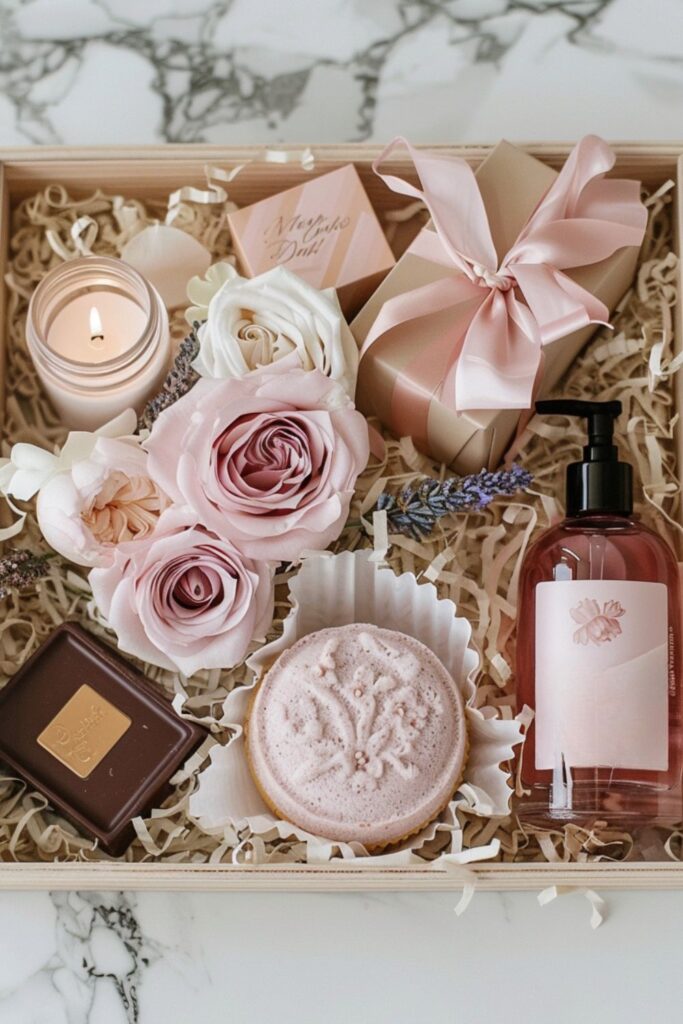
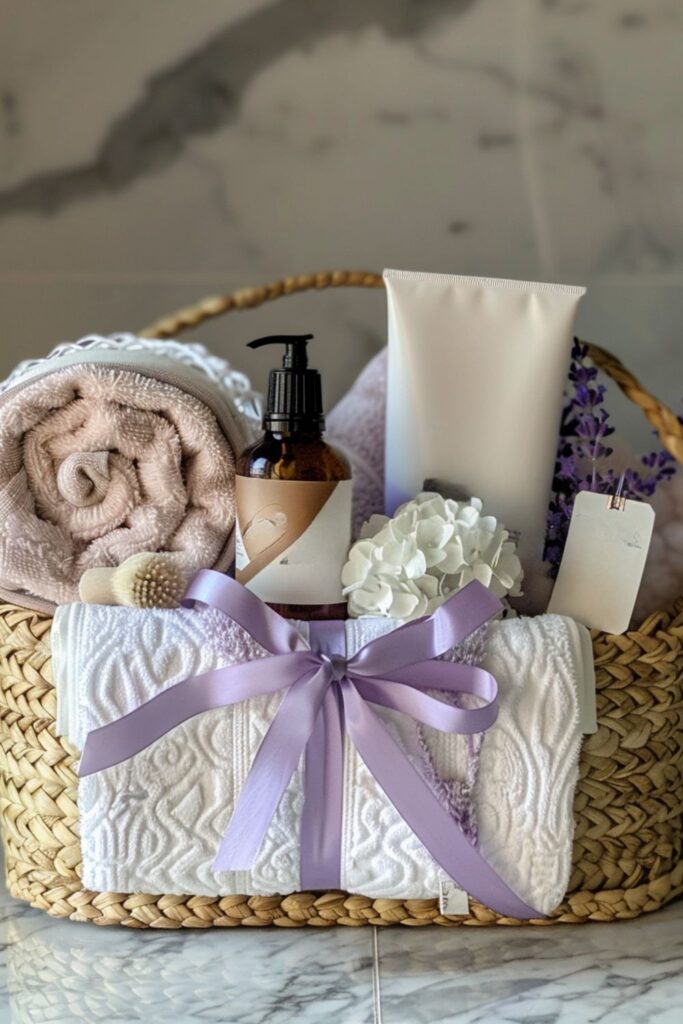
    When you’re searching for Good Mothers Day Gifts, it’s easy to assume “premium” means expensive. We’ve all seen those $150 curated baskets and wondered how anything homemade could compete. But here’s the secret: a gift basket looks high end because of structure, balance, and editing — not the total on your receipt.

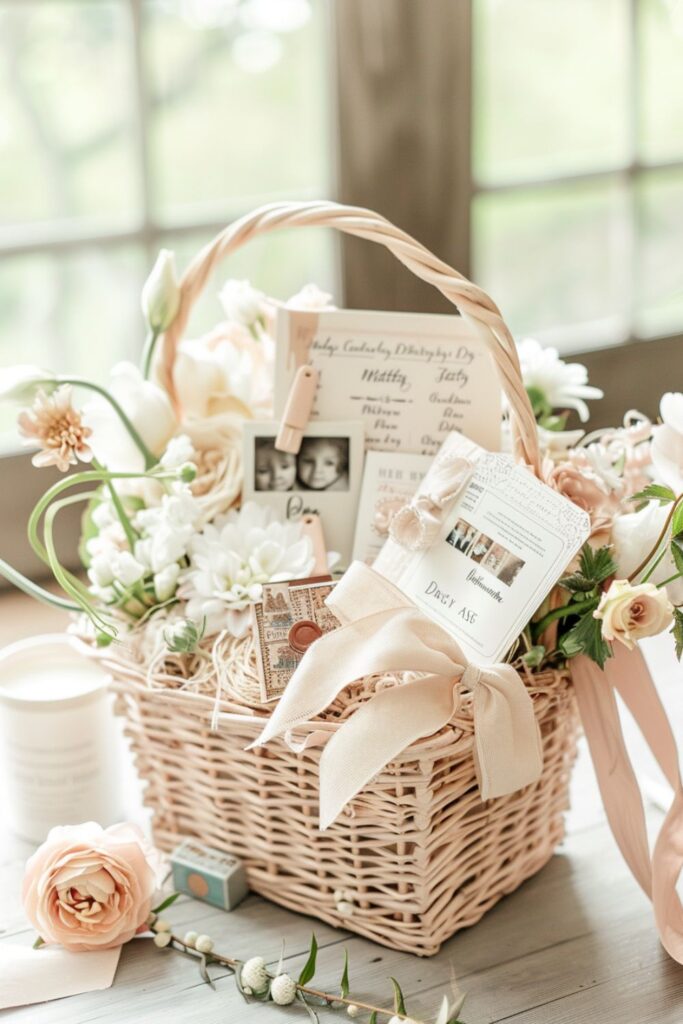
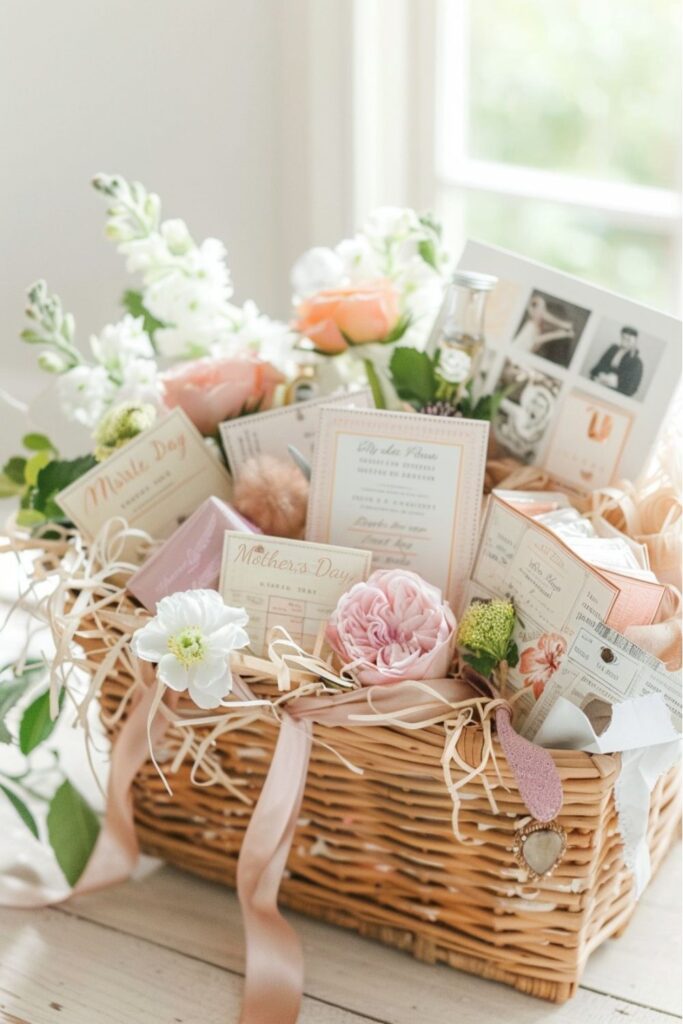
    The difference between a basket that feels thoughtful and one that feels thrown together is intention. High-end baskets follow invisible rules: a clear theme, layered height, cohesive colors, and breathing room. They aren’t crammed full. They’re styled.

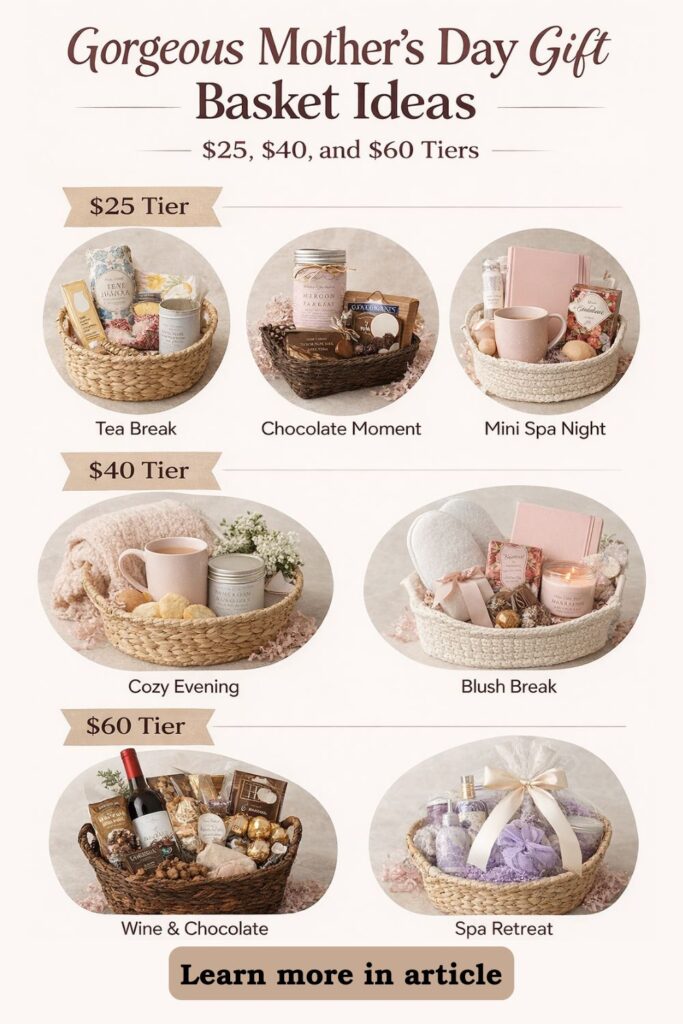
    Below is a step-by-step guide to creating beautiful, intentional Mothers Day Present Ideas at three price tiers — $25, $40, and $60. Each level builds on the same design principles. Whether you’re creating something simple or slightly more elaborate, the goal is the same: make it look curated, not crowded.

    Need some relationship guidance? Drop on by our directories choc full of relationship coaches and dating coaches to help make your love life the best it can be.  Or click here to have us match you to the best.

    The $25 Basket: Small, Polished, and Intentional

    A $25 basket works beautifully for teachers, grandmothers, neighbors, or when you want something meaningful without overspending. The key at this level is restraint. The more focused you are, the more premium it feels.

    Step 1: Choose One Clear Theme

    Before you shop, decide on one tight theme so everything feels cohesive and connected.

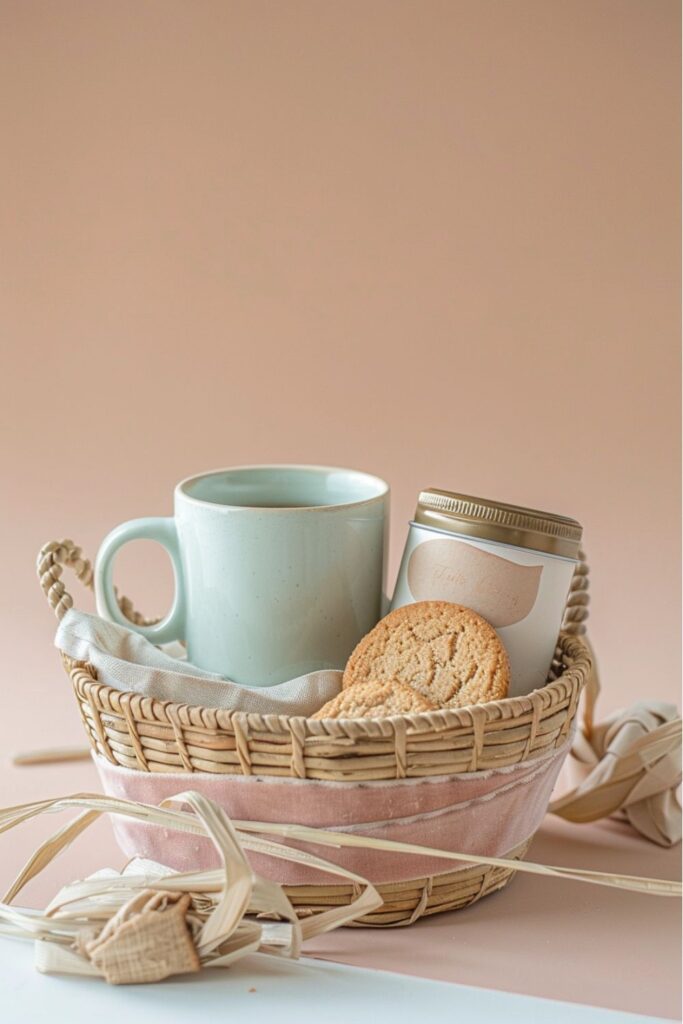
    Pick a simple luxury theme: Choose something like “Tea Break,” “Chocolate Moment,” or “Mini Spa Night,” and commit to it fully. If it doesn’t fit the theme, it doesn’t go in. That discipline is what makes the basket look intentional instead of random.

    Limit yourself to 4–5 items: Fewer, slightly larger pieces look more expensive than lots of tiny fillers. A tea tin, a mug, shortbread cookies, and a small jar of honey can look incredibly curated when they share a color palette or mood.

    Step 2: Use the 3-Height Rule

    Even an affordable basket can look styled when you vary height.

    Anchor with one taller item: A candle, bath bottle, or tea tin should sit toward the back and create structure. This gives the basket dimension instead of a flat appearance.

    Layer medium and small items in front: Place a mid-height item slightly forward and then smaller treats toward the front edge. Keep everything visible at first glance. Nothing should be buried.

    The result? It looks polished and balanced — not stuffed.

    The $40 Basket: Balanced and Gift-Worthy

    The $40 range is the sweet spot for Things For Mothers Day that feel generous but still practical. At this tier, you’re not adding more items — you’re upgrading one key piece.

    Step 1: Upgrade One Item

    Instead of increasing quantity, increase perceived quality.

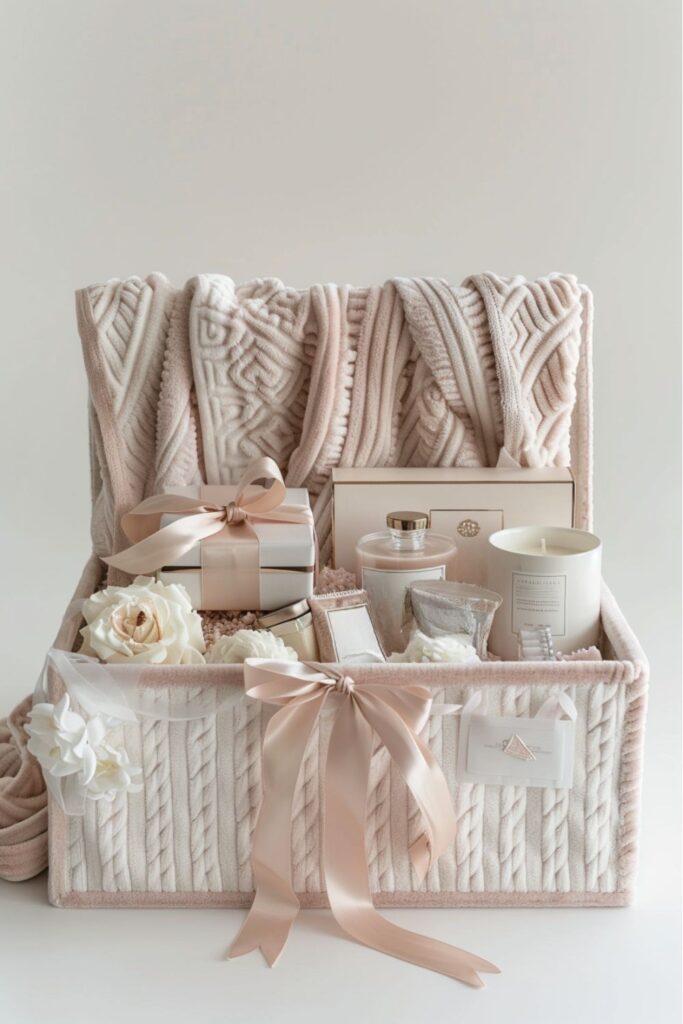
    Choose one standout anchor item: A plush throw, a hardcover journal, a high-quality mug, or a beautiful serving spoon instantly raises the overall value of the basket. This becomes your visual focal point.

    Build supporting items around it: Add coordinating pieces that echo the mood. If your anchor is a soft blush throw, add matching tea, a candle in a similar tone, and wrapped chocolates in complementary packaging. Everything should feel like it belongs together.

    Step 2: Create Visual Symmetry

    Premium baskets feel balanced and calm to look at.

    Group similar items together: Keep edible items on one side and self-care or lifestyle items on the other. This creates clean visual zones instead of chaos.

    Use color repetition: Repeat one or two key colors throughout the basket. If your mug is lavender, echo that shade in ribbon, tissue paper, or floral accents.

    This tier feels intentional and styled — like you planned it, not rushed it.

    The $60 Basket: Boutique-Style Without the Boutique Price

    At $60, you can create Creative Mother’s Day Gifts that genuinely look boutique-made. The secret at this level is layering and editing — not excess.

    Step 1: Think in Layers

    High-end baskets are built in vertical layers, not piled in loosely.

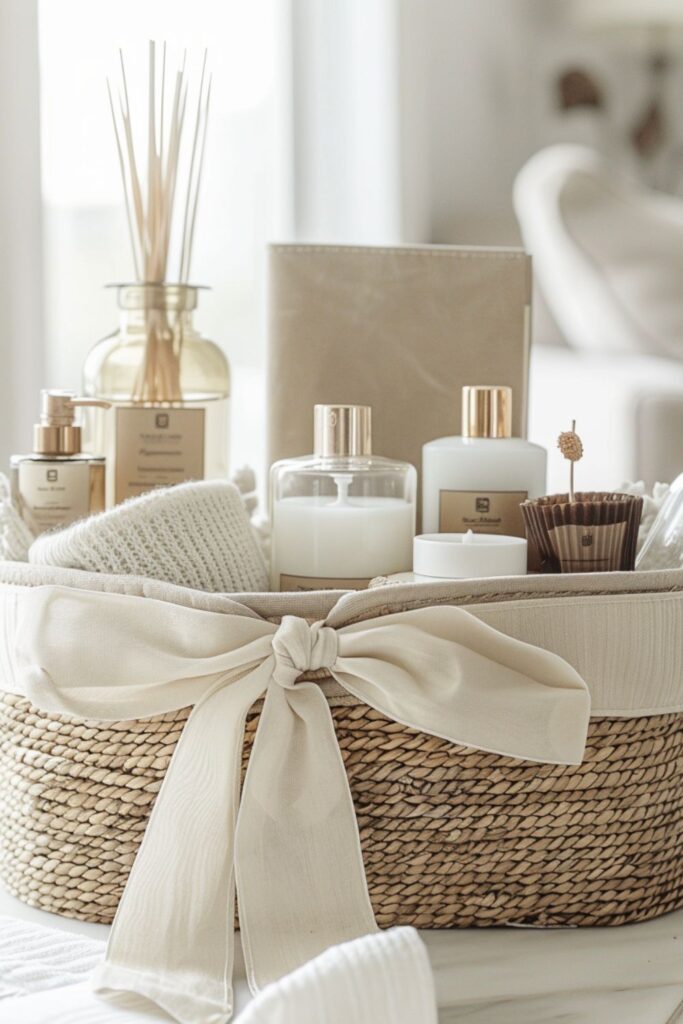
    Start with a structured base: Use a sturdy woven basket, wooden crate, or reusable storage bin. The container itself should feel substantial. That alone increases perceived value.

    Add filler strategically: Use shredded paper, kraft crinkle cut, or folded fabric to lift items upward. Nothing should sink below the rim. Each item should be visible and spaced intentionally.

    Place taller items at the back, mid-height pieces in the center, and smaller items slightly forward. Create a gentle arc or triangle shape for a boutique display effect.

    Step 2: Edit Like a Stylist

    More money doesn’t mean more items — it means more refinement.

    Remove anything that feels generic: Skip novelty fillers and mismatched packaging. If something looks cheap next to everything else, take it out.

    Finish with a coordinated wrap: Clear cellophane, a wide satin ribbon, and a handwritten tag instantly transform the presentation. Keep the bow generous but not overwhelming.

    The final result should feel like something she’d see in a boutique window — only better, because you made it.

    Visual Tricks That Instantly Make Any Basket Look Expensive

    No matter your budget, these design shifts change everything.

    Use fewer, better items: Five cohesive pieces feel more luxurious than twelve unrelated ones. Space equals value.

    Keep packaging consistent: Remove loud price stickers and overly busy branding when possible. Transfer items to simple jars or wrap in neutral tissue if needed.

    Create breathing room: Leave small gaps between items so each one stands out. Crowding makes things look cheaper.

    Match textures: Pair soft with soft (throw + robe) or sleek with sleek (journal + pen). When textures harmonize, the basket feels thoughtfully designed.

    How to Personalize Without Raising the Budget

    Need some relationship guidance? Drop on by our directories choc full of relationship coaches and dating coaches to help make your love life the best it can be.  Or click here to have us match you to the best.

    Personalization is what transforms a basket from nice to unforgettable.

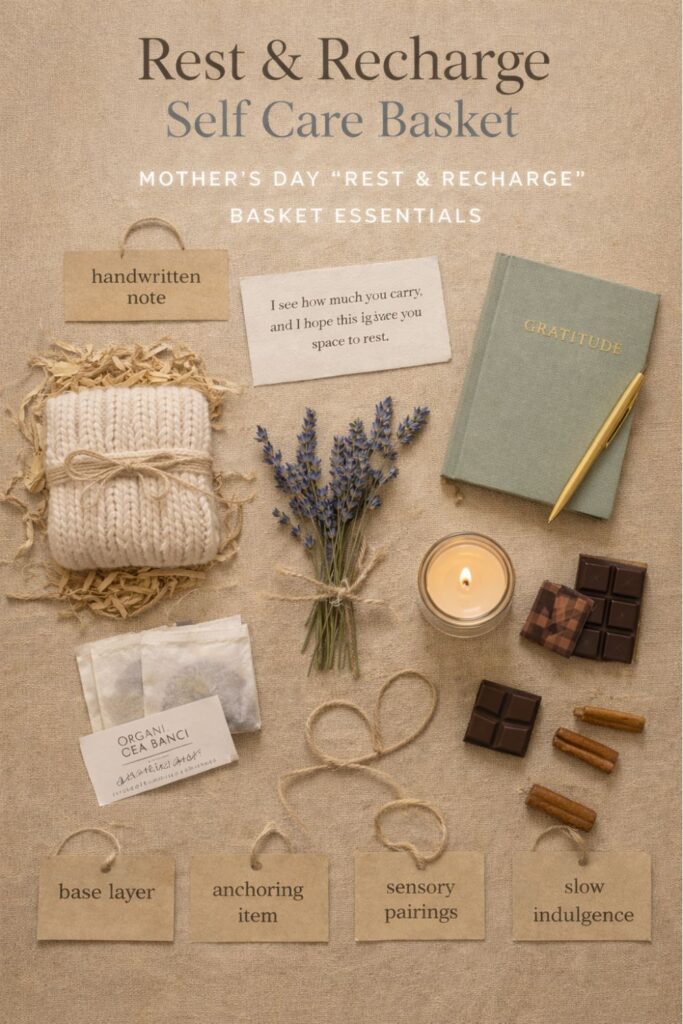
    Add one handwritten note: A short, specific message will mean more than any extra item. Mention a shared memory or something you admire about her.

    Reference her current season of life: Is she a new grandma? Starting a garden? Launching a business? Tailor the theme to reflect where she is now.

    Choose something she’ll actually use: A beautiful olive oil for someone who loves cooking, seed packets for a gardener, or a quality planner for someone rebuilding routines.

    When done right, even modest baskets become some of the best Good Mothers Day Gifts because they feel intentional and deeply personal.

    Premium isn’t about price. It’s about care, structure, and thoughtfulness. And now you know how to create that feeling at any budget.

    The post Budget-Friendly Mother’s Day Gift Baskets That Look High End appeared first on Life Coach Hub.


    Source link

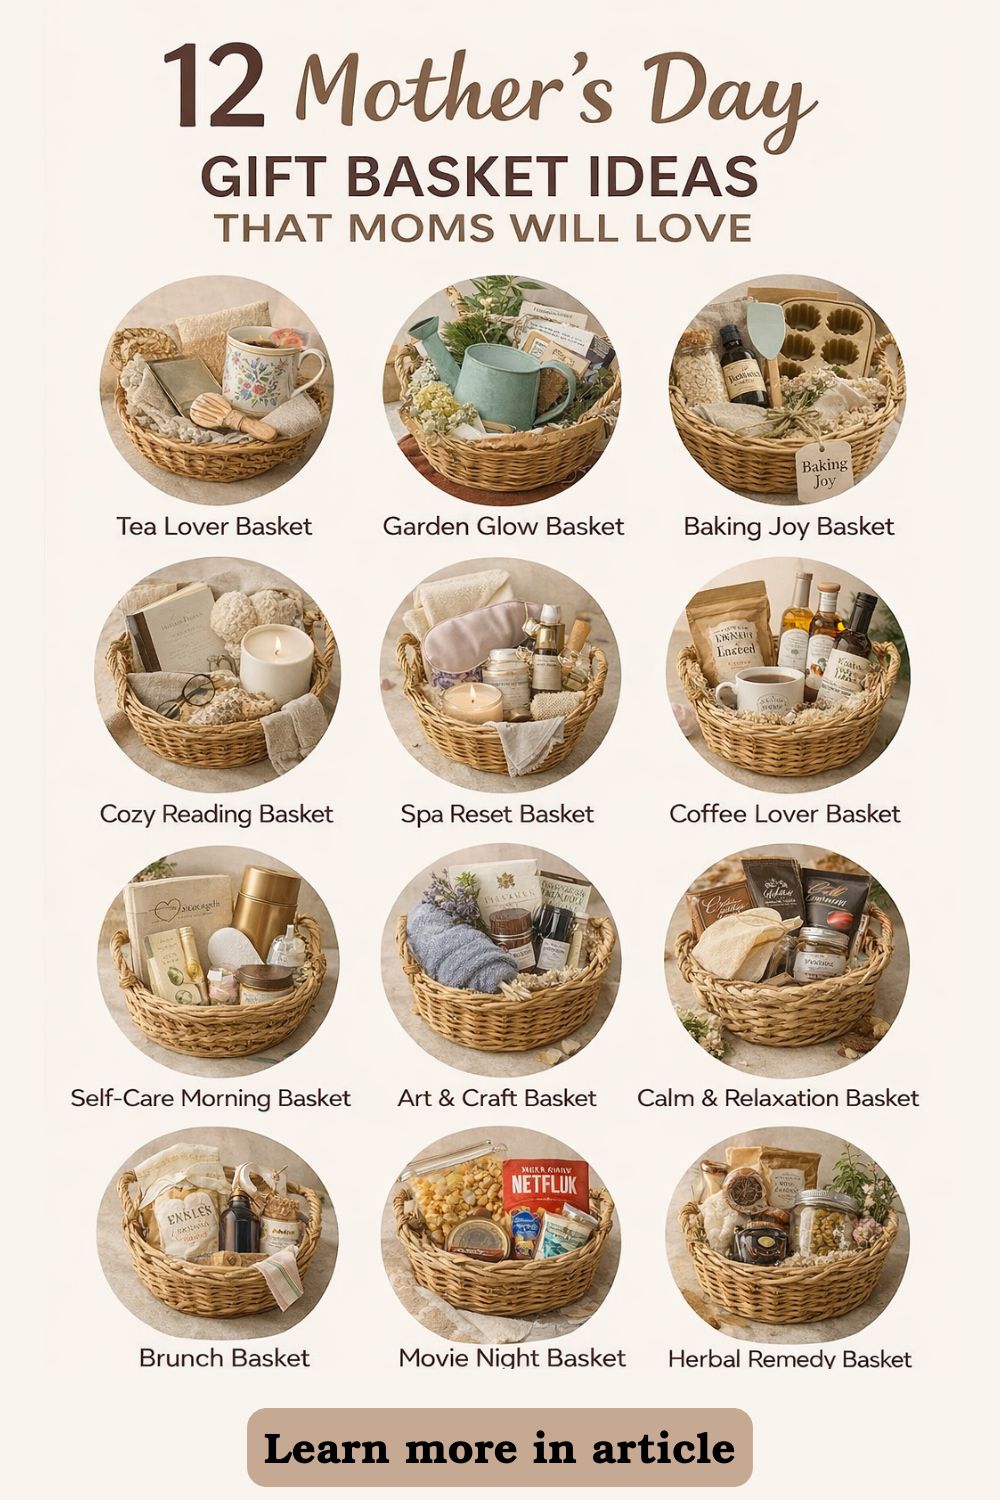
  • The 5-Theme Method for Creating Unique Mother’s Day Gift Baskets

    The 5-Theme Method for Creating Unique Mother’s Day Gift Baskets


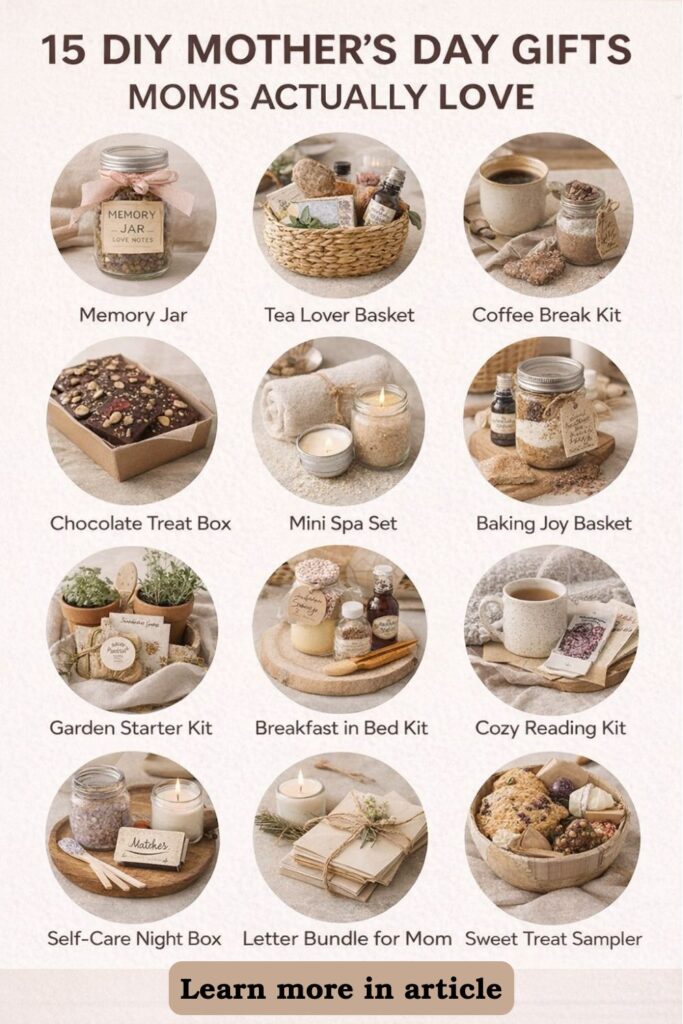
    When it comes to Unique Mothers Day Gifts, gift baskets often fall into the same trap: random filler. A candle gets tossed in, a mug is added, maybe some chocolate, maybe a lotion. Each item might be nice on its own, but together they feel disconnected.

    That’s why many baskets end up looking like a last-minute collection of items rather than a thoughtful gift.

    The 5-Theme Method solves that problem by giving your basket a clear structure. Instead of choosing items randomly, you build the gift around a single theme and layer the contents intentionally.

    This method uses what we call the 3-Tier Rule:

    • Tier 1: Anchor item — the standout piece that defines the basket
    • Tier 2: Functional support items — practical pieces that support the anchor
    • Tier 3: Sensory extras + personal touches — small details that make the gift feel warm and meaningful

    Once you start thinking in these tiers, building a basket becomes surprisingly easy. Every item has a purpose, and the final result looks curated rather than crowded.

    The themes below are simple formulas you can follow. Each one creates Creative Mother’s Day Gifts that feel cohesive, personal, and memorable.

    Need some relationship guidance? Drop on by our directories choc full of relationship coaches and dating coaches to help make your love life the best it can be.  Or click here to have us match you to the best.

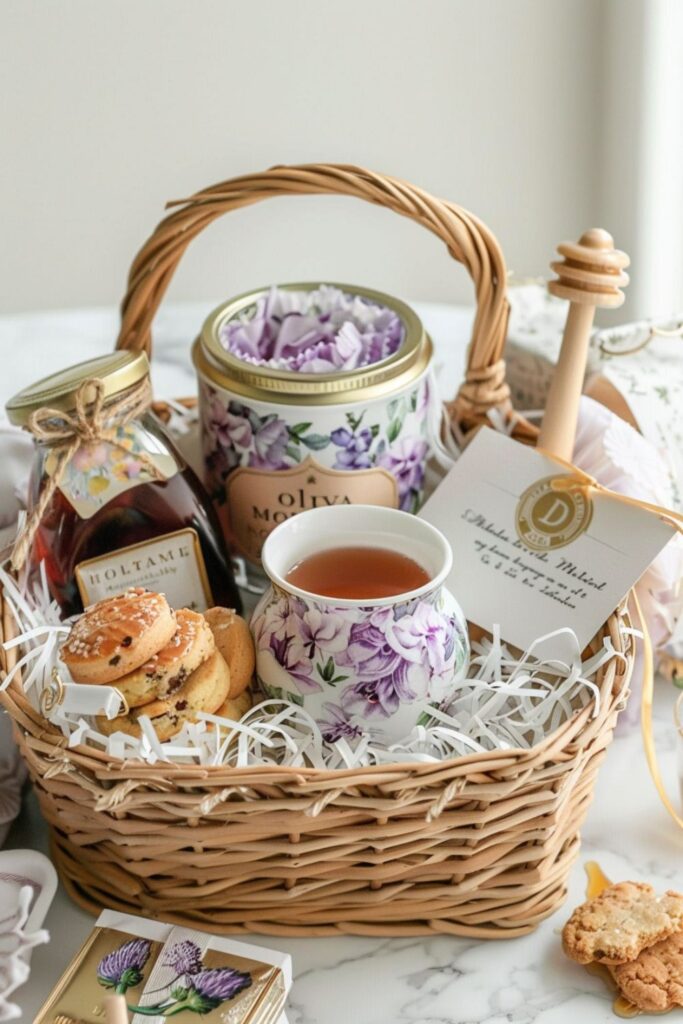
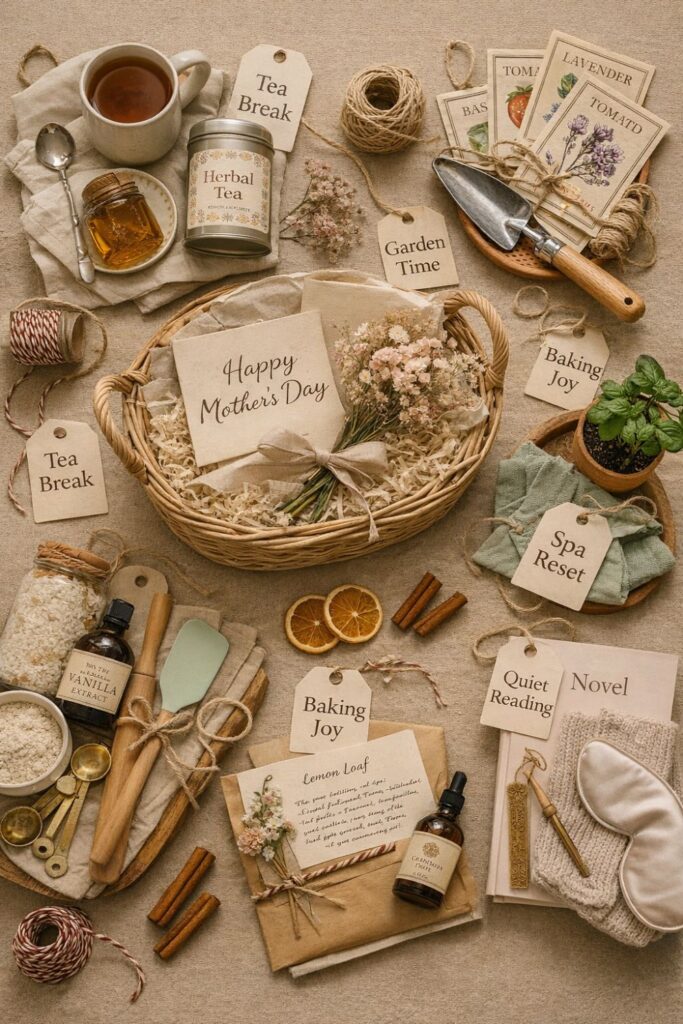
    1. The Tea Lover Basket

    For the mom who finds comfort in a warm mug, the Tea Lover Basket creates a calm, relaxing experience rather than just a collection of tea products.

    Start with a tea-focused anchor item that feels special. This could be a beautiful loose-leaf tea blend, a sampler of artisanal teas, or a premium herbal blend packaged in a decorative tin. The goal is to choose something that feels like a treat she wouldn’t normally buy for herself.

    Next, build the functional layer around that tea. A well-chosen mug or teacup makes the basket feel complete and visually cohesive. Choose one with a soft color palette or a simple floral pattern so it naturally fits the theme. A tea infuser, honey jar with dipper, or lemon slice tin can add both usefulness and visual balance.

    Now add the sensory layer that makes the basket feel cozy. Shortbread cookies, a small biscuit tin, or a linen napkin tucked beside the mug can turn the gift into a full tea moment. These small extras create the feeling of a relaxing ritual rather than a simple drink.

    Finally, add a personal touch. A handwritten note suggesting a quiet evening tea break instantly changes the emotional tone of the basket. Even a short message about taking time to slow down can make the gift feel thoughtful and intentional.

    The result is a peaceful gift experience that feels warm, cohesive, and deeply personal.

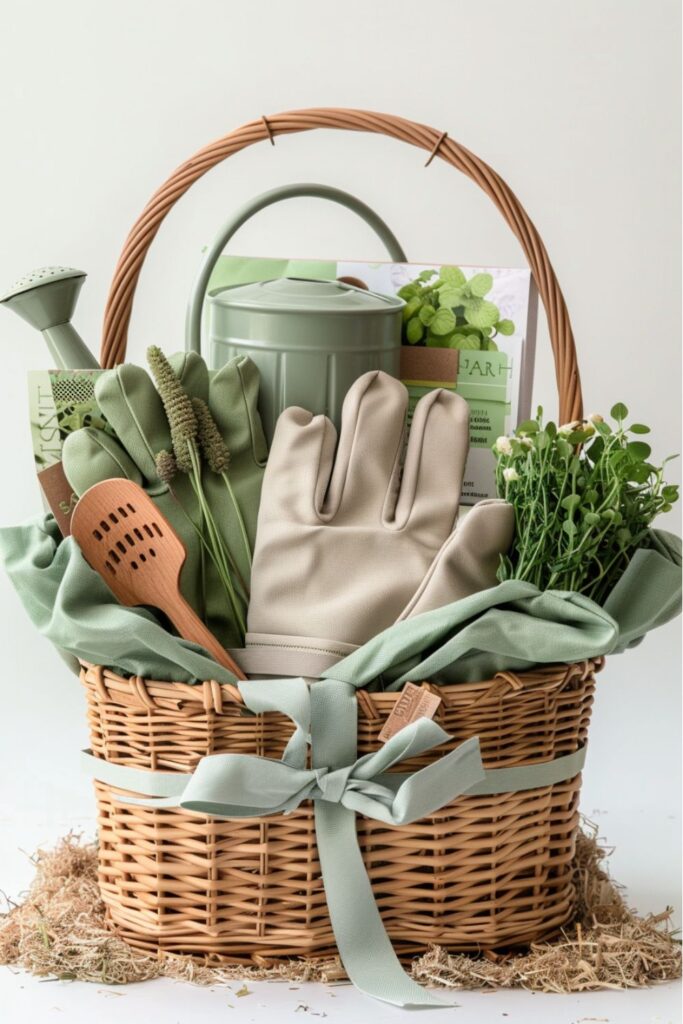
    2. The Garden Glow Basket

    The Garden Glow Basket is ideal for moms who enjoy spending time outdoors or caring for plants. Instead of gifting random gardening supplies, this theme creates a small gardening experience she can enjoy right away.

    Begin with a garden-focused anchor item. This could be a high-quality hand trowel set, a small watering can, or a bundle of heirloom seed packets. The anchor item should be something practical but also visually appealing so it naturally becomes the centerpiece of the basket.

    From there, add functional support items that help the gardening experience feel complete. Gardening gloves, plant markers, or a small kneeling pad are perfect additions. These items show that the basket was designed with real use in mind.

    To make the basket look intentional, stick to a cohesive color palette. Earthy tones like terracotta, sage green, and cream work beautifully for this theme. Even simple tools can feel elevated when the colors work together visually.

    For the sensory and personal layer, include a small potted herb like basil or mint. This adds life and texture to the basket while reinforcing the gardening theme.

    A handwritten planting calendar or note about what she can grow during the season adds a meaningful personal touch.

    Instead of basic gardening supplies, the basket becomes a thoughtful invitation to enjoy time outside.

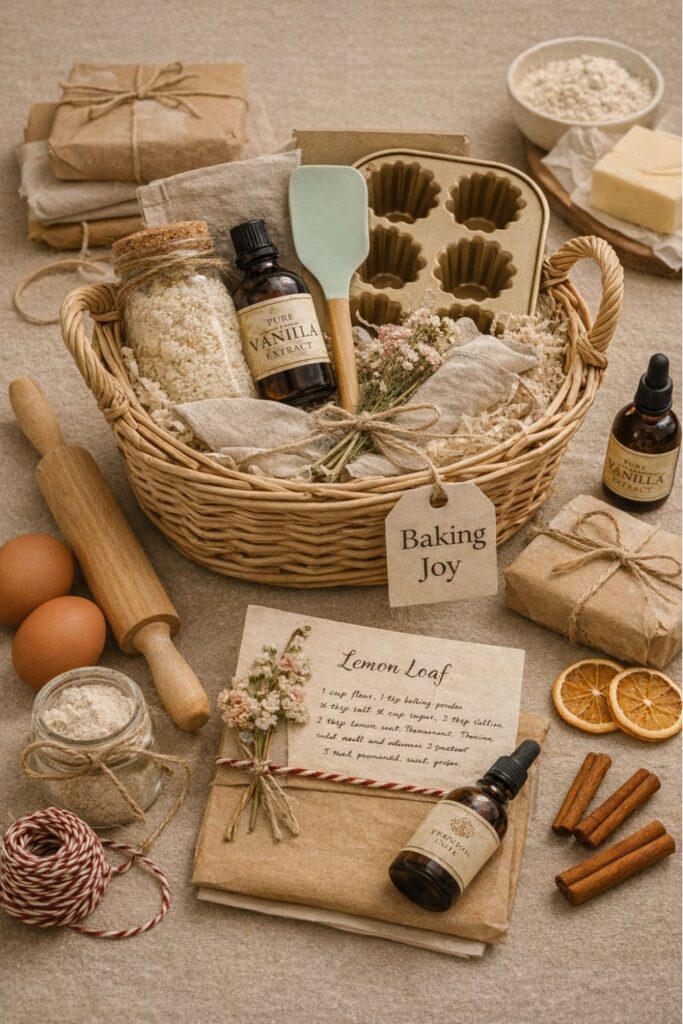
    3. The Baking Joy Basket

    For moms who love baking, this basket transforms everyday kitchen items into a complete baking experience.

    Start with a showpiece baking anchor that immediately communicates the theme. A decorative rolling pin, artisan vanilla extract, or a unique cake pan works beautifully. The anchor item should be something that feels fun and inspiring to use.

    Next, build around a single recipe idea. Rather than adding random baking ingredients, choose one treat she could easily make. For example, a lemon loaf basket might include flour, sugar, and dried lemon slices in small labeled jars. This gives the basket a clear purpose.

    Add support tools that make the baking process smoother. Silicone spatulas, parchment paper sheets, or measuring spoons in coordinated colors help reinforce the theme without overwhelming the basket.

    For the final sensory layer, include a sweet detail that makes the gift feel personal. A handwritten recipe card, a custom “Made with Love” label, or a small jar of sprinkles can add personality.

    The key to this basket is simplicity. When everything revolves around one baking moment, the basket feels intentional and inviting.

    4. The Cozy Reading Basket

    The Cozy Reading Basket is perfect for the mom who loves quiet moments with a book. This theme focuses on comfort, relaxation, and uninterrupted reading time.

    Begin with the book itself as the anchor item. Choose a novel in her favorite genre or a beautifully bound classic edition. The book should feel like the centerpiece of the basket rather than just another item inside it.

    Once the anchor is chosen, build the comfort layer around it. A soft throw blanket or cozy socks instantly sets the mood. Choose colors that complement the book cover or overall palette of the basket.

    Next, add supportive reading accessories. A bookmark, clip-on reading light, or herbal tea sachets can deepen the reading experience without making the basket feel cluttered.

    These small items create the sense of a relaxing evening routine rather than just a book gift.

    Finally, include a personal message inside the book cover explaining why you chose it. This small detail often becomes the most meaningful part of the gift.

    The result is an intimate basket designed around quiet moments and personal enjoyment.

    5. The Spa Reset Basket

    Spa baskets are common, but they only feel special when the items truly belong together. The key is to keep the theme simple and cohesive.

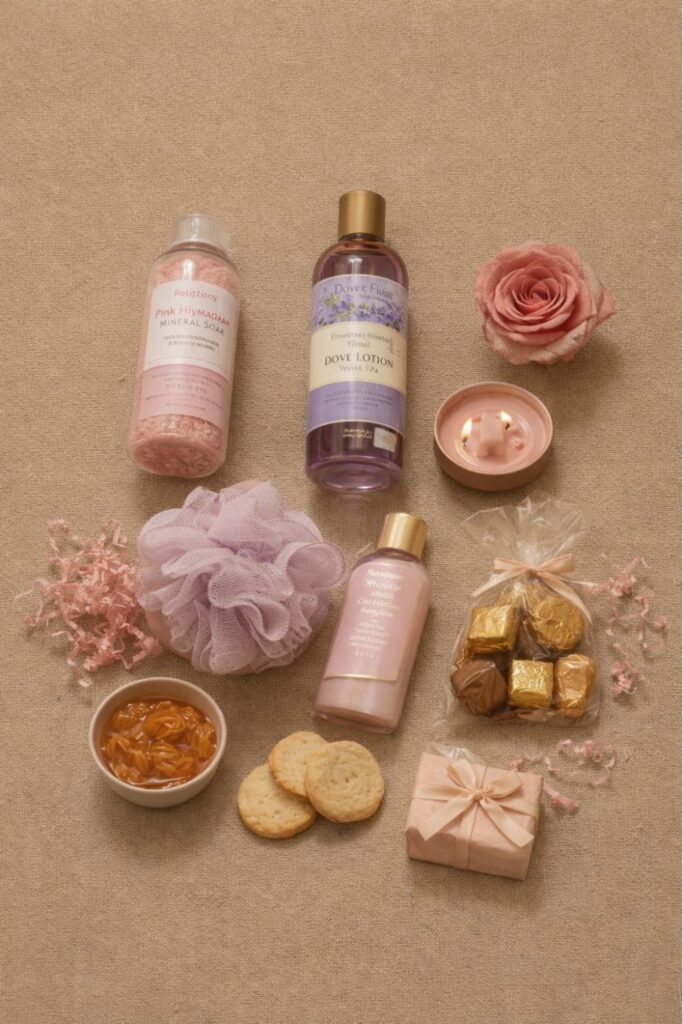
    Start by choosing one hero self-care item that defines the basket. This might be a luxurious bath soak, a silk eye mask, or a nourishing body oil. The anchor item should feel indulgent and calming.

    Next, choose a single scent family and stick to it. Lavender, eucalyptus, or citrus are excellent choices. Keeping every product within the same scent range prevents the basket from feeling mismatched.
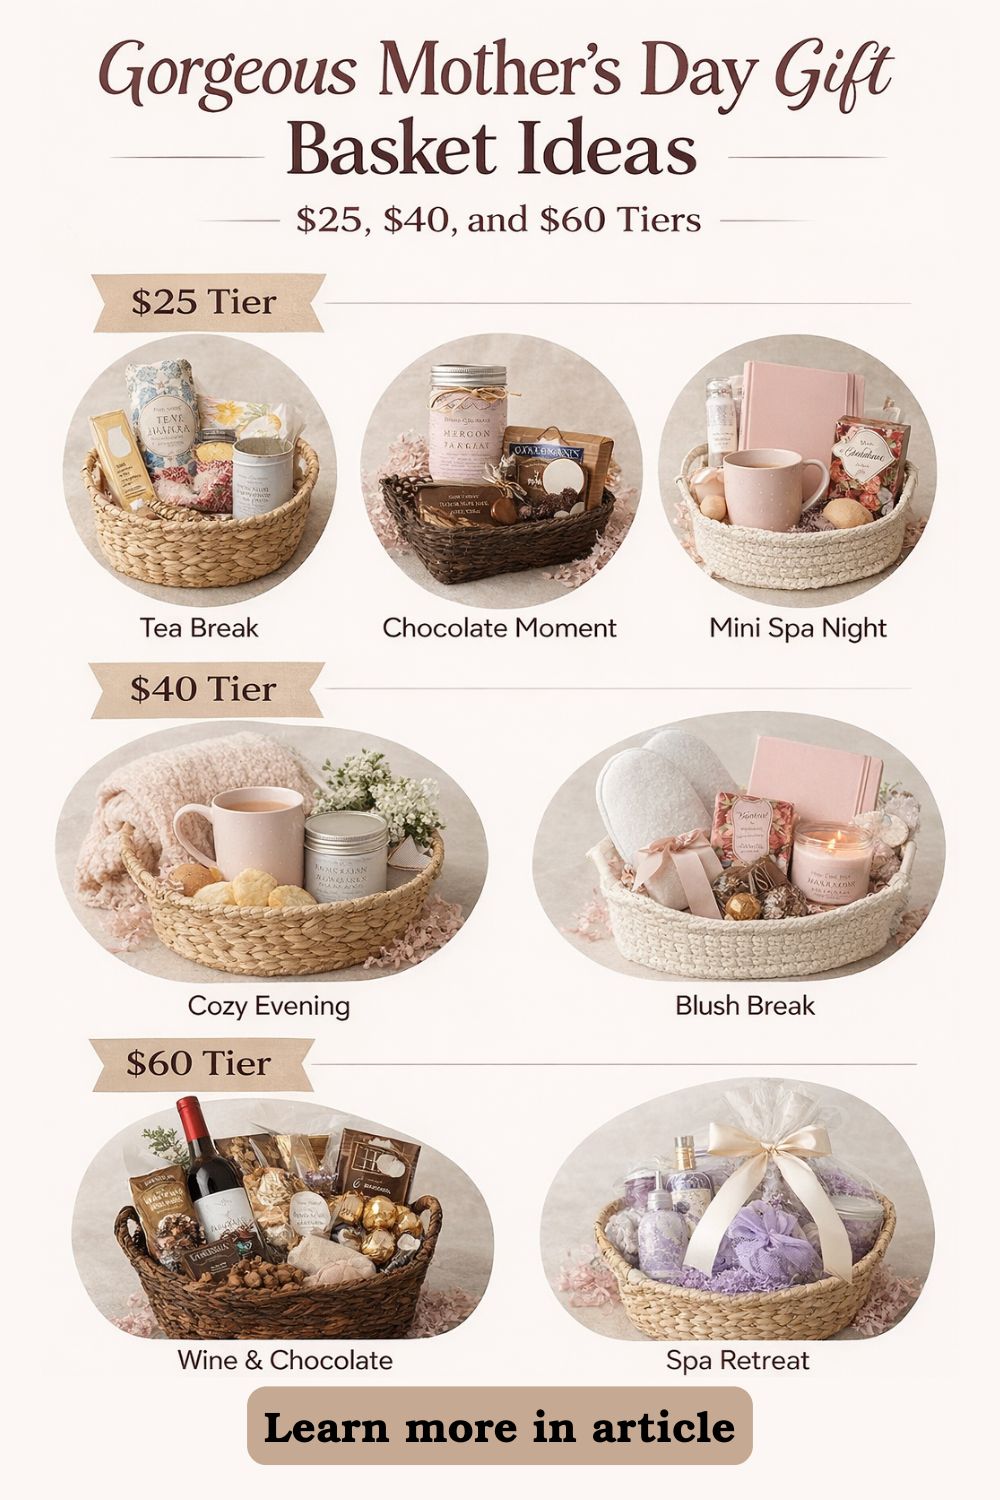
    From there, layer in practical spa supports. A soft washcloth, dry brush, or simple candle in a neutral container can help build the experience without overwhelming it.

    The final step is adding a ritual element. A handwritten card suggesting a short self-care routine can turn the basket into a guided moment of relaxation.

    Instead of a random mix of spa products, the basket becomes a complete reset experience.

    The 3-Tier Rule Explained (So You Never Add Random Filler Again)

    If you remember only one thing when building gift baskets, remember the 3-Tier Rule.

    First, choose the anchor item. This is the centerpiece that defines the theme. Without a strong anchor, the basket can quickly become a random mix of products.

    Next, add support items that enhance the anchor. These pieces should make the main item easier or more enjoyable to use.

    Finally, add sensory extras and personal touches. These small details create warmth and personality without overwhelming the gift.
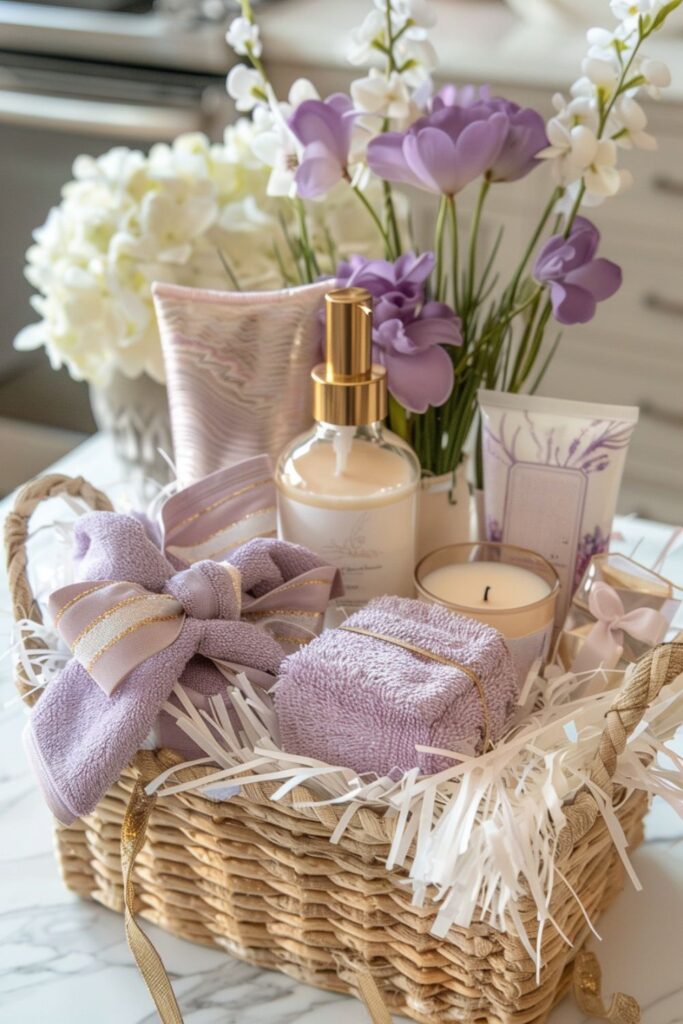
    If you ever feel unsure about adding an item, ask yourself which tier it belongs to. If it doesn’t clearly fit one of the three categories, it probably doesn’t belong in the basket.

    This simple structure keeps the basket focused and visually balanced.

    How to Make It Look Cohesive and Premium

    Need some relationship guidance? Drop on by our directories choc full of relationship coaches and dating coaches to help make your love life the best it can be.  Or click here to have us match you to the best.

    A gift basket doesn’t need expensive items to feel beautiful. Presentation and structure are what create that polished look.

    Start with a consistent color palette. Limiting the basket to two or three colors instantly makes it feel curated. Neutral baskets with soft accent colors often work best.

    Next, use texture layering. Combining materials like linen, wood, glass, and paper creates visual interest without adding clutter.

    Another important detail is height variation. Place the anchor item slightly higher toward the back of the basket and layer smaller items in front. This simple technique creates depth and balance.

    Finally, include one handwritten element. Whether it’s a note, recipe card, or message tucked into the basket, personal handwriting adds warmth that store-bought gifts can’t replicate.

    When you combine thoughtful themes with intentional presentation, you don’t just create gift inspo.

    You create a meaningful experience — and that’s what truly makes these Unique Mothers Day Gifts stand out.

    The post The 5-Theme Method for Creating Unique Mother’s Day Gift Baskets appeared first on Life Coach Hub.


    Source link

  • How to Build a “Rest & Recharge” Mother’s Day Self Care Basket

    How to Build a “Rest & Recharge” Mother’s Day Self Care Basket


    When you’re searching for Mothers Day Gift Ideas, it’s easy to grab a few cute things, place them in a basket, tie on a ribbon, and call it done. But a real rest and recharge basket isn’t about how much you include. It’s about how it feels when she opens it.

    This step-by-step layering method helps you create one of those Good Mothers Day Gifts that offers something deeper than a quick smile. It creates relief. Space. A moment to breathe. Instead of adding more “stuff,” you’re giving her permission to slow down.

    Below is the full layering process to build a self care basket that feels intentional, calm, and genuinely restorative.

    Need some relationship guidance? Drop on by our directories choc full of relationship coaches and dating coaches to help make your love life the best it can be.  Or click here to have us match you to the best.

    Step 1: Start With the Base Layer (Foundation First)

    Before you add anything she can see, you build the part she won’t consciously notice—but will absolutely feel.

    The base layer is both physical and emotional. It creates height, softness, and visual calm. More importantly, it sets the tone.

    Choose a soft base filler: Use shredded kraft paper, crinkle cut paper, or even a lightweight cotton scarf folded at the bottom. The goal is to lift the items upward so they don’t look dropped into an empty container. A soft base immediately signals comfort.

    Select a basket that feels grounded: Choose a woven rattan basket, a neutral storage bin, or even a fabric tote she can reuse later. Avoid anything overly decorative that has no life beyond this gift. Reusable containers make the basket feel thoughtful rather than disposable.

    Create visual breathing space: Don’t pack it tightly. Resist the urge to fill every corner. Height is good; overcrowding is not. When items have space between them, the basket feels calm instead of chaotic.

    This base is what separates Cute Mothers Day Gifts from intentional ones. It should quietly communicate, “This is your moment.” Not, “Here are ten things.”

    When done right, the foundation whispers slow down.
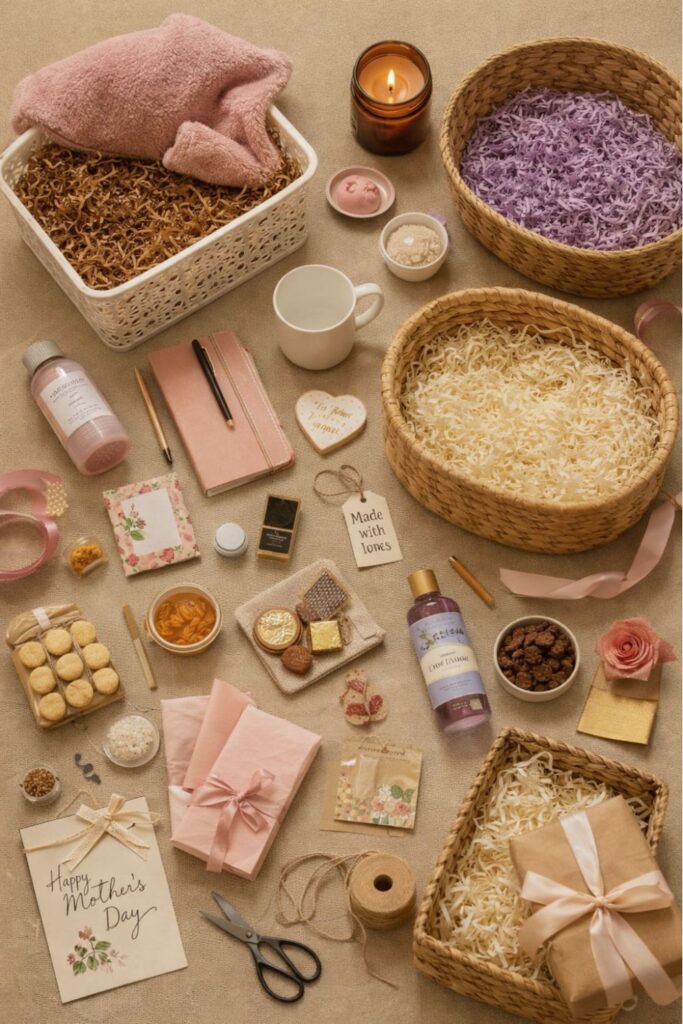
    Step 2: Add One Anchor Item (The Heart of the Basket)

    Every beautiful gift basket needs one hero piece—the item that defines the experience.

    Without an anchor item, the basket feels scattered. With one, everything else makes sense.

    Choose one meaningful anchor item: This could be a plush robe, a high-quality journal, a luxury body butter, or a weighted eye mask. Choose something that feels substantial. Something that says, this is the main gift. The rest will support it.

    Position it upright and visible: Place the anchor item at the back center of the basket. When she first sees it—whether from above or from the front—her eye should land there naturally. This creates structure and visual balance.

    Let everything else support it: Once your anchor is placed, choose additional items that reinforce the same theme. If the anchor is a journal, add a pen and herbal tea for quiet reflection. If it’s a robe, include cozy socks and a candle for comfort.

    The anchor answers the emotional question: What kind of rest is this?

    Deep sleep?
    Reflection?
    Spa-level comfort?

    When you focus on one clear experience, the basket feels cohesive rather than random.

    This is where Good Mothers Day Gifts start to feel intentional.

    Step 3: Layer in Sensory Pairings (Touch, Scent, Taste)

    Now you build the emotional impact. This is where the basket shifts from practical to powerful.

    People don’t remember items. They remember how those items made them feel.

    Pair scent with touch: Place a candle, essential oil roller, or linen spray next to something soft—like cozy socks, a knit throw, or a plush headband. Scent and texture together create a sensory experience, not just a product display.

    Include one slow indulgence: Add herbal tea, dark chocolate squares, honey sticks, or even shortbread cookies. Choose something meant to be savored, not rushed. This reinforces the idea of slowing down.

    Balance visual weight: Arrange items in small clusters of two or three. Avoid lining everything up evenly. Vary heights and shapes slightly, but keep them grouped so the layout feels calm and cohesive.

    This layering method transforms diy mothers day gifts into something that feels curated and elevated without being excessive.

    You’re not just adding more items. You’re creating small moments:

    Light the candle.
    Put on the socks.
    Sip the tea.

    That sequence is what makes the basket feel restorative instead of decorative.

    Step 4: Finish With a Handwritten Note (The Emotional Layer)

    Without this final layer, it’s just a collection of nice products.

    With it, it becomes personal.

    Write a short, specific message: Skip generic phrases. Instead, write one honest sentence about her. “I see how much you carry, and I hope this gives you space to rest.” Specific acknowledgment feels deeply meaningful.

    Place it where she’ll see it first: Tuck the note slightly into the anchor item so it’s visible before she removes anything. The emotional message should come before the objects.

    Keep it simple and sincere: This doesn’t need to be a letter. One sentence is enough. Clarity beats length.

    This is the difference between Unique Mothers Day Gifts and truly thoughtful ones.

    The note tells her:
    I notice you.
    I see you.
    You deserve this.

    And that is what she will remember most.

    How to Style It for a Beautiful Overhead Layout

    If you’re photographing the basket—or simply want it to look intentional—structure matters.

    Divide the basket into visual zones: Back row for the anchor item. Middle for scent and touch pairings. Front for indulgent treats and the note. This layered layout creates natural depth.

    Keep color tones consistent: Choose a palette and commit to it. Blush and cream. Lavender and white. Sage and neutral. When the tones harmonize, the basket instantly feels cohesive.

    Leave small gaps between items: Negative space is powerful. It makes everything feel breathable and peaceful.

    The goal is simple: the basket should look calm at first glance.

    How to Personalize It Based on Her Season of Life

    The most meaningful Mothers Day Gift Ideas reflect her real life—not a generic version of motherhood.

    For busy moms: Choose quick-access rest like shower steamers, a 10-minute journal, and easy tea blends. Think realistic relaxation, not elaborate routines.

    For career-focused women: Add structured relaxation tools—like a guided reflection journal, calming desk essentials, or a luxury hand cream she can keep at work.

    For women in transition: Include items that encourage reflection. A beautiful pen. Gratitude cards. A soft blanket for quiet evenings.

    When you match the basket to her season of life, it becomes one of those Good Mothers Day Gifts she’ll actually use—not just admire.

    A Rest & Recharge basket isn’t about filling space.

    It’s about creating it.

    And when done right, it becomes more than one of many Cute Mothers Day Gifts on her table.

    It becomes permission to pause.

    The post How to Build a “Rest & Recharge” Mother’s Day Self Care Basket appeared first on Life Coach Hub.


    Source link

  • How to Divide One Small Closet Between Two People

    How to Divide One Small Closet Between Two People


    Are you all about style, decor and organization? Download a copy of our Decluttering Workbook.
    *****

    Sharing a small closet often feels frustrating, but the problem usually isn’t that two people are using the same space.

    The real issue is lack of clear boundaries.

    In many shared closets, space slowly shifts over time. One person adds a few extra hangers to the rod. Another stack of sweaters appears on a shelf. Shoes migrate to the floor. Gradually, one side expands while the other person feels squeezed.

    Without a defined system, the closet becomes a quiet competition for space.

    A well-divided closet prevents this tension by establishing clear zones and balanced storage. When each person knows exactly where their clothing belongs and how much space they have, the closet feels fair and functional.

    The goal isn’t to create rigid rules. It’s to design a layout that distributes storage logically so both people can use the closet comfortably.

    With a simple system of inventory, zone division, and storage parity, even a very small closet can support two wardrobes without feeling chaotic.

    Need some in depth help with organization and productivity ? Drop on by our directories choc full of productivity coachesminimalist coaches, and work/life balance coaches to get your life organized! Or click here to have us match you to the best.

    Start With a True Inventory for Both People

    Before dividing the closet, it’s important to understand what each person actually needs to store.

    Assumptions about wardrobe size often lead to uneven space distribution.

    Count hanging and folded items for each person: Begin by reviewing each wardrobe and counting the types of clothing that require hanging. Note how many long garments there are — such as dresses, coats, or long jackets — as well as shorter items like shirts and pants.

    Also consider folded items that may require shelf space.

    Knowing the number of pieces helps determine how much rod space and shelving each person realistically needs.

    This step creates a practical foundation for dividing the closet.

    Identify any special storage requirements: Some wardrobes include items that need additional consideration. Workwear might require wrinkle-free hanging space, while casual clothing might fit comfortably in double-hang sections. Accessories, sports gear, or seasonal outerwear may also require separate storage.

    Discuss these needs openly before planning the layout.

    The goal is not perfect equality but fairness based on actual clothing volume.

    When both people understand the true storage requirements, it becomes easier to design a system that feels balanced from the start.

    Apply the Equal Zone Method

    Once you know how much space each wardrobe requires, the next step is to establish clear visual boundaries inside the closet.

    Without boundaries, space naturally drifts.

    Divide the closet physically into two zones: The most common approach is a left-and-right split. One person receives the left side of the closet while the other uses the right. If the closet layout doesn’t allow this easily, you can divide the space front-to-back or top-to-bottom depending on the available structure.

    The key is creating a clear line where one person’s storage ends and the other begins.

    Installing separate rods or shelf dividers helps reinforce that boundary.

    Mirror the structure wherever possible: When the closet layout allows, create a similar setup on both sides. This might include double rods on each side for shorter garments, matching shelf heights, and similar bin zones.

    Symmetry makes the closet feel balanced.

    Even when wardrobes differ slightly, mirrored structures help maintain visual fairness and reduce the chance that one side gradually expands into the other.

    Clear zones turn a shared closet into two individual storage areas within the same space.

    Create Storage Parity (Not Identical Space, But Equal Value)

    Fairness in a shared closet doesn’t always mean giving each person the exact same layout.

    What matters more is equal usefulness.

    Adjust rod configurations based on garment length: One person might own more long garments such as dresses or coats, while the other has mostly shirts and shorter items. Instead of forcing identical rod arrangements, adapt the layout to suit each wardrobe.

    One side might include a tall hanging section, while the other uses two stacked rods.

    Both sides can still offer comparable storage capacity even if the structures differ slightly.

    Equalize shelf and bin access: Shelving and bins should also feel balanced. Each person should have access to a similar number of storage bins and shelf areas so accessories, folded items, and smaller clothing pieces can be stored easily.

    Clear labeling helps maintain this balance.

    When both wardrobes receive equivalent functional space, the closet feels fair even if the layouts aren’t identical.

    This concept of storage parity helps prevent resentment while still allowing flexibility.

    Define Shared Zones Clearly

    Not every area of the closet needs to belong to one person.

    Certain sections can function as shared storage if they’re clearly defined.

    Assign a neutral top shelf for shared items: The highest shelf in the closet often works well as a communal zone. This space can store seasonal items, shared luggage, or off-season clothing that neither person uses regularly.

    Using labeled bins keeps these items organized and prevents them from spilling into personal zones.

    Shared storage should be purposeful, not accidental.

    Create a shared floor area if necessary: The floor of the closet can also serve as a communal space when organized properly. A single shoe tray can divide footwear neatly, or separate hampers can be placed side by side for laundry.

    The key is keeping the floor structured rather than cluttered.

    When shared areas are intentional and clearly defined, they function smoothly without causing confusion or overlap.

    Reinforce Boundaries With Visual Cues

    Even with well-defined zones, visual cues can help maintain the division between wardrobes.

    These cues reduce the chance that clothing slowly migrates across the closet.

    Use different hanger colors for each person: Assigning one hanger color to each person creates an immediate visual distinction. For example, one side might use black hangers while the other uses white or gray.

    This simple difference makes it easy to see if clothing drifts to the wrong side.

    It also creates visual clarity when scanning the closet.

    Label shelves or storage bins subtly: Adding small name labels to bins or shelf sections helps reinforce boundaries without making the closet feel overly rigid.

    These labels act as gentle reminders of where items belong.

    Over time, these visual cues help both people maintain the structure naturally.

    The closet begins to function like two organized systems sharing one space.

    Maintain the Closet With a Weekly Micro Reset

    Even the best system can drift if it’s never maintained.

    A short weekly reset prevents small issues from turning into major clutter problems.

    Return misplaced items to the correct side: Spend a few minutes each week scanning the closet and returning any garments that migrated across the boundary.

    Rehang items that may have been placed temporarily in the wrong section.

    This keeps zones clear.

    Rotate seasonal clothing and tidy shelves: As seasons change, redistribute coats, sweaters, or lighter clothing so the closet remains balanced. Straightening shelves and aligning bins also helps maintain the visual structure.

    These small adjustments take only a few minutes.

    But they prevent the slow creep that often leads to frustration in shared closets.

    Consistent maintenance keeps the system working smoothly.

    How to Divide a Very Narrow Closet

    Some closets are too narrow for a traditional left-and-right split.

    In these cases, a vertical layout can work better.

    Divide the closet top-to-bottom: One person may use the upper rod and shelf while the other uses a lower double-rod section. This arrangement works well when vertical height is available.

    Keep the floor clear for better flow: Narrow closets feel cramped when the floor fills with storage items. Keeping the floor mostly open preserves walking space and makes the closet easier to use.

    Vertical organization allows narrow closets to function effectively for two people.

    When One Person Truly Needs More Space

    Sometimes one wardrobe simply requires more room than the other.

    In these cases, fairness may involve adjusting storage beyond the closet.

    Negotiate based on actual clothing volume: If one person has significantly more items, consider redistributing some storage to dressers, wardrobes, or under-bed containers elsewhere in the room.

    Reevaluate the arrangement seasonally: Clothing needs change throughout the year. Revisiting the closet layout occasionally ensures both people continue to feel comfortable with the system.

    Shared storage works best when it evolves with changing needs.

    When a small closet is divided clearly and thoughtfully, it stops feeling like a source of tension.

    Instead, it becomes a space where both people know exactly where their clothing belongs.

    Boundaries are clear.
    Storage feels fair.
    And the closet finally works for two people instead of against them.

    Are you all about style, decor and organization? Download a copy of our Decluttering Workbook.
    *****

    Need some in depth help with organization and productivity ? Drop on by our directories choc full of productivity coachesminimalist coaches, and work/life balance coaches to get your life organized! Or click here to have us match you to the best.

    The post How to Divide One Small Closet Between Two People appeared first on Life Coach Hub.


    Source link

  • Very Small Closet Ideas That Don’t Require Renovation

    Very Small Closet Ideas That Don’t Require Renovation


    4 Christmas Living Room Styles That Reveal Your Holiday Personality

    Are you all about style, decor and organization? Download a copy of our Decluttering Workbook. **** Your living room already knows your holiday personality; it shows up in the textures […]


    Read More


    Source link