10 Crazy Simple DIY Christmas Décor Ideas That Look Luxe
Creating a beautiful Christmas home doesn’t have to be expensive, overwhelming, or time-consuming. With a few clever techniques and simple materials, you can achieve a high-end, designer look without spending […]
Not to mention, that crafting is therapeutic. So, if you want to combine therapy with making extra money, try one of these best selling crafts.
Where Can I Sell My Crafts?
Today, we are in the midst of a technological revolution in which everything – and we mean everything – can be discovered online.
It has never been easier to start selling handmade items online! Plus, there are so many crafts to make and sell online for money.
You can start selling your products and at home crafts in a variety of methods, such as at market stalls of craft fairs and flea markets or you can sell online digitally.
You may sell your DIY crafts on Depop, Ebay, and Etsy, among other places. –> Check out this list of the best things to sell on Etsy.
Starting your own Etsy shop is easy and it is probably the #1 place to sell crafts online.
The latter option is a platform designed exclusively for small enterprises that is exceptionally easy to use for selling your own manufactured goods.
When your item sells, these websites often charge a fee, which is usually around 10% of the item’s value.
Alternatively, the website may charge listing fees. If you don’t want to pay the fees involved with these platforms, you can always sell your products on social media platforms like Facebook and Instagram.
Finally, you can sell your things at craft fairs and other similar events by setting up a stall or exhibit with your creations.
You can then sell them to people who come to the craft fairs events. Any of the crafty ideas below would sell well.
More reading:
Paper Crafts
Get busy crafting with some pieces of paper, whether they are plain or colored. Grab some glue, glitter, and more to create beautiful pieces! Paper products are quick crafts to sell.
One of the crafts that sell best is anything related to these paper items.
1. Custom Greeting Cards
Designing personalized cards is a great way to express yourself. These cards can be customized in any way you like! Plus, you can make some money selling this craft!
2. Embroidered Cards
Embroidered cards are one of the most simple crafts to produce. Print some photos and letters, cut them out, then stitch them together with thread for quick, easy results.
3. Paper Lanterns
These lanterns are simple to produce and sell, and they make ideal wedding or party decorations.
4. Origami Garlands
Origami garlands are a simple and enjoyable craft that everyone can do. Making origami garlands does not require any special expertise. This is one of the easier craft ideas as well.
5. Paper Flowers
The wonderful thing about this project is how adaptable it is! You can make a lot of different flowers. And these sell online easily since there are many uses for them.
6. Home Binder Labels
Making printable pages for a home binder is a terrific method to make something simple that you can distribute.
7. Pantry Labels
Making these labels is a creative and interesting project that will come in handy for all of us! They are useful for keeping any pantry organized..
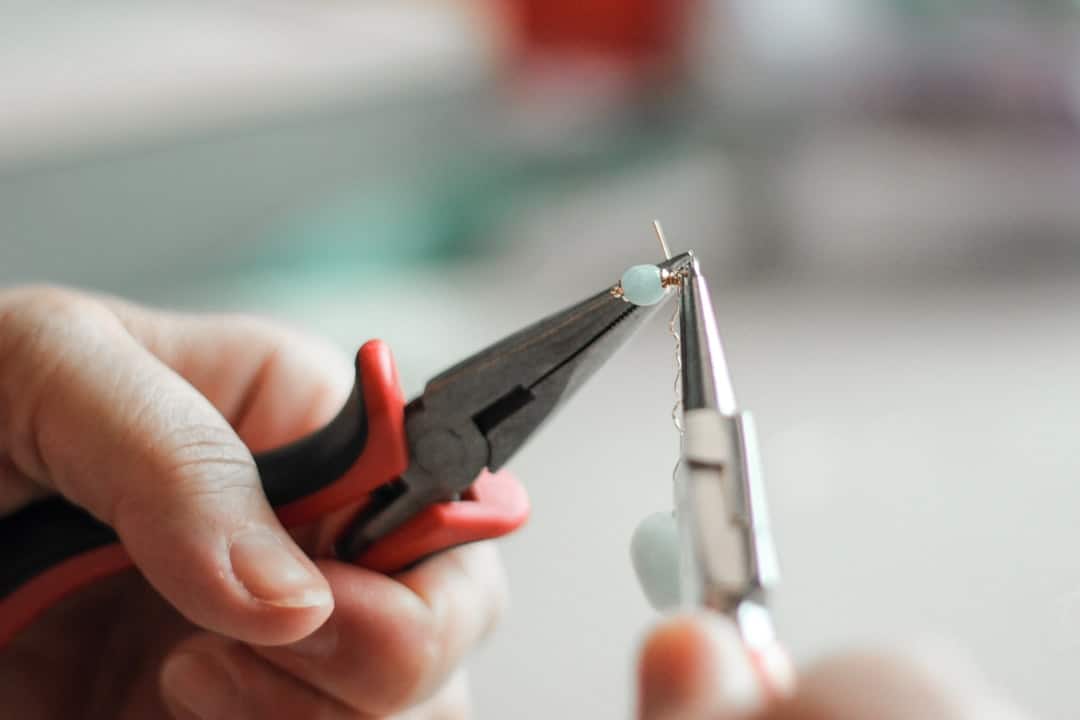
Beaded Best Selling Crafts and JEwelry
Jewelry is a popular craft to make and sell
It’s time to get beady busy with these fantastic, fun beaded crafts you can sell. Bead crafts are one of the crafts that sell best because jewelry is such a popular item.
If you are looking for the best selling handmade items, jewelry is on the list of profitable craft ideas for sure.
When it comes to DIY stuff to sell, anything that can be made into jewelry is a hot item. You can create jewelry with beads, resin, or polymer.
8. Necklaces
This is a classic piece of jewelry that may be made with craft store beads.
9. Earrings
Earring findings, beads, and glue are all you’ll need for this craft project. These projects are ideal for beginners because they need relatively little time to complete.
10. Bracelets
This bracelet is similarly simple to make as the bead necklace. Any type of jewelry makes for trending crafts to sell.
11. Headbands
Another popular head adornment that you can manufacture yourself is this one. Only a thread, beads, and a needle are required.
You can also of course make headbands from simple fabrics, which makes it one of the profitable crafts in this list.
12. Hair Pins
This is a simple and enjoyable handmade hair item to make. It’s really a great project for beginners because no sewing knowledge is required.
13. Flower Pins
This is a sweet flower pin that will add some sparkle to your attire. Flowers, a button, and a few beads are all you’ll need.
14. Key Chains
This is a simple and quick way to dress up your keys. A keychain, a hole punch, and a choice of beads and charms are all you’ll need.
15. Clutch Bag
If you enjoy carrying clutches, you might think about crafting your own. This is an excellent craft for fashion-conscious ladies.
Clay Crafts to Sell
Pottery is a beautiful craft to make and sell
Clay is so fun to work with, and can create some beautiful pieces. Prepare to get messy! It is an excellent craft fair idea and a popular handmade item to sell.
When it comes to handmade crafts to sell, clay items do require some skill and time but creating pottery can be therapeutic!
But, these are some of the more profitable crafts to sell because you can sell at a much higher price point.
16. Pottery
Another craft that allows you to make magnificent works of art is this one. Clay pots can be used for a variety of purposes.
Pottery is one of the crafts that sell best, it combines functionality with something artistic.
17. Clay Jewelry
This is one of the most adaptable crafts out there. Clay allows you to personalize your creations while still being quite simple to work with.
18. Sculptures
This is yet another intriguing craft idea that allows you to be creative. You can make whatever kind of figure you want using clay sculpture.
19. Clay Doll
This is an age-old craft. The fun part about making your own doll is that you can customize her appearance.
Wooden Crafts
Wood you believe us if we told you that anyone can make these crafts, no matter how creative they are?
Some of these craft ideas require more advanced knowledge than others, but take a woodworking class and get started selling these crafts!
Plus, due to the time-intensive nature of wood crafting, you can sell your pieces for a lot more than the average craft.
Plus, it is one of the popular things to make and sell both online and at arts and crafts fairs. People are always looking for home decor items.
You can even add a shimmer to your wood items because lacquers and finishes are one thing mica powder can be mixed with.
20. Wooden Boxes
Depending on what the buyer requests, these boxes can be easily customized. There is also a trend in laser engraved wooden products like boxes or cutting boards. You will need a laser engraving tool in order to do this.
21. Bookshelf
Constructing bookshelves out of wood is a fun and profitable hobby that can be done at home.
22. Chairs
Building wooden chairs is a peaceful pastime that dates back hundreds of years, as well as a high-end craft item that you may produce and distribute.
It is a lot harder to make furniture obviously, but it is one of the best selling wood crafts.
23. Chess Table
Crafting chess sets out of wood is a fun activity that both kids and adults can enjoy, and it’s a terrific craft product to sell.
24. Wooden Toys
When looking for something useful to sell, wooden toys are always a good option.
25. Toy Blocks
Making wooden blocks is a common and enjoyable hobby among crafters.
26. Toy Box
Making toy boxes out of wood is a terrific way to make some additional money, and children will appreciate it.
27. Puzzle Game
A handcrafted wooden puzzle is a keepsake item to sell because it can be individualized if given as a present.
28. Tabletop Games
Playing tabletop games is a pleasant hobby that everyone can enjoy. Did you know you can actually make your own?
29. Tic Tac Toe Board
Constructing a tic-tac-toe board is a fun activity that you can do with your children to teach them how to play this popular game.
30. Wooden Keychains
Making wooden keychains is a fun hobby that anyone can enjoy and use later. It is an excellent craft to sell since keychains are something everyone needs.
Sewing Crafts
Whether you own a sewing machine, or all you have is a simple needle and thread, you can earn money from home with a sewing craft side hustle.
Since this craft is another one that combines home-made art with something you can use everyday, it is one of the best selling crafts. You will need some basic sewing skills however.
31. Patchwork Quilt
Sewn patchwork quilts are one of the most fun craft ideas that you can both produce and sell.
32. Pillow Covers
Sewn pillow covers are a fast and easy craft that can also be sold. You also could design pillow coverings out of old fabric trimmings.
33. Baby Quilt
This baby quilt is a nice project that can earn you income. It’s a simple job that can be completed in a few hours. Just sew together different fabric patches for a beautiful blanket.
Baby quilts are one of the best selling craft ideas since it is ideal for baby showers.
34. Tote Bag
A terrific craft to make and sell is a cloth tote bag. You may easily discover patterns online and then make your own by following the directions.
35. Face Masks
Face masks are a simple and entertaining craft to produce and distribute, primarily in context of the present pandemic, when they became a need in daily life.
36. Reusable Sandwich Bags
These items are not only ecologically beneficial which is a trending purchasing factor, but also cost-effective.
37. Pincushion
A felt pincushion is a fun project that doubles as a functional tool and a unique present idea.
38. Table Coasters
Fabric coasters are simple to construct and can be tailored to any design or color palette.
39. Toy Plushies
Creating soft plushies out of recycled waste fabric is a simple craft that can be made with only a few materials.
Yarn Crafts
Knitting is an ideal money-making craft
Knitting is way more fun than you would think! This is such a great way to pass the time, while creating some beautiful pieces. Plus, you can sell what you make!
40. Hat
Knitted hats are a easier project that allows you to express yourself.
41. Scarf
Knitting scarves is a popular hobby that takes some practice to master, but once you do, you’ll discover it’s much easier than it sounds. When it comes to craft ideas for selling, this one is pretty easy to sell.
42. Socks
Knitting socks is a simple skill that anybody can learn, and it’s a terrific method of keeping warm in the colder months.
43. Mittens
Knitted mittens are a fun hobby that makes a great present for the holidays.
44. Beanie Hat
Beanie knits are a good project that may also be worn as a hat. They’re appropriate for both summer and winter.
45. Fingerless Gloves
Knitted fingerless gloves are a fun project that may also be used as a scarf in the winter.
46. Boot Cuffs
Knitted boot cuffs are a wonderful project to do on a chilly day.
47. Baby Cardigan
Knitted baby cardigans are a great item to offer because they are always in demand from new parents.
48. Sweater
Knitting sweaters is a simple and enjoyable activity that may be transformed into whatever style you wish.
Crochet Crafts
Crocheting is, yet, another great way to pass the time while staying creative and potentially making money from selling your craft products.
Have you seen the Sookie and Ivy pictures and videos? This woman makes crochet hats for her dogs and takes videos, they are SO fun and her website has some crochet tutorials that are helpful. You can watch the videos on their Facebook page.
49. Hat
Crocheting beanie hats is a relaxing hobby that will keep you toasty in the winter.
50. Scarf
Crocheting scarves is a simple activity that requires little experience.
51. Mittens
Crocheting mittens is a wonderful way to keep your hands warm in the winter.
52. Fingerless Gloves
Crocheting fingerless gloves is a fun project that will keep you toasty this winter.
53. Sweater
You can get creative crocheting sweaters that come in a variety of designs, patterns, and dimensions.
54. Throw Blanket
Crochet throw blankets are quite popular and never go out of style. Everyone requires a cozy blanket!
55. Doll Clothes
Making some wacky doll outfits is a fun hobby that allows kids to be creative while playing.
56. Slippers
Crocheting slippers is a delightful project that keeps feet warm while somehow giving them a comfortable aesthetic that many people would want to give as a present.
57. Stuffed Animals
Crocheting adorable, cuddly plush creatures is a relaxing hobby that allows you to be inventive.
58. Booties
Crocheting tiny little booties is a wonderful way to keep your baby’s feet toasty while they slumber.
59. Tote Bags
Create your very own crocheted tote bags for the ultimate fashion statement.
Cricut Crafts
Do you have a cricut machine at home? Well, it’s time to dust it off and get started on some fun, creative projects that you can make and sell.
There has been a recent trend in cricut when it comes to at home crafts to sell as well.
60. Mugs
Making some customized mugs is a fun craft that makes more money than you might think.
61. Notebooks
Creating notebooks is a fascinating activity for students who need to keep track of their writings.
62. Mouse Pads
Mouse pads are a simple and enjoyable project that can be done anytime and are really handy.
63. Bags
Producing bags is a cool idea that results in a one-of-a-kind bag for any purpose.
64. Backpacks
Designing backpacks is a fun project that allows you to express oneself creatively.
65. T-Shirts
If you have a cricut machine, making personalized shirts is a fun project that requires very little talent.
66. Hats
Making hats is a great hobby that you can tailor to any event or individual.
67. Glitter Tumblers
These glittery, glistening tumblers are great for any party or fun occasion and an easy craft you can make and sell.
Hand Painted Crafts To Make And Sell
Decor crafts are profitable crafts to sell. There are a lot of home decor crafts you can make an dpaint.
And, painting is such a therapeutic activity, no matter how old you are. Pass the time with these fun painting activities combined with things to make and sell.
68. Plant Pots
The pot and some paint in various colors are the only items needed for this incredibly simple craft.
69. Tote Bag
Most retailers carry generic tote bags for a reasonable price, and you can customize them using fabric paint.
70. Hand Painted Rocks
To make some creative paintings on rocks, all you require is some rocks and acrylic paints, which you can then market for cash.
Crafts For The Holiday Season
No matter what time of year it is, it is never too early to start preparing for the Christmas holiday period. Ho, ho, ho!
Christmas arts and crafts can be some of the best selling handmade items.
71. Homemade Christmas Cards
Creating cards is a fun activity that allows you to bring joy to friends and relatives during the Christmas holidays. Plus, you can make extras and sell them for Christmas cash.
72. Ornaments
Making Christmas ornaments is a nice crafting project that not only earns you money, but also allows you to share your enjoyment of the season with everyone.
73. Wreaths
Building wreaths is a fun holiday project that you can use to decorate your home.
74. Holiday Gifts
Making gifts is a fun activity that may keep you occupied all year, and there are many possibilities to choose from. Use your imagination!
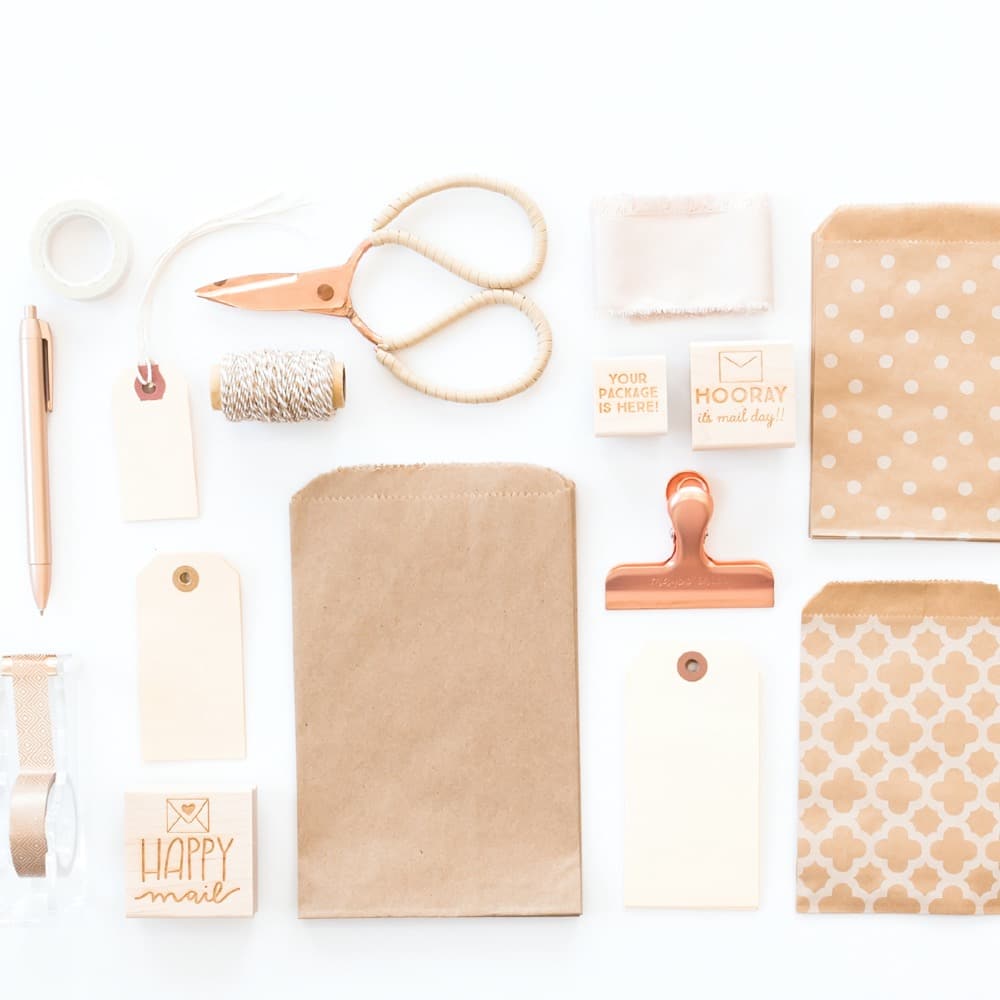
75. Gift Wrapping
Gift wrapping is a wonderful activity that teaches you about various types of paper and embellishments. While it is not a craft you can make and sell, you can make extra money wrapping gifts for people.
76. Decorations
Creating decorations is a fun pastime and a craft you can make and sell for parties and holidays. And home decor crafts are popular.
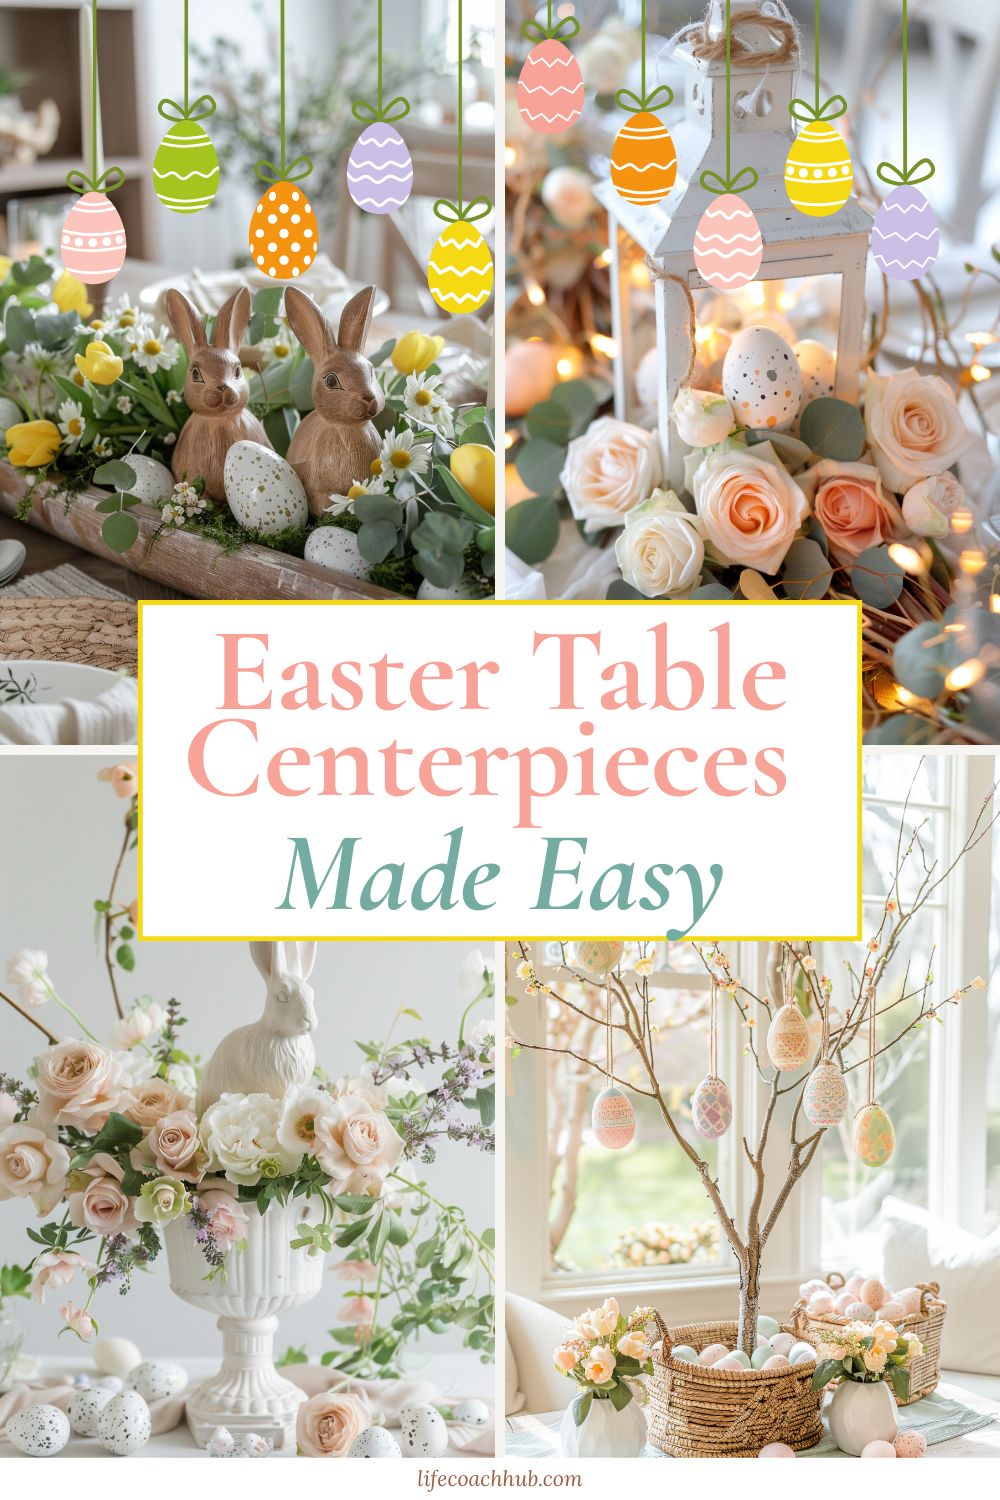
77. Table Centerpieces
Designing table centerpieces is a fun activity that allows you to express your creativity while also benefiting others in your household (or someone else’s).
78. Holiday Flowers
Generating flowers is an enjoyable task that allows you to express your artistic side. You can even arrange for it to be sent to your friends and family.
79. Cookies
Cookie baking is a simple activity that requires little to no kitchen knowledge. Simply combine the ingredients, bake, and then decorate.
80. Candles
Finally, creating candles is a pleasant pastime and craft that requires melting wax and adding smells to create a soothing environment at home during the holiday period.
Another popular craft to make and sell is anything related to Mason jars. They are super cute when painted and could be used for all kinds of things!
81. Painted Mason JArs for Decor
Painted mason jars are a super cute home decor item. I have several throughout my house with decorative fake flowers in them and I love them!
These are one of the profitable crafts in our list since buying a jar is cheap but you can resell them well. And, home decor crafts are in high demand!
83. Mason Jar Tissue Holders
You can create tissue holders from mason jars and sell them!
84. Mason Jar Storage Containers
Mason jars can be painted or decorated and used for just about anything. You can use them for items like cotton balls in your bathroom. Or, in your pantry for baking ingredients.
85. Mason Jar Salt & Pepper Shakers
Yes, you can even turn them into salt and pepper shakers. There are many uses for mason jars. You can start a whole craft business just from these.
Other Crafts to Make and Sell
If you want to sell crafts, the possibilities are endless! Here are some other money making ideas of DIY items to make and sell.
86. Candles
Candles never go out of style, or demand. They are easy to DIY and sell online. You can sell them at a craft fair or local flea market as well.
If you want to start your own craft business with something easy, candles are a good fit!
87. Monogrammed Items
This isn’t exactly a craft, but you can purchase your own monogramming machine and sell a ton of products with people’s initials on them.
Everything from baby clothes, to tote bags, to bachelorette gifts. Monogrammed items are in high demand and easy to sell in an Etsy shop or locally.
88. Laser Printed Items
To sell crafts that have been laser printed, you will need to purchase a machine that allows you to do this.
The xTool Laser Cutter is the perfect tool for this. You can engrave and place text on just about anything you want to sell. You can build an entire crafting business around it!
But, this is a recent trend in arts and crafts that people like to purchase. And monogramming fits well with this also.
89. Digital Download Designs
This is a different type of craft to make and sell. You can make a design, maybe for a note card for instance, by hand and then have a high quality scan made of it.
You can then sell that scan, as a digital download that people can use to print out themselves. The nice thing about this is you can sell it a million times because it is digital!
You can also create the design on your computer instead of by hand if you prefer. Planners are a very popular digital download right now.
90. Pet Crafts
The pet care business is a big one! People love spending money on their dogs and cats. You can make and sell all kinds of products.
Dog treats, dog blankets, and even leash holders for the wall. If you can sew, you can even make pet clothing. There are many DIY ideas you can apply to this industry to make money selling!
Bath, Beauty, and Wellness Crafts That Make Money
Bath and beauty products offer high profit margins because they use affordable materials and customers buy them regularly as gifts or personal care items.
These crafts work well for beginners and experienced makers alike.
Handmade Soaps and Bath Bombs
Handmade soap is one of the most profitable beauty crafts you can make at home. You can create bars for $2-3 each and sell them for $8-12.
Customers love natural soaps because they avoid harsh chemicals found in store-bought options.
Bath bombs are equally popular and cost even less to make. A single bath bomb uses about $1 in materials but sells for $5-8. You can add dried flowers, essential oils, or natural colorants to make yours stand out.
Both products let you get creative with scents, colors, and shapes. Holiday-themed bath products sell especially well during gift-giving seasons.
You can make large batches quickly once you learn the basic process. Many crafters report these items become their best sellers at craft fairs and online shops.
Lip Balm and Body Scrubs
Lip balm requires minimal supplies and produces high profit margins. You can make a tube for about $0.50 and sell it for $3-5. Customers often buy multiple flavors at once, which increases your sales per transaction.
Body scrubs are simple to make with ingredients like sugar, salt, and oils. Your material costs run around $2-3 per jar, and you can charge $10-15. These products appeal to people looking for spa-quality items at home.
Both crafts travel well and don’t break easily, making them perfect for shipping. You can create seasonal scents or target specific markets like beard balm for men.
Packaging matters with these products, so invest in clean labels and attractive containers to justify your prices.
Ways to Learn New Arts and Crafts
Some of these items on our list might be new to you. If you want to learn a new hobby or crafting technique that you can use to start a craft business, here are some ways to do that:
Local classes
You can often find local classes for some crafting techniques. Sometimes adult education classes at colleges that are for the general public will be available as well. A google search might help you find something.
Online Classes
You can definitely find tutorials and videos online to learn crafting. Here are some sites to look for courses:
Places to Sell Crafts
If you have started or are starting a craft business, you might be wondering where you can sell your at home crafts.
There are actually a ton of places online and in person where you can sell your crafts! Here are a few:
Calculate your material costs by tracking every item you use to make one product. Include packaging materials, labels, and tags in this number. Don’t forget small things like thread, glue, or paint that add up over time.
Factor in your time by deciding what you want to earn per hour. If a project takes two hours and you want $15 per hour, add $30 to your material costs. Many crafters underprice their work by forgetting to pay themselves.
Basic Pricing Formula:
Materials + Labor + Overhead = Cost
Cost × 2 = Wholesale Price
Wholesale Price × 2 = Retail Price
Add 10-15% to cover business expenses like website fees, marketing costs, and equipment. Research what similar items sell for in your market. You can charge more if your crafts use premium materials or unique techniques.
Test different price points to see what works. If items sell out quickly, your prices might be too low. If nothing sells after a month, consider adjusting your prices or improving your product photos and descriptions.
Most PRofitable Crafts to Sell
If you are starting your own craft business, profit is a very important thing to consider. You don’t want to spend hours of time on one item that doesn’t have a good profit margin.
DIY crafts are great because the potential for profit is high since you are doing everything yourself!
Try to figure out crafts that have low costs upfront for making them and also don’t require as much time for you to do them.
Both of these factors will increase your profit. So before you choose what arts and crafts to do for your craft business, research all the materials costs!
Final Thoughtson Money Making Crafts
Starting a craft business can be a great way to earn extra money while doing something you enjoy. The key is choosing crafts that people actually want to buy and that don’t cost too much to make.
You don’t need to be an expert to get started. Many successful craft sellers began as complete beginners who simply learned as they went along.
Remember these important points:
Start with one or two craft types instead of trying to make everything
Keep track of your material costs so you know your real profit
Take clear, well-lit photos of your work for online sales
Price your items fairly but don’t undervalue your time
Your first sales might take a while to happen. That’s normal and doesn’t mean you should give up.
The most profitable crafts are usually personalized items, seasonal decorations, or practical products people use every day. Think about what your friends and family already ask you to make for them.
You can sell at craft fairs, on websites like Etsy, or through social media. Many crafters use a mix of all three to reach more customers.
The best craft business for you is one that fits your skills, interests, and available time. Don’t pick something just because it’s trending if you won’t enjoy making it. Your enthusiasm shows in your work and helps attract buyers who appreciate handmade quality.
Figure out what your favorite craft is and get started today!
10 Christmas Table Decoration & Centerpiece Ideas Designers Swear By (Super Simple Settings to Copy)
Are you all about style, decor and organization? Download a copy of our Decluttering Workbook. **** Most people think Christmas table décor requires elaborate centerpieces, matching dish sets, and hours […]
Are you all about style, decor and organization? Download a copy of our Decluttering Workbook. ****
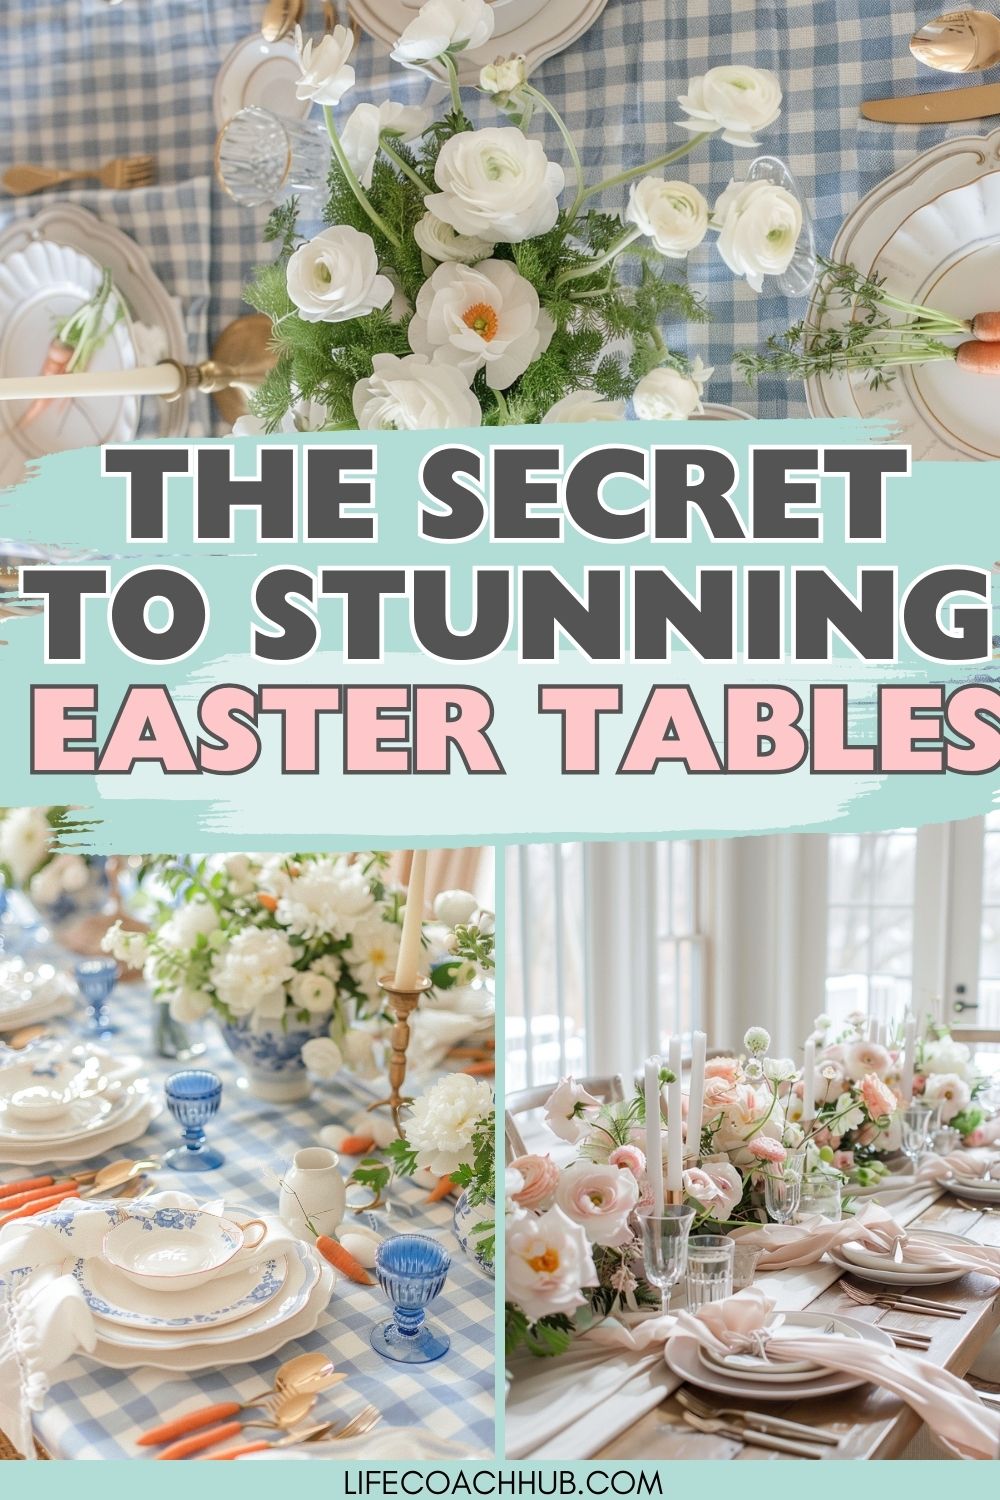
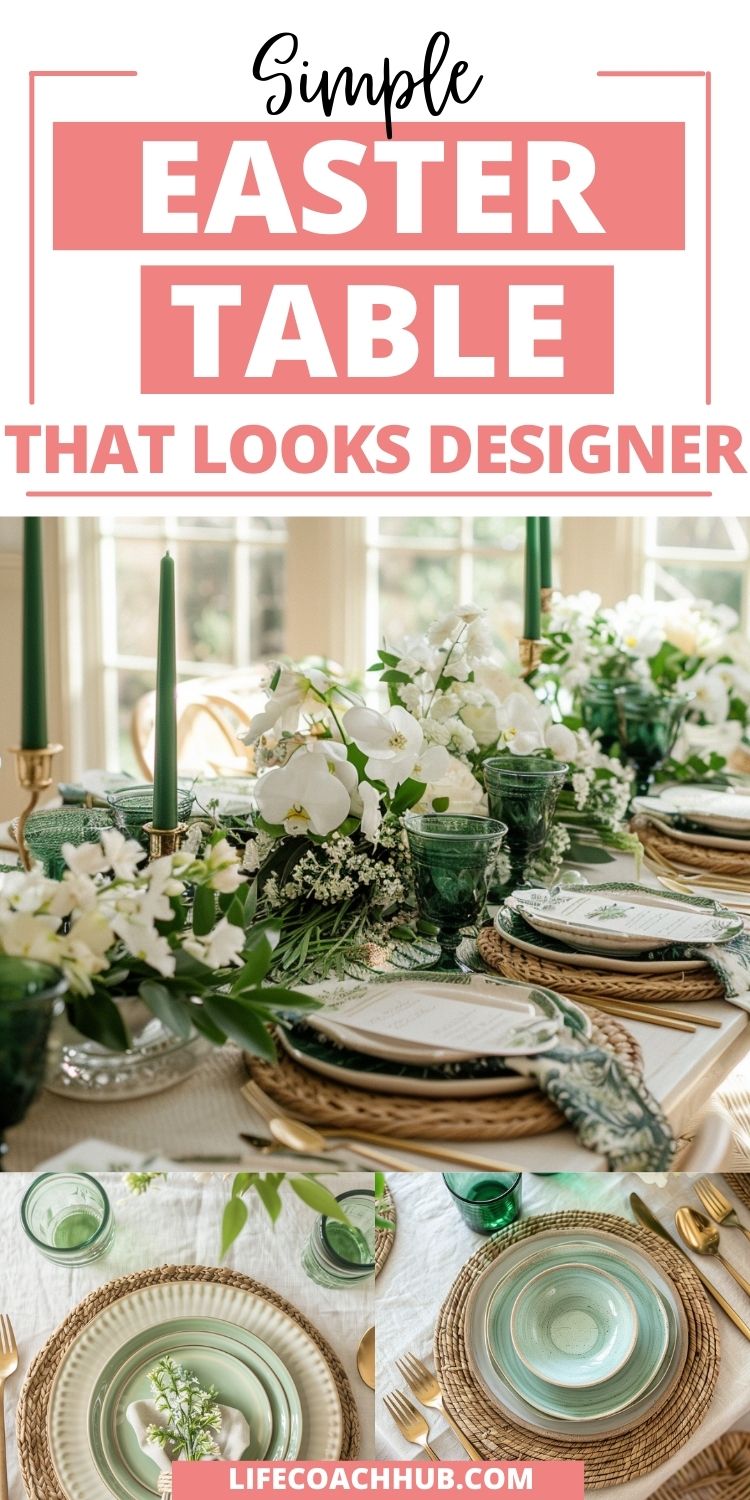
Easter table setting ideas can look high-end even when you are using everyday dishes. The secret is not expensive pieces; it is consistent layering and a few repeatable details.
A place setting is also the part guests interact with most. When it feels thoughtful, the whole table feels more special.
This guide walks you through simple, practical steps to build Easter place settings that look polished. Each section includes a clear “do this, then do that” approach you can follow.
7 Window Christmas Decor Ideas That Look Luxe With Almost No Effort
Are you all about style, decor and organization? Download a copy of our Decluttering Workbook. **** Bare windows can make a whole room feel unfinished, even if your tree looks […]
Are you all about style, decor and organization? Download a copy of our Decluttering Workbook. *****
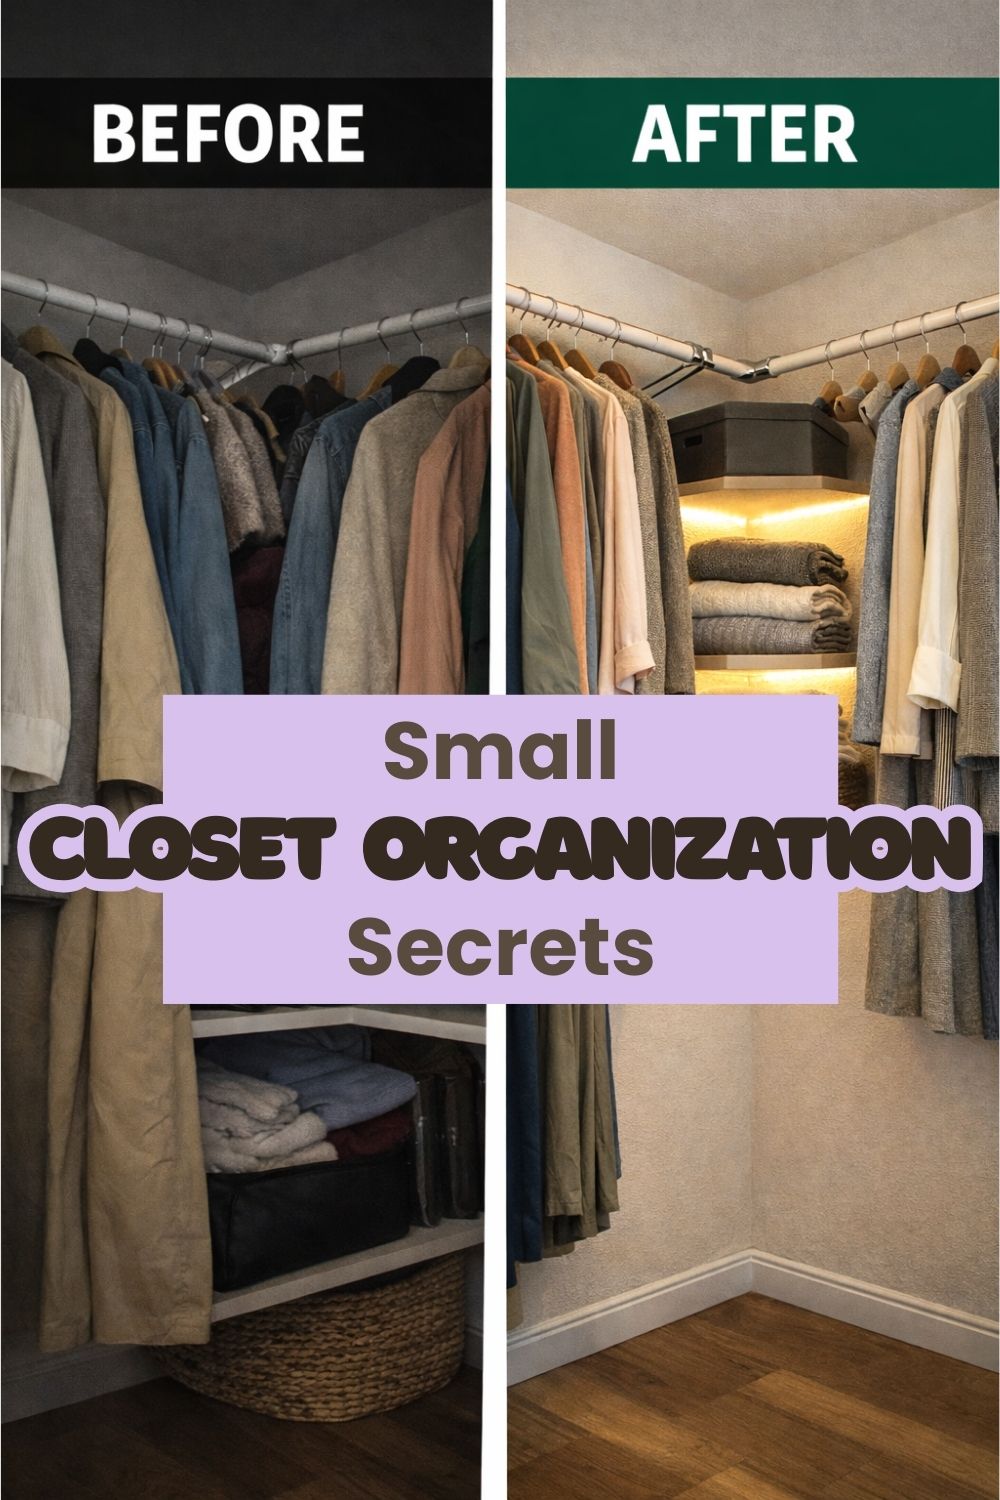
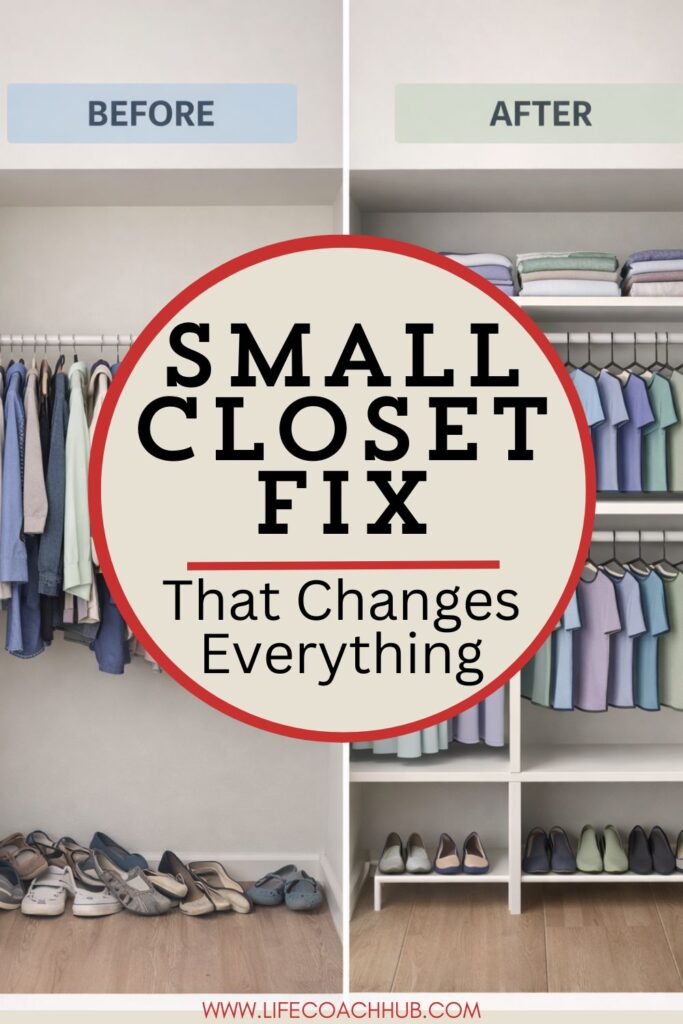
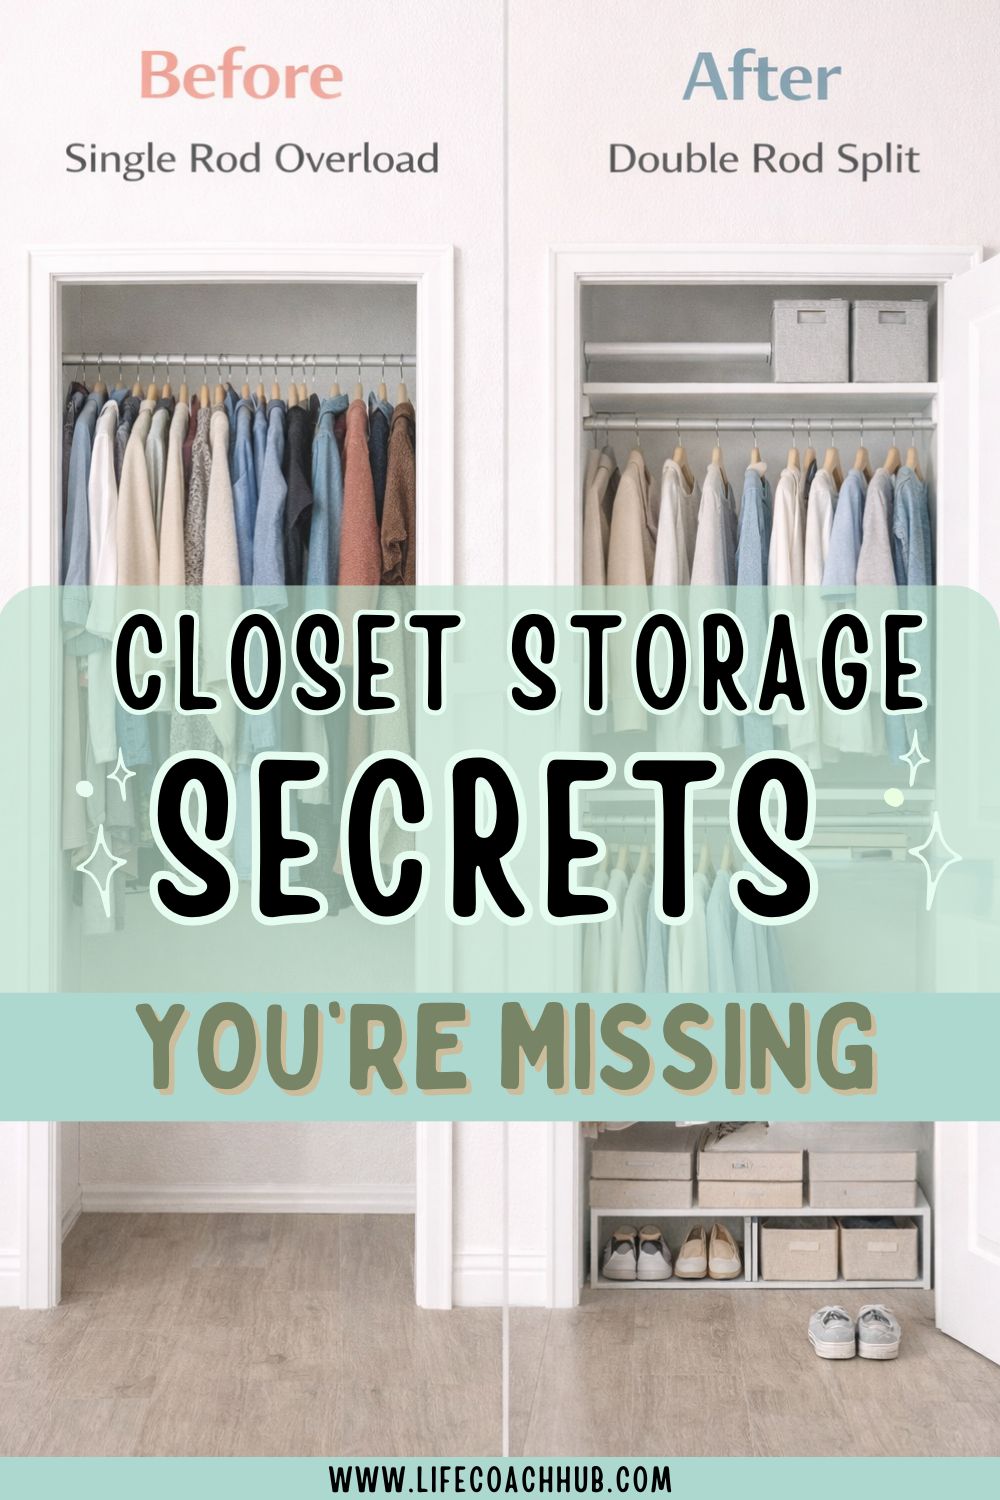
Adding a second hanging rod sounds like the fastest way to double your storage. But in a small closet, it can just as easily steal your fold space and create a cramped, overstuffed mess.
The key isn’t just installing two rods. It’s planning rod height and mapping your clothing categories before you move a single bracket. When you treat your closet like a layout puzzle instead of a dumping ground, you gain real capacity without sacrificing shelves.
Below is a step-by-step, how-to guide that walks you through measuring, planning, installing, and preserving fold space the right way.
Start by clearing everything out and grouping like with like.
Sort by clothing category: Separate long-hang items (dresses, coats), medium-hang (blouses, button-downs), short-hang (tees, kids clothing), and folded items (jeans, sweaters, lounge sets), and stack each category together so you can see volume at a glance.
Measure your closet height and current rod placement: Measure floor-to-ceiling height, floor-to-current-rod height, and shelf depth; write these numbers down so you can calculate realistic spacing instead of guessing.
When you physically see how many long pieces you truly own, you may realize you don’t need as much vertical hanging space as you thought. That insight is what protects your fold area later.
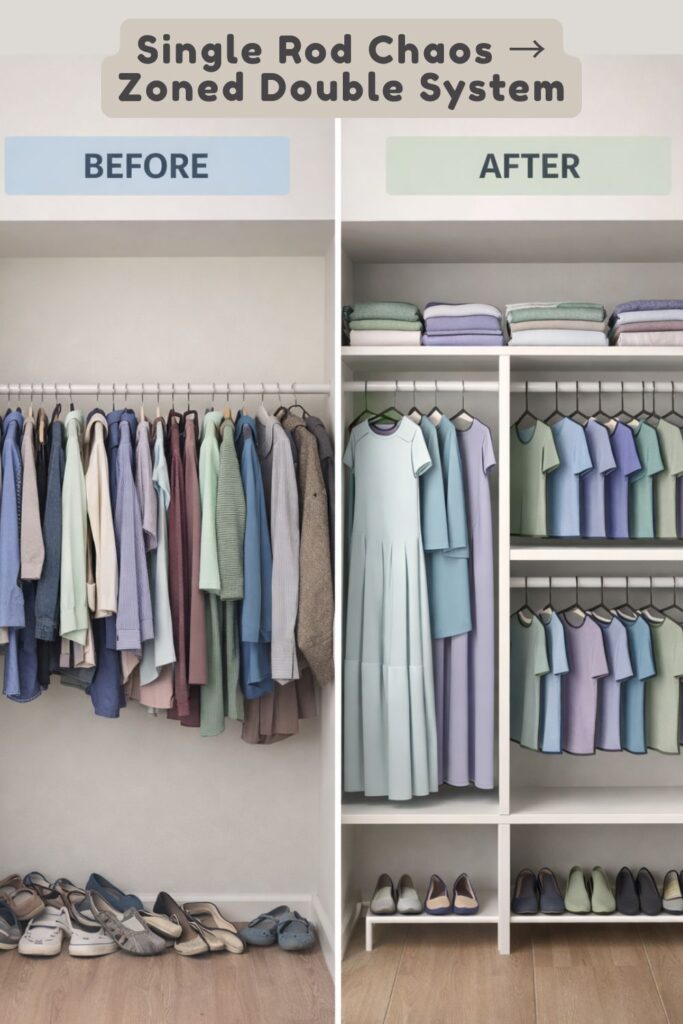
Step 2: Choose the Right Two-Rod Layout for Your Wardrobe
Not all double-rod systems are equal. The best layout depends entirely on your clothing mix.
There are two common configurations: full double hang or a combo section.
Decide between full double-hang or combo layout: If you own mostly tops and short garments, use two evenly spaced rods; if you own several dresses or coats, dedicate one tall section to long hang and use a second section for double rods.
Calculate rod spacing intentionally: For double short-hang, place the bottom rod about 40–42 inches from the floor and the top rod about 80–84 inches high; for long-hang sections, allow 60–65 inches of vertical clearance so garments don’t drag or wrinkle.
The goal is vertical efficiency. Two short-hang zones typically store nearly twice as much as one tall rod, but only if your clothing categories support it.
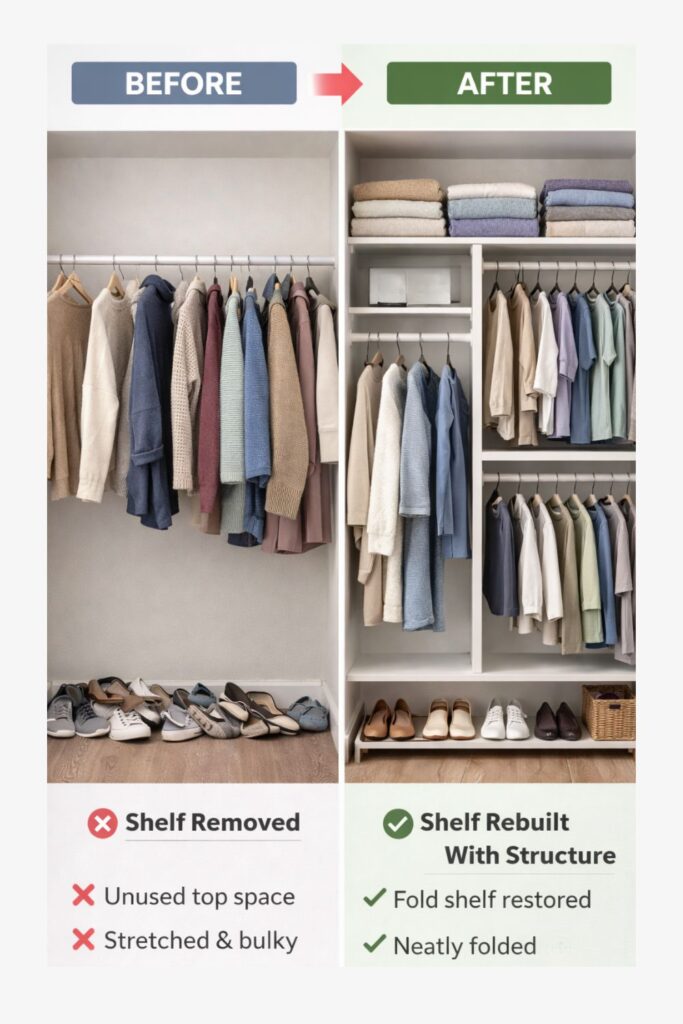
Step 3: Protect and Rebuild Your Fold Space
This is where most small closets go wrong. People remove shelves to make room for rods, then lose all structure for folded clothing.
Instead, preserve at least one dedicated fold zone.
Reserve a defined fold shelf area: Keep at least one shelf 8–12 inches tall for sweaters and denim, and avoid stacking higher than 10 inches to prevent toppling and visual clutter.
Use structured supports instead of tall piles: Add shelf dividers, slim bins, or low-profile baskets so folded stacks stay upright and separated rather than collapsing into each other.
A controlled fold zone keeps bulkier pieces from migrating onto rods where they stretch out and crowd lighter garments.
Step 4: Map Clothing Categories to Each Zone
Once your rods and shelves are placed, assign them purpose. Random placement recreates chaos even in a well-designed layout.
Think in terms of frequency and function.
Assign rods by daily use: Place everyday tops, uniforms, or work clothing on the lower rod for easy reach, and reserve the upper rod for seasonal items or less frequently worn pieces.
Designate shelves for bulk and structure: Store sweaters, jeans, and heavier fabrics on shelves; use lower bins for accessories, belts, or small bags so they don’t eat up hanging space.
When each area has a category identity, maintenance becomes easier because you’re returning items to a system, not just “putting things away.”
Small Adjustments That Make a Huge Difference
Once your layout is set, small upgrades can dramatically increase visual space and capacity without major renovation.
These refinements prevent your new system from slipping back into clutter.
Switch to slim, uniform hangers: Replace bulky plastic or mixed hangers with slim velvet or thin wood hangers to gain inches of rod space and create a consistent visual line.
Add vertical shoe or bin storage at floor level: Install a low-profile shoe rack or stackable clear bins under the bottom rod so floor space becomes usable storage instead of a dumping zone.
Uniformity reduces visual noise. Even in a packed closet, matching elements make the space feel intentional rather than overwhelmed.
How to Maintain a Two-Rod Closet Long Term
A smart layout works only if it stays mapped. Without maintenance habits, even the best configuration fills up quickly.
Think of this as protecting your effort.
Adopt a category check every season: At the start of each season, review each rod section and remove items that no longer fit, are rarely worn, or duplicate similar pieces.
Limit vertical stacking creep: If folded stacks exceed 10 inches or begin leaning, remove or relocate pieces immediately instead of compressing them into the pile.
Two rods don’t automatically create order. Category discipline does.
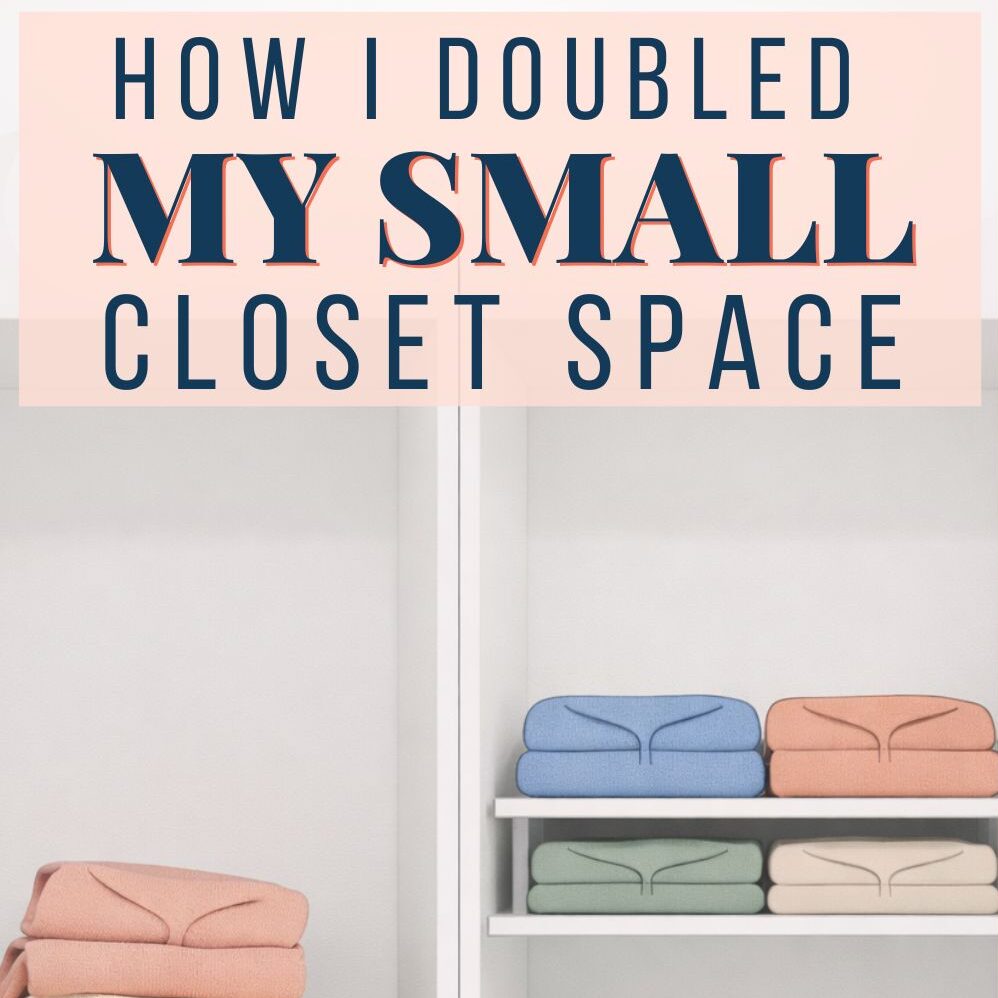
When planned correctly, a two-rod system doesn’t steal fold space. It reveals unused vertical capacity while keeping structure where you need it most.
The secret isn’t adding more hardware. It’s designing your closet around what you actually wear.
Are you all about style, decor and organization? Download a copy of our Decluttering Workbook. *****
Are you all about style, decor and organization? Download a copy of our Decluttering Workbook. *****
A very small closet doesn’t fail because it’s tiny. It fails because everything inside it is competing for the same few inches of space.
Shoes slide under dresses. Sweaters stack too high. Bags hang wherever they fit. Before long, the closet feels stuffed even when it’s technically not full.
Before assigning zones, you need to understand the exact space you’re working with. Even small differences in height and depth will determine what each zone can handle.
Start by emptying the closet completely so you can see the raw structure.
Measure your full interior space: Record the total height, width, and depth of the closet, including rod height, shelf spacing, and floor clearance so you can design zones that fit realistically.
Sort your clothing by type before returning anything: Group long-hang items, short-hang items, folded pieces, shoes, and accessories separately so you can visually match categories to zones instead of forcing them in randomly.
Once you see both your measurements and your clothing volume, the zone assignments become obvious instead of overwhelming.
Divide hanging space by garment length: Create a long-hang section for dresses and coats, and if possible, add a double-rod section for shirts and shorter items so you use vertical height instead of wasting it.
Place daily-use items at eye level: Keep the most frequently worn clothing on the lower rod or center area so you’re not reaching overhead or digging behind longer pieces every morning.
Shelves are often where small closets spiral out of control. Stacks get taller. Piles collapse. Categories mix together.
The Shelf Zone needs structure.
Limit fold stacks to manageable heights: Keep folded clothing stacks under 10 inches tall so they stay upright and visible instead of turning into unstable towers.
Create mini-subzones using dividers or bins: Separate sweaters, denim, workout wear, and small bags into distinct sections so categories don’t blur together over time.
A controlled Shelf Zone protects bulkier items from creeping onto rods where they stretch and crowd lighter garments.
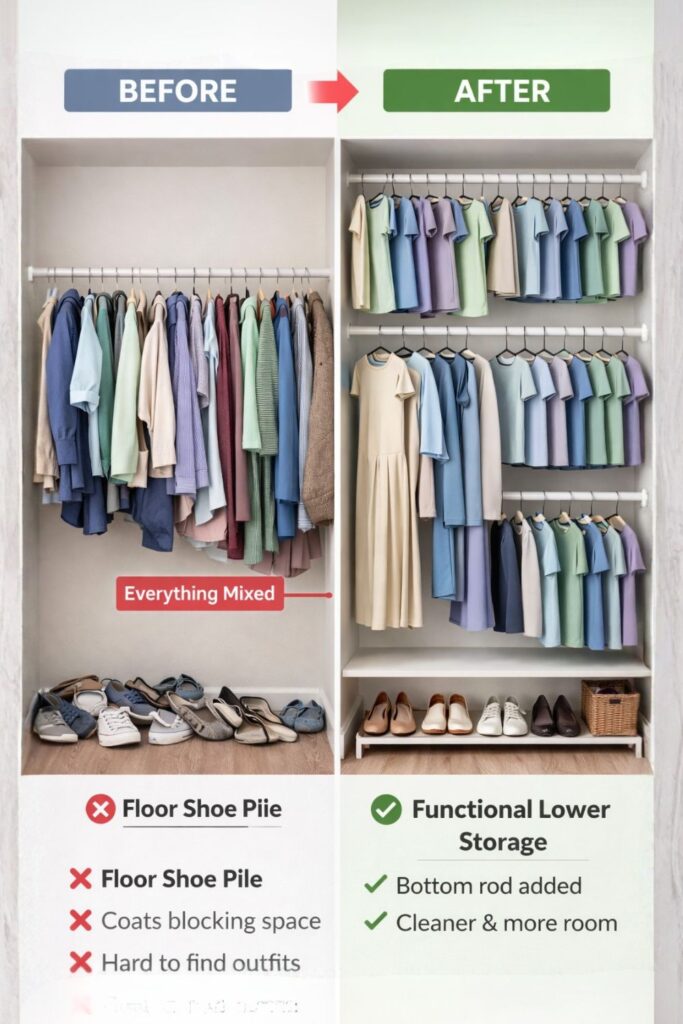
Step 4: Activate the Floor Zone (Without Creating a Pile)
Install a low-profile shoe rack or tiered stand: Elevate shoes off the ground so pairs stay visible and organized rather than stacking unevenly.
Use clear, stackable bins for seasonal or rarely used items: Store off-season accessories or special-occasion pieces in contained boxes so nothing sits loose on the floor.
The rule is simple: nothing directly touches the closet floor unless it has a designated container or rack.
Step 5: Maximize the Door Zone
The back of the closet door is often ignored, but it’s one of the most powerful vertical zones in a tiny space.
Think of it as bonus storage.
Install over-the-door organizers or hooks: Use hanging organizers for accessories, belts, scarves, or smaller items that don’t need deep shelving.
Keep this zone for lightweight, frequently accessed items: Assign jewelry, hats, or daily-use extras here so they don’t crowd shelf or rod space.
How to Assign Clothing Categories to the Right Zone
Now that your zones exist, the next step is mapping items intentionally so they stay organized long term.
Without clear category placement, even defined zones can get overloaded.
Match bulk to shelves and length to rods: Store bulky sweaters and denim on shelves, long garments on tall rod sections, and shorter daily tops in double-hang areas to maximize efficiency.
Give each item one permanent home: Avoid allowing items to float between zones; if something doesn’t clearly belong in a zone, reconsider whether it should remain in the closet at all.
The “one zone per item” rule prevents drift and eliminates the daily reshuffling that causes clutter fatigue.
How to Maintain the Zone Method in 10 Minutes a Month
A layout works only if it’s maintained. Fortunately, the Zone Method makes upkeep simple because you’re reviewing sections, not individual pieces.
Set aside a short reset time each month.
Check each zone for overflow: Scan hanging rods for crowding, shelves for leaning stacks, and floor areas for loose items so you can correct small issues before they grow.
Remove items that no longer fit a zone: If an item consistently disrupts a zone’s structure, edit it out rather than forcing it back into the system.
Are you all about style, decor and organization? Download a copy of our Decluttering Workbook. *****
Corner closets look spacious on paper — but in real life, they often feel awkward and underused. Straight rods collide, deep back corners swallow items, and shelves either block access or leave empty triangular gaps.
The issue isn’t the square footage. It’s that most storage systems are designed for flat walls, not angled corners.
When you adjust rods and shelves to follow the shape of the space, a corner closet becomes surprisingly efficient. Below is a step-by-step guide to organizing a small corner closet without letting dead space take over.
Step 1: Measure the Corner Geometry Before Installing Anything
Corner closets require precision. If you skip measuring, rods and shelves can overlap or block each other.
Start by mapping the shape from above.
Measure both adjoining walls and the corner depth: Record the length of each wall that meets at the corner and the distance from the doorway to the back point so you understand how much usable hanging and shelving space exists.
Mark door clearance and walking space: Open the door fully and note where it swings so new rods or shelves don’t interfere with access or create tight pinch points.
A clear overhead plan prevents rods from colliding and ensures you’re building with the angle — not against it.
Step 2: Replace Straight Rods with Angled Hanging Rods
Traditional straight rods often stop short of the corner or create overlapping hangers. Angled rods solve that problem by following the geometry of the space.
This is one of the most impactful layout upgrades.
Install a 45-degree corner rod connector: Use a corner bracket or angled rod adapter that allows two rods to meet cleanly without crowding hangers into a tight cluster.
Run rods along both walls into the corner evenly: Keep spacing consistent so hangers glide smoothly across the angle rather than bunching up where the rods connect.
When rods align with the corner instead of fighting it, you unlock usable inches that were previously wasted.
Step 3: Add Triangular or Corner Shelves Instead of Deep Rectangles
Deep rectangular shelves in corners create hidden black holes. Items pushed to the back become invisible and forgotten.
Install triangular or angled corner shelves: Cut custom triangular wood shelves or use stackable corner units that fit snugly into the angle without extending too far into the walkway.
Keep shelf depth shallow for visibility: Limit depth so folded clothing or bags remain visible from the front rather than disappearing into shadow.
The goal is reachability. If you can’t see it easily, the space isn’t working.
Step 4: Layer Storage Vertically Within the Corner
Once rods and shelves align with the corner, vertical layering maximizes capacity without crowding.
Think up instead of outward.
Add a second rod for short garments: Install double-hang rods along one wall so shirts and blouses use vertical space efficiently while longer items stay on the opposite wall.
Stack corner shelves vertically instead of deepening them: Place two or three shallow triangular shelves above each other rather than one oversized unit that blocks access.
Install motion-activated LED strip lighting along the rods: Position lights where they illuminate the angled rod connection and corner shelves directly.
Use bright, neutral light tones: Choose daylight-style bulbs that eliminate shadows so items in the back corner remain clearly visible.
Lighting ensures your newly activated corner doesn’t slip back into obscurity.
How to Maintain a Corner Closet Long Term
Corner spaces are prone to becoming “just for now” storage areas. Preventing that requires simple maintenance habits.
Small resets protect the layout.
Perform a monthly corner check: Remove items that have drifted into the back angle without a designated shelf or rod space.
Avoid deep stacking in the corner zone: If items start piling behind others, reduce volume rather than compressing the space further.
A small corner closet doesn’t have to waste space. When rods follow the angle, shelves fit the geometry, and zones stay intentional, the so-called “dead space” becomes one of the most useful areas in the room.
The difference isn’t more storage. It’s smarter alignment with the shape you already have.
Are you all about style, decor and organization? Download a copy of our Decluttering Workbook. *****
Easter Table Decorations That Look High-End but Take Almost No Effort
Are you all about style, decor and organization? Download a copy of our Decluttering Workbook.**** Easter table decorations don’t have to be elaborate to feel meaningful. A few intentional choices […]