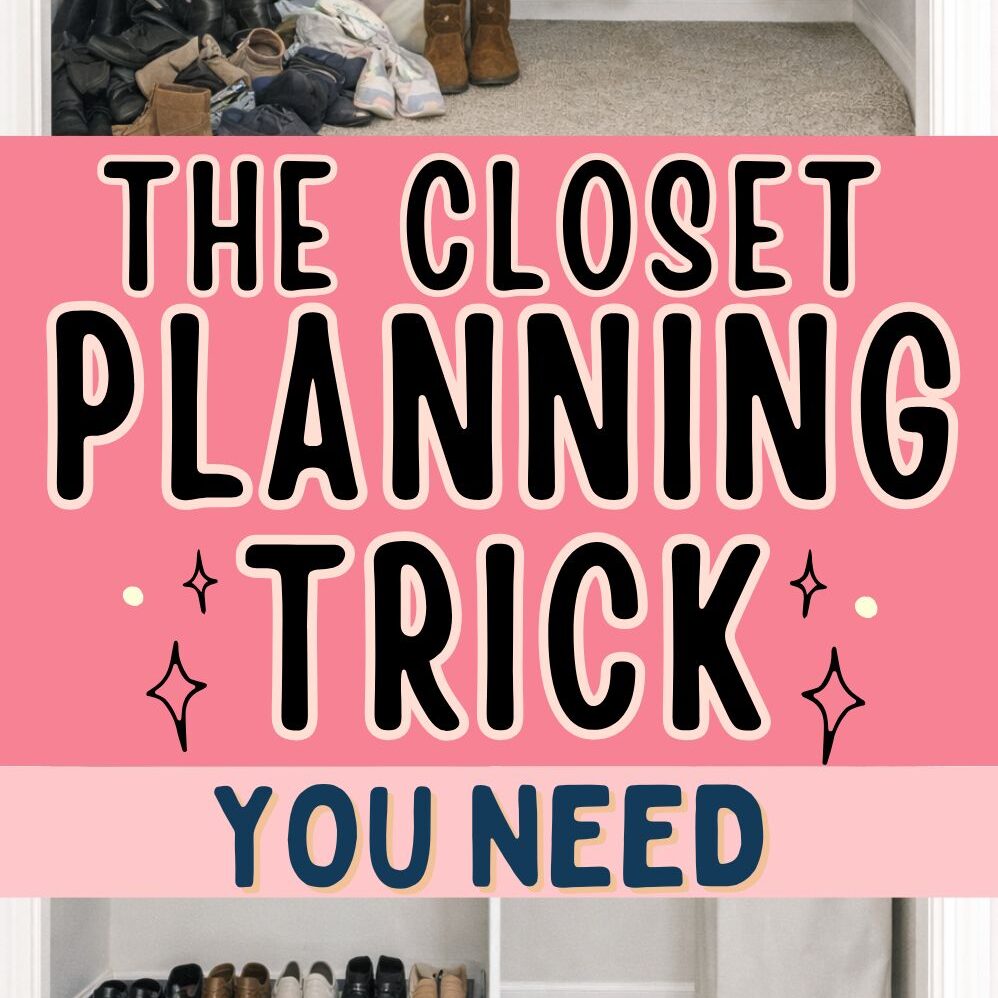
A walk-in closet sounds luxurious — until you step inside and it feels tight, dark, and crowded.
Many smaller walk-ins feel more cramped than reach-in closets because of poor lighting, heavy colors, and rods packed too tightly together. The square footage may be limited, but how the space is designed determines how it feels.
Lighting is the fastest way to visually expand a small space. Shadows shrink rooms. Even illumination opens them.
Replace dim or warm bulbs with bright neutral lighting: Install LED bulbs in a bright white or soft daylight tone instead of yellow lighting. Make sure the overhead fixture distributes light evenly across the entire ceiling, not just in the center.
Add vertical and layered lighting: Install stick-on LED strips under shelves, puck lights inside darker corners, or motion-sensor lights along vertical panels. Lighting from multiple directions reduces shadow pockets and visually stretches the space.
The goal is balanced brightness from top to bottom.
2. Choose Light, Reflective Colors
Color affects how walls recede or close in. Dark tones absorb light, while lighter tones reflect it.
Paint walls in a light neutral shade: Soft white, warm ivory, pale greige, or light taupe help boundaries visually expand. Even a slightly lighter tone than your current color can make a dramatic difference.
Light walls blur the edges of the room.
Keep shelving and rods cohesive with the walls: Avoid heavy contrast between walls and built-ins. Matching rods and shelving to the wall color creates visual continuity instead of chopping the room into sections.
Consistency makes the space feel seamless rather than segmented.
3. Adjust Rod Spacing for Breathing Room
Overpacked rods are one of the biggest reasons walk-ins feel tight.
Leave intentional gaps between hangers: Avoid squeezing garments shoulder to shoulder. Maintain small visible spaces between sections so each grouping feels defined rather than compressed.
Air space is visual space.
Separate long and short garments strategically: Dedicate one section for long-hang pieces like dresses and coats, and use double rods for shorter items such as shirts and folded pants. This prevents overlapping fabric that blocks light and crowds the walkway.
Contain accessories in neutral bins: Choose one or two cohesive bin colors and avoid busy patterns. Keep labels subtle and aligned so shelves look intentional rather than overloaded.
Simplified color choices reduce visual noise and increase perceived space.
Use Mirrors and Reflection Strategically
Reflection adds depth without taking up square footage.
Install a full-length mirror opposite a light source: Position the mirror so it reflects brightness across the room. This doubles the visual impact of your lighting.
Mirrors create the illusion of extended space.
Incorporate subtle gloss or reflective finishes: Semi-gloss paint, acrylic bins, or metallic rod finishes gently bounce light around the room without overwhelming it.
Light movement adds dimension.
Edit What’s at Eye Level
What you see immediately when you walk in determines how the space feels.
Keep eye-level shelves minimal and intentional: Display only your most-used or favorite pieces at this height. Avoid stacking too high or crowding this visual zone.
Rotate seasonal items out regularly: When seasons change, move unused clothing to upper storage zones. Keeping only current-season items at accessible levels prevents overcrowding.
A smaller walk-in feels bigger when it holds less at one time.
If you’ve ever priced out custom closet systems, you know how quickly the numbers climb. But most small closets don’t need custom cabinetry.
They need structure.
With a clear layout strategy and a tight materials list, you can dramatically improve how your closet functions for under $100. The key isn’t buying more — it’s buying intentionally and installing strategically.
Step 1: Measure and Plan Before You Spend a Dollar
Budget projects fail when you shop first and think later. The layout must drive the purchase list.
Measure your closet precisely: Use a tape measure to record width, depth, and total height. Measure the existing rod height and the clearance below it. Write everything down, including how much floor space you realistically have.
Knowing your dimensions prevents buying rods that don’t fit or bins that waste depth.
Sketch a simple layout plan: Decide where daily wear will go, whether you’ll add a second rod, and where bins will sit. Even a rough drawing helps you visualize spacing before installation.
A five-minute sketch can save you fifty dollars in mistakes.
Step 2: Create a Smart Materials List (Under $100)
The goal is high impact, low cost. Focus on items that increase capacity and clarity.
Choose core hardware that adds structure: Purchase an adjustable tension rod or basic rod kit to create a second hanging level. If needed, add inexpensive shelf brackets and wall anchors for stability.
One extra rod can nearly double hanging capacity for less than the cost of a single storage tower.
Double-hanging is ideal for short items and dramatically increases usable space.
Separate long and short garments intentionally: Dedicate one side of the closet to long-hang items like dresses and coats. Use the double-rod section for daily tops and bottoms.
Separating lengths prevents overcrowding and keeps the layout clean.
Assign one shelf for labeled bins: Use bins for accessories, workout gear, or seasonal items. Label each clearly and keep spacing even. Avoid stacking loosely without containment.
Even on a budget, styling makes the system feel cohesive.
Switch to matching slim hangers: Uniform hangers create straight lines and reduce visual clutter. Slim profiles also allow more garments to fit comfortably.
Consistency makes a budget upgrade look intentional.
Leave breathing room between sections: Don’t cram garments tightly together. Maintain small gaps so each grouping feels defined.
A smart budget plan prioritizes what matters most.
Save on simple hardware and bins: Basic rods, plain plastic bins, and standard shelf brackets work perfectly well when installed correctly.
Function matters more than brand names.
Spend wisely on durability and flexibility: Invest slightly more in slim hangers and sturdy wall anchors. Adjustable hardware also provides long-term flexibility if your wardrobe changes.
Spend where stability and usability matter most.
How to Upgrade Later Without Starting Over
Your under-$100 plan can be phase one — not a temporary fix.
Choose neutral, versatile materials: Select bin colors and hanger styles that will still look cohesive if you upgrade shelving later.
This allows you to expand without replacing everything.
An “allowance” from your parents when you were 8 years old was great, but it’s just not going to cut it now!
Or maybe you’ve aged out of the allowance stage altogether.
But not having money is a drag. And so is always having to ask your parents for cash.
Making money as a teenager can be a challenge. You’re in a place in life where you have no job experience and no resume. But you have to start somewhere right?
There are still many ways to get money as a teen, even without a job. Especially in this day and age of online jobs and endeavors!
From side hustles, to part-time jobs, to your own small business or online work, there’s no reason you have to be poor!
If you are asking yourself the question “How can I make money as a teenager?” read on to find the best jobs for teens!
Best Jobs for Teens
There are a ton of “starter” jobs out there for teenagers that don’t require work experience and offer flexibly hours.
1. Babysitter
Babysitting is one of the best jobs for teens because you can set your own schedule and rates.
There is a reason it has always been a go-to job for teens who want to make money.
You’ll watch children while their parents are away, which includes feeding them, helping with homework, and keeping them safe.
Most babysitters earn between $12 and $20 per hour depending on location and experience.
You can start by watching kids in your neighborhood or for family friends. Many parents prefer hiring teens they already know and trust.
Getting certified in CPR and first aid makes you more appealing to parents and lets you charge higher rates.
The great thing about it is that parents often need sitters on weekend evenings and occasional weekdays, so it won’t interfere much with school.
2. Tutor
If you’re good at a particular subject, tutoring lets you help other students while earning money.
You can tutor younger kids or classmates who need extra help in subjects like math, science, or English. Tutors typically make $15 to $30 per hour based on the subject and grade level.
You can find students through your school, online platforms, or by advertising in your community.
Many parents look for tutors during the school year to help their kids improve grades. Online tutoring is also popular and lets you work from home.
This job builds your communication skills and deepens your own understanding of subjects. You create lesson plans and explain concepts in ways that make sense to different learners. It looks great on college applications too.
More reading:
3. House Cleaner
House cleaning is another great way to make money as a teenager. You can do it anytime that works with your schedule and it pays well.
You’ll vacuum, dust, mop floors, clean bathrooms, and tidy up rooms for busy families or elderly neighbors. Teen cleaners can earn $15 to $25 per hour or charge per house.
Start by offering your services to neighbors and family friends who know you’re reliable. You’ll need basic cleaning supplies, though many clients provide their own. Weekend mornings are popular times for cleaning jobs.
The work is physically active but doesn’t require special training. You can often finish a house in 2-3 hours, making it easy to fit around other commitments. Building a regular client base means steady income.
4. Grocery Store Cashier
I don’t know about you but when I was little my career-dream was to someday work a cash register at a grocery store!
But, it is actually an ideal job for teenagers to try. Working as a grocery store cashier gives you regular hours and a consistent paycheck.
You’ll scan items, handle payments, bag groceries, and help customers. Most grocery stores pay $10 to $14 per hour and offer employee discounts.
Many grocery chains hire workers as young as 14 or 15 for cashier and bagger positions. You’ll get trained on the register system and customer service basics.
Stores often need help during evenings and weekends when you’re out of school.
This job teaches you how to work with the public and handle money accurately. You’ll develop time management skills during busy rushes.
In addition, the experience looks good on future job applications and you might get promoted to better positions.
Popular Part-Time Jobs for Teenagers
Teenagers looking for work often find the best opportunities in food service, retail, and customer-facing positions.
These jobs typically offer flexible hours that work around school schedules and don’t require previous experience.
5. Library Assistant
Working as a library assistant gives you a quiet environment where you can earn money while staying around books and learning resources.
You’ll help visitors find materials, check books in and out, shelve returned items, and keep the library organized. It is pretty easy work!
The job teaches you money making skills like organization and customer service as well as how to use library systems.
You’ll also learn to help people with research questions and use computers and databases. Most libraries need you to be detail-oriented and comfortable working independently.
Library assistants usually work after school hours and on weekends when students need help with homework.
The pace is generally calm compared to retail or food service jobs. You might also get first access to new books and materials.
6. Busser
I have made a lot of money in my life from restaurant jobs. When it comes to jobs for teens, I think getting started in a restaurant is the best work you can do!
It is an excellent fall-back at any point in your life and the money is typically better.
You can get started as a busser. Bussers clear and clean tables in restaurants so new customers can sit down quickly.
You’ll remove dirty dishes, wipe down tables and chairs, and sometimes help refill water glasses or bread baskets.
This job keeps you moving throughout your shift. You need to work fast during busy meal times and stay organized when the restaurant fills up.
Bussers often share tips with servers, which means you can earn more than just your hourly wage.
The work builds your stamina and teaches you how restaurants operate. You’ll learn to work as part of a team and handle pressure during rush hours.
Many bussers move up to server positions once they learn how the restaurant works so it is a great starting point.
7. Restaurant Hostess
As a restaurant hostess, you’re the first person customers see when they walk in. You greet guests, manage the waiting list, seat people at tables, and answer phone calls about reservations or hours.
You need good communication skills and a friendly attitude for this role. The job requires you to stay calm when customers get frustrated about wait times.
You’ll also work with servers to make sure tables get seated in a fair rotation.
This position gives you valuable customer service experience. You’ll learn to multitask by handling walk-ins while managing phone calls and tracking which tables are available.
The work environment is usually cleaner than kitchen jobs since you stay in the front of the restaurant.
8. Server
The best restaurant job for teens on our list is server. That is the highest paid position in a restaurant.
Servers take customer orders, deliver food and drinks, and make sure diners have everything they need during their meal.
You’ll answer questions about the menu, make recommendations, and handle payment at the end.
The job requires strong memory skills and the ability to carry multiple plates at once. You need to be friendly and patient, even with difficult customers.
Servers earn tips on top of their hourly wage, which means you can make a lot more money doing this than working at a retail store.
You’ll develop thick skin and learn to handle complaints professionally. The work teaches you time management as you juggle multiple tables at different stages of their meals.
Peak hours like Friday nights and weekend brunches are your busiest and most profitable times. Becoming a server is one of the best money making jobs to try.
9. Dishwasher
Dishwashers keep restaurants running by cleaning plates, glasses, silverware, and cooking equipment. You’ll load and unload industrial dishwashers, scrub pots and pans, and help maintain a clean kitchen workspace.
The work is physically demanding and hot since you’re around steam and hot water all shift. You don’t interact with customers, which some teens prefer.
The job is straightforward and doesn’t require you to memorize complex information.
Most restaurants desperately need reliable dishwashers, so these positions are often easy to find. You’ll work as part of the kitchen team and learn how professional kitchens operate. The experience can lead to other kitchen positions if you’re interested in cooking.
10. Barista
Baristas make coffee drinks, teas, and other beverages in coffee shops and cafes. You’ll take customer orders, operate espresso machines, steam milk, and create drinks according to specific recipes.
The job requires you to learn different drink recipes and work quickly during morning rush hours.
You need good customer service skills since you’ll chat with regular customers and handle special requests.
Many baristas enjoy the creative aspect of making latte art and customizing drinks.
You’ll often get free or discounted drinks during your shift. The work teaches you to multitask as you make multiple drinks while taking new orders.
Coffee shops attract a regular crowd, so you’ll get to know customers and build relationships with them.
11. Retail Sales Associate
Another ideal way to make money as a teenager is by working as a sales associate at a store. you can work at a clothing store, shoe store, or even ice cream shop. There are endless options for this type of work.
Retail sales associates help customers find products, answer questions, and process purchases at stores. You’ll also restock shelves, organize displays, and keep the store clean and presentable.
The job requires you to learn about the products your store sells. You need to be approachable and willing to help shoppers find what they need.
Many retail positions offer employee discounts, which is great if you like the store’s products.
You’ll develop sales skills and learn to handle cash registers and payment systems. The work varies between busy periods when lots of customers need help and slower times when you focus on organizing and restocking.
Holiday seasons bring extra hours and increased pay opportunities. You can get a job during the holidays for extra money.
Retail jobs are excellent summer jobs for teens as well.
Summer Jobs for Teens
Summer break opens up job opportunities that aren’t available during the school year. Many of these positions are outdoors or recreation-focused, taking advantage of warm weather and kids being out of school.
12. Camp Counselor
Working as a camp counselor is a weekly side hustle puts you in charge of leading activities and supervising groups of kids at day camps or overnight camps.
You’ll organize games, help with arts and crafts, and make sure campers stay safe and have fun.
Most camps look for counselors who are at least 16 years old, though some accept younger teens through counselor-in-training programs.
You don’t usually need previous experience to start, but you should enjoy working with children and be comfortable leading groups.
The pay varies by camp type and location, but you can expect anywhere from minimum wage to $15 per hour.
Overnight camps sometimes provide room and board as part of your compensation. This job teaches you leadership skills and responsibility while keeping you active all summer.
You can find summer camp counselor positions by checking with local YMCAs, recreation departments, religious organizations, and private camps in your area.
13. Lifeguard
One well-known summer job for teens has always been lifeguarding.
Lifeguard positions open up at pools, beaches, and water parks when warm weather arrives. Your main job is watching swimmers and responding to emergencies, but you’ll also enforce pool rules and keep the facility clean.
You need to get certified before you can work as a lifeguard. The American Red Cross and similar organizations offer training courses that teach water rescue techniques, CPR, and first aid.
These classes usually take about 25-30 hours to complete and cost between $200-$300.
Most places require lifeguards to be at least 15 years old. Once certified, you can earn $12-$20+ per hour depending on your location.
There’s currently a national lifeguard shortage, which means pools and beaches are actively hiring.
The certification lasts for two years, so you can use it for multiple summers. Strong swimming skills are a must before you even start training.
14. Swim Instructor
If you’re a skilled swimmer, teaching swim lessons is another water-based option for summer work.
You’ll work with kids or adults who are learning to swim, helping them build confidence and master different strokes.
Many community pools, YMCAs, and private swim schools hire teen instructors. You typically need lifeguard certification or specific swim instructor credentials from organizations like the Red Cross. Some facilities will hire you at 15 or 16 if you have strong swimming skills.
Swim instructors often earn more than regular pool staff, with rates ranging from $12-$25 per hour.
You might teach group classes or private one-on-one lessons. Private lessons usually pay more.
This job requires patience and good communication skills since you’ll be working with students who might be nervous about the water.
You set your own pace with lessons and celebrate each student’s progress.
15. Golf Caddy
Golf courses get busy during summer, and many need caddies to assist golfers during their rounds which makes for an ideal job for teenagers.
As a caddy, you carry golf bags, clean clubs, help find lost balls, and offer advice about the course when asked.
You don’t need previous golf experience, but knowing basic golf rules and etiquette helps. Most courses provide training to new caddies. The minimum age varies by course, but many accept teens as young as 14.
Caddies typically earn minimum wage from the golf course, but tips from golfers can significantly boost your income.
A friendly attitude and good communication can lead to better tips. Some caddies make $50-$100 per round when tips are included.
You’ll spend several hours walking outdoors for each round of golf. The work can be physically demanding since golf bags are heavy, but it’s a good way to stay active and potentially network with successful adults.
16. Landscaper/Lawn Mower
Lawn care and landscaping businesses need extra help during summer when grass grows fast and people want their yards looking good.
Your duties might include mowing lawns, trimming hedges, pulling weeds, mulching, and basic yard maintenance.
Some teens work for established landscaping companies while others start their own lawn mowing mini business in their neighborhood.
If you work for a company, expect to earn minimum wage to $15 per hour. Running your own operation lets you set your own rates, typically $25-$50 per lawn depending on size.
You’ll need access to equipment like mowers and trimmers. Companies provide these tools, but if you’re working independently, you might use your family’s equipment or invest in your own.
This job involves working outdoors in hot weather and requires physical stamina. You’ll probably need reliable transportation to travel between job sites. The work is straightforward and you can often listen to music while mowing.
17. Car Wash Attendant
Car washes hire additional staff during summer when more people get their vehicles cleaned.
You’ll wash and dry cars, vacuum interiors, clean windows, and apply wax or other treatments depending on the service package.
Most car wash positions are entry-level and don’t require experience. The minimum hiring age is usually 16, though some places hire at 15.
You’ll earn minimum wage, but many locations allow employees to accept tips from satisfied customers.
The work keeps you active since you’re constantly moving between vehicles. You’ll be working with water and cleaning products, so expect to get wet and wear clothes you don’t mind getting dirty.
Some car washes operate on a team system where everyone works together on each vehicle, while others assign specific tasks to different employees.
The job teaches you attention to detail and customer service skills in a fast-paced environment.
Best Online Jobs for Teens
Online work gives you flexibility to earn money from homewhile managing school and other commitments. The jobs below pay well and help you build real skills for the future.
18. Virtual Tutoring
Tutoring online lets you share what you already know while getting paid $15 to $25 per hour. You can teach younger students in subjects where you excel, like math, science, or English.
Most tutoring platforms require you to be at least 16 years old. Websites like Tutor.com and Wyzant connect you with students who need help. You set your own schedule and work from home.
Advanced subjects like SAT prep or calculus pay more than basic tutoring. You’ll need a quiet space, reliable internet, and a computer with a webcam. Some platforms ask you to pass a subject test before you start tutoring.
The best part about tutoring is that you’re helping someone learn while earning money. You can work a few hours a week or more, depending on your availability.
19. Freelance Writing
Freelance writing pays around $22 per hour and only requires good writing skills. You can write blog posts, articles, or social media content for businesses and websites.
Platforms like Fiverr and Upwork let you create a profile and bid on writing projects. You need to be 13 or older, but anyone under 18 needs parental consent to sign up.
Start with small projects to build your portfolio and get good reviews.
Your earnings grow as you gain experience and positive feedback. Some teen writers make over $1,000 per month once they have regular clients. You pick the projects you want and work on your own time.
Writing jobs teach you communication skills that help in almost any career. The more you write, the faster you get, which means you can earn more in less time.
20. Social Media Manager
As a teenager, you probably spend a LOT of time on social media. So, why not make money for it?
Managing social media for small businesses pays well and uses skills you already have. You create posts, reply to comments, and help businesses connect with customers online.
Many local shops and startups need help with platforms like Instagram, TikTok, and Facebook. You can charge $15 to $20 per hour or offer monthly packages. Most businesses want someone who understands what content works and can post consistently.
You typically need to be 14 or older for this type of work. Your job includes planning content, designing graphics, and tracking what posts get the most engagement. This role works great if you’re creative and spend time on social media anyway.
Small businesses often prefer working with teens because you understand current trends better than adults. You can start by helping family friends or local businesses to build your experience.
Virtual assistants handle tasks like email management, scheduling, and data entry for busy professionals.
This job pays around $18 per hour and teaches you valuable organization skills. Plus, it looks great on your resume as it is essentially an office job done remotely.
You need to be at least 16 years old for most virtual assistant positions. Your work might include organizing files, making appointments, or entering information into spreadsheets. The tasks vary depending on who hires you.
This job requires attention to detail and good communication. You’ll use tools like Google Calendar, Microsoft Office, and email programs.
Most virtual assistants work part-time hours that fit around school schedules.
The job is straightforward once you learn what your client needs. You gain professional experience that looks great on college applications and future resumes.
When it comes to easy online jobs, this is a good one to try. FlexJobs is a good site to look for this work.
22. Play games and Watch Videos
Did you know you can make money online on sites like Branded Surveys and Swagbucks just for playing games or watching videos?
You can even make money just for watching ads online.
One of the best sites where you can earn for playing games and completing simple tasks is Survey Junkie. They are one of the highest paid survey sites out there.
Survey Junkie and Branded Surveys will also pay you to take online surveys. Paid online surveys can be done anytime as well!
You won’t make a ton of money from these survey sites, but it is an easy way to make some pocket change!
Here are some other sites that will pay you for playing games:
Mistplay lets you discover new games while earning rewards.
App Station is another gaming app that pays in gift cards
Coinpop is a free app that offers a lot of different types of games you can play for PayPal cash or gift cards.
Hou can start a landscaping business, dog walking or start your ownonline business which gives you unlimited earning potential.
You can sell products on Etsy, create content on YouTube or TikTok, or offer services like graphic design.
Popular options include print-on-demand stores where you sell custom t-shirts or mugs without holding inventory. You can easily setting up an online store.
Digital products like study guides or templates cost nothing to make after the first one. Content creation through videos or podcasts can earn money through ads and sponsorships, though most creators start earning little to nothing.
Best places to start an online business:
Business Type
Startup Cost
Best For
Etsy Shop
$$ (materials)
Creative teens who make crafts or digital art
YouTube/TikTok
$ (basic equipment)
Teens comfortable on camera
Print-on-Demand
$$ (design tools)
Teens with design skills
You’ll need patience because building a business takes time. The advantage is that you own your work and keep all the profits. Many teens use their earnings to save for college or fund travel experiences.
24. Start an eCommerce Business
Start your own online business
Just because you are a teenager, doesn’t mean you can’t have a thriving online business as we just mentioned!
You could sell anything from jewelry to clothing to planners or even technology products. You can make thousands of dollars as a teenager online with an eCommerce business.
Setting up a Shopify account is an easy way to start your own teenage online business. Read this Shopify Launch Checklist and see how to start your own website selling products.
Another option is to start an Amazon by Fulfillment business which is a type of drop shipping business.
This is probably a better choice of business for a teen since it involves less work and headache. You don’t have to manage inventory or shipping yourself.
You figure out what products to sell and then buy them from a wholesaler. You have the products shipped to Amazon and they handle fulfilling orders and shipping them out when someone buys your products.
You just get to pocket all the profit! Here is an in depth guide on how to get started selling on Amazon FBA.
Start an eCommerce Store
Shopify:You can easily and affordably start your own online business!
25. Resell items
A great way to create income as a teenager is by selling items like clothing, collectibles or even furniture.
You can go to local estate sales or garage sales or the Goodwill and find deeply discounted items.
You can then resell these items for a profit on sites like Ebay, Etsy, or even Facebook Marketplace.
Shopping is a fun activity most teenagers like anyways, may as well turn that skill into a money maker!
If you are selling clothes online then you can try Poshmark. Reselling items is an excellent way to make money as a teenager without a job online.
You can even buy and resell big ticket items like cars for an even bigger profit in your pocket. It is a great way to make extra money.
Creating YouTube videos as a teenager is another great way to make money online. You can do make-up tutorials for instance. YouTubers get money from affiliate marketing and ads when they monetize their YouTube channel.
There are actually a lot of successful teenage YouTubers out there now. MattyBraps has over 10 million subscribers!!
You will need to be comfortable talking in front of a camera.
27. Rent a Car on Turo
You may want to buy a car for yourself and your freedom. But did you know you can rent cars on Turo and make a few hundred dollars or more a month?
It is like AirBnb for cars. You can rent your car on any days that you don’t need it. It is an excellent side business to start.
Pet-Related Jobs for Teens
Who doesn’t love hanging out with dogs? Why not make money for it?
Pet-related work gives you hands-on experience with animals while earning money in your neighborhood.
These jobs teach responsibility and work well with school schedules since you can often choose your own hours.
28. Pet Sitter
Pet sitting means caring for animals while their owners are away. You’ll feed pets, give them water, and make sure they’re safe and comfortable.
Some pet owners want you to stay at their house overnight, while others just need you to stop by once or twice a day.
You might also need to give pets medicine, clean litter boxes, or let dogs outside. Pet owners look for sitters who are responsible and love animals.
You can start by asking neighbors and family friends if they need pet care help.
Most pet sitters charge between $15 to $30 per visit. Overnight stays usually cost more. You can use apps like Rover to find clients, but many teens get jobs through word of mouth.
Building trust with pet owners takes time, but once they know you’re reliable, they’ll hire you again.
29. Dog Walker
Dog walking is perfect if you enjoy being active and spending time outdoors. You’ll take dogs on walks around the neighborhood, usually for 20 to 30 minutes per walk.
Some dogs need walks once a day, while others need two or three walks.
You need to be comfortable handling dogs of different sizes and energy levels. Some dogs pull on the leash or get excited around other animals. Always ask the owner about the dog’s behavior before your first walk.
Most dog walkers charge $10 to $25 per walk. You can walk multiple dogs at once to earn more money, but start with one dog until you gain experience.
Create a simple schedule that works with your school day and homework time.
30. Start Selling Dog Treats
Tap into the pet market and use it to make money for yourself. You can actually bake your own dog treats and sell them at local fairs, to your neighbors or even local pet stores.
Here is an actual course teaching you how to make money creating dog treats! The course is taught by Kristen Larsen who actually created her own money-making side hustle making dog treats.
Finding and Applying for Teen Jobs
Looking for your first job takes effort, but knowing where to search and how to present yourself makes the process much easier.
Focus on places that regularly hire teens, create simple application materials, and practice basic interview skills.
Where to Look for Openings
Online job boards are a great starting point for your search. Sites like Indeed let you filter by keywords such as “teen jobs” or “entry-level” combined with your city or zip code.
You can also check out specialized platforms like Hire Teen that focus specifically on connecting teenage workers with employers.
Local businesses in your area often hire teens for entry-level positions. Walk into fast food restaurants, grocery stores, retail shops, and movie theaters to ask about applications.
Many managers prefer when candidates show up in person because it demonstrates initiative.
Don’t overlook your personal network. Tell your parents, neighbors, teachers, and friends that you’re looking for work.
Many teens find their first job through someone they know. Family friends might need help with yard work, babysitting, or pet sitting.
Check community bulletin boards at libraries, recreation centers, and coffee shops. Summer camps, pools, and seasonal businesses post openings in these spots during hiring season.
Tips for Applying
Create a basic resume even if you don’t have work experience yet. List your school activities, volunteer work, sports teams, or any babysitting you’ve done.
Include skills like communication, teamwork, responsibility, and any computer programs you know how to use.
Tailor your resume for each job by highlighting the most relevant activities and skills. If you’re applying to work at a pet store, mention any experience caring for animals. If it’s a retail position, talk about working well with people.
Fill out applications completely and carefully. Read each question before answering and double-check for spelling mistakes.
Use a professional email address that includes your name, not a nickname or joke address.
Some states require work permits for teens under 18. Check your state’s requirements and get the necessary paperwork before you start applying. Your school guidance office can usually help with this.
Preparing for Interviews
Practice answering common questions before your interview. Employers often ask “Why do you want this job?” and “What are your strengths?”
Prepare honest answers that show you’re responsible and eager to learn. Practice with a parent or friend until you feel comfortable.
Dress neatly for your interview. You don’t need formal business clothes, but wear clean, presentable clothing without wrinkles or stains. Avoid anything too casual like sweatpants or clothes with inappropriate graphics.
Arrive 10 minutes early and bring a copy of your resume. Turn off your phone before entering the building. Make eye contact, offer a firm handshake, and speak clearly when answering questions.
Prepare a few questions to ask the interviewer. You might ask about training, typical work schedules, or what a normal shift looks like. This shows genuine interest in the position.
Final THoughts on Making Money for Teens
As you can see from this long list of jobs for teens, there are many options to make money as a teenager!
Or, you can try more than one and really increase how much money you earn.
Figure out what your preferences are. Would you prefer to make money online from home? Or do you want to do something social and be around people? Maybe you want to try your hand at something entrepreneurial.
The point is, you have a gazillion options and can choose whatever you most want!
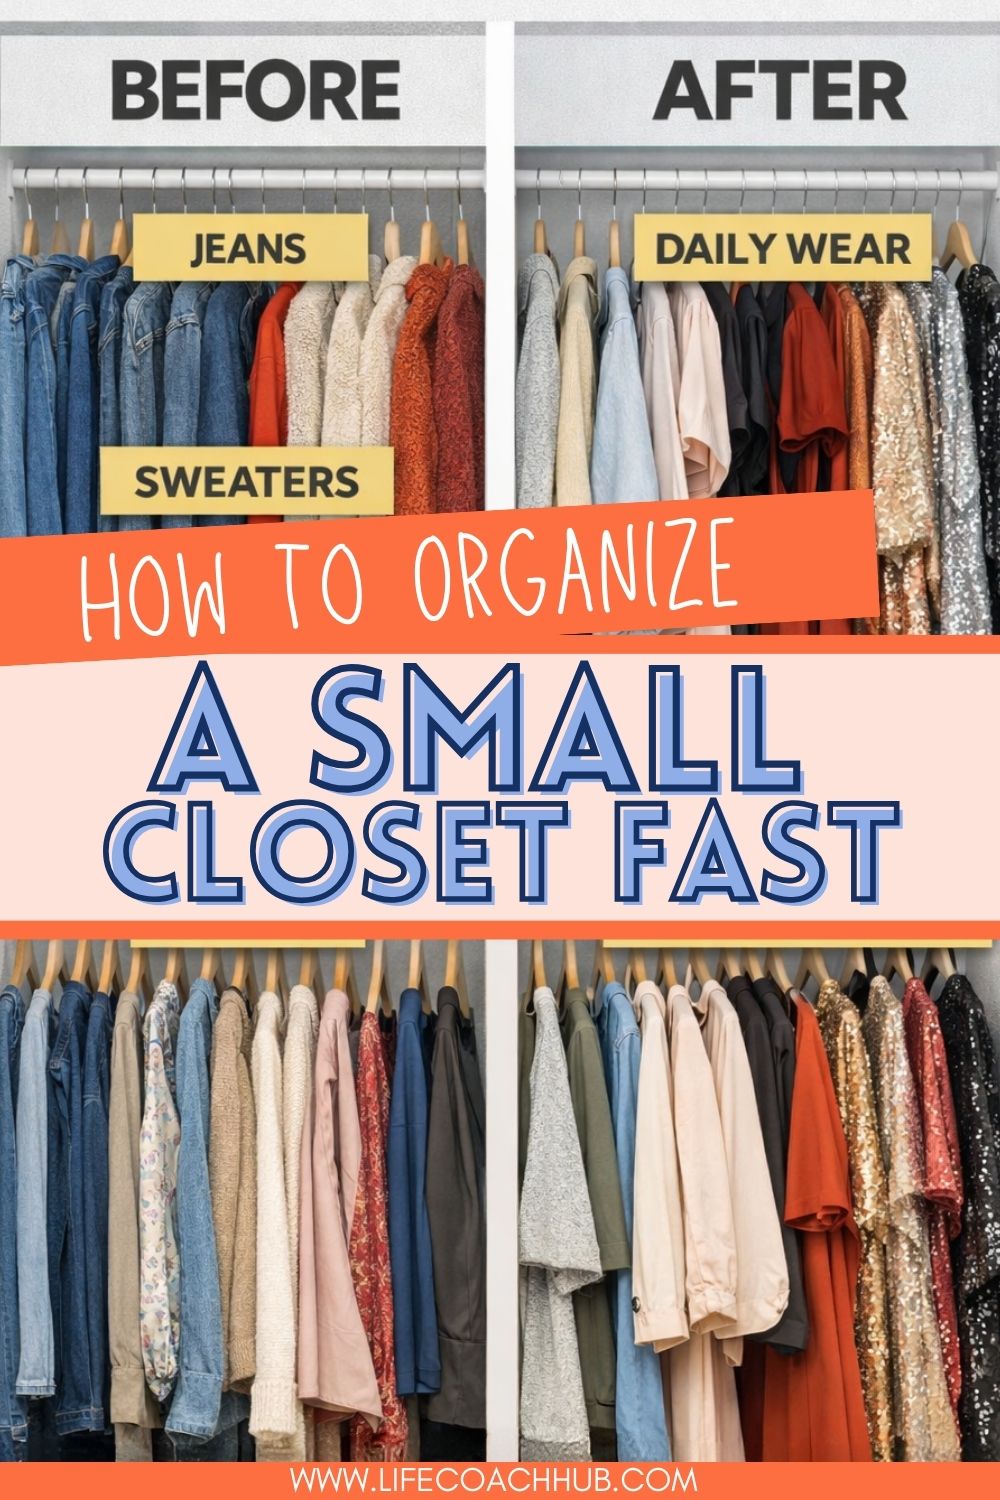
Most people organize a small closet by type: all jeans together, all dresses together, all sweaters in one section. It looks neat at first. But it doesn’t match how you actually get dressed.
If your mornings still feel chaotic even though your closet is technically “organized,” the issue might not be space. It might be your system.
Instead of sorting by clothing type, try organizing by clothing category based on real-life use. This small shift makes a tight closet feel bigger, more functional, and much easier to maintain.
1. Start With How You Actually Get Dressed
Before you move a single hanger, pause and think about your real routine. The goal isn’t a showroom closet. The goal is faster decisions and less friction.
Identify your daily-wear category: Look at what you realistically wear 70–80% of the time. This might include work-from-home outfits, school drop-off basics, errand clothes, or casual staples. Pull these items out and group them together physically so you can see your true “everyday uniform.”
Once you see this pile, you’ll notice patterns. Similar silhouettes. Repeat pieces. Colors you reach for constantly. That’s your primary zone.
Define your occasional category: Now identify what you wear only for specific plans — formalwear, event dresses, travel outfits, seasonal coats, or special pieces. Gather these separately so they’re clearly distinct from your daily rotation.
Now that you’ve identified your categories, it’s time to restructure the space.
Assign one side of the closet to daily wear: Use the most accessible section — eye-level rod space or the side closest to the door. Hang only your daily-wear items here. Leave slight spacing between pieces so you can see each one clearly without crowding.
This becomes your “grab-and-go” zone.
Move occasional wear to a secondary zone: Place special-occasion items on the opposite side, higher shelf, or back rod. Keep them visible but not dominant. If they overwhelm your daily area, they create unnecessary visual noise.
When your closet is divided by use, not type, your brain processes it faster. You stop scanning through gowns when you just need a sweatshirt.
Group similar items inside each zone: In your daily-wear section, you can cluster tees together, jeans together, and cardigans together. Do the same inside your occasion zone with dresses, blazers, or coats.
The key is that these mini-groups stay inside their category. You’re not mixing daily tees with formal tops anymore.
Remember: this is still a small closet. Your organization must support movement and visibility.
4. Remove the “In-Between” Items
The biggest clutter culprit in small closets is the “maybe” piece — the item that isn’t daily but isn’t truly occasional either.
Decide which category each piece supports: If you haven’t worn something in 30–60 days and it doesn’t clearly belong to a specific event category, it may not deserve prime space. Choose its zone intentionally or remove it entirely.
Avoid letting these in-between pieces live in your daily section. They crowd the area and slow down decisions.
Edit with your real lifestyle in mind: Ask yourself if each item supports the life you’re currently living — not the one you imagine or the one you used to have. Your closet should match your real calendar, not a fantasy schedule.
Small closets demand clarity. Ambiguous pieces create visual clutter fast.
5. Maintain the System With a Simple Weekly Reset
This method works beautifully — as long as you maintain the category boundary.
Return items to their correct zone: At the end of the week, take five minutes to move anything that drifted into the wrong section. Daily wear should stay streamlined. Occasion wear should stay contained.
Drift is normal. Quick resets prevent buildup.
Reassess seasonal shifts: When seasons change, swap categories intentionally. Your “daily” zone in summer may look completely different from winter. Update the zones instead of cramming everything together.
Even subtle visual cues help your brain maintain the system automatically.
Use different hanger colors or textures: For example, darker hangers for daily wear and lighter ones for occasion wear. This creates a clear visual boundary without adding labels or clutter.
When you open the closet, your eyes instantly recognize the split.
Create physical spacing between zones: Leave a small empty gap between daily and occasion sections. That “air pocket” acts like a visual divider and prevents items from blending together over time.
If two people share a tight closet, category organization becomes even more powerful.
Assign each person their own daily and occasion zones: Instead of mixing everything on one rod, give each person a defined side or section. Within that section, they can use the daily/occasion split independently.
This prevents style overlap and hanger chaos.
Keep visual ownership clear: Different hanger styles, shelf bins, or small labels can make ownership obvious at a glance. The clearer the boundaries, the less likely items are to migrate.
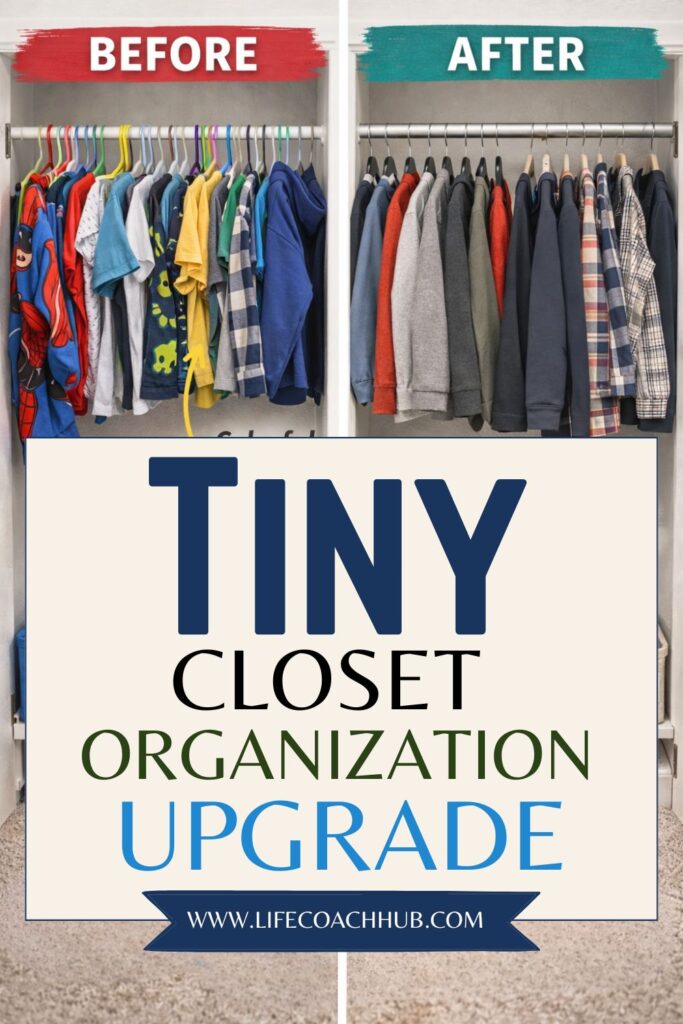
Organizing a small room closet for kids or teens isn’t just about making it look neat. It’s about designing a space they can actually use on their own.
If they can’t reach it, they won’t use it. Independence starts with accessibility.
Lower the main hanging rod: Install or adjust a rod so daily clothes sit at child or teen eye level. For younger kids, this might be waist height. For teens, it may be slightly higher but still easy to reach without stretching. Keep everyday shirts, hoodies, and pants here so they can grab and rehang items without help.
A reachable rod encourages responsibility. It removes the excuse that something is “too hard” to put away.
Move less-used items up high: Reserve upper rods or shelves for seasonal coats, special occasion outfits, or out-of-season clothing. These pieces don’t need daily access, so they shouldn’t compete for prime real estate.
When daily clothing is easy to reach and occasional clothing is slightly elevated, the closet naturally separates into functional zones.
Kids and teens don’t think in technical clothing types. They think in activities: school, sports, weekends, events.
Define broad categories they understand: Instead of separating by “blouses” and “cardigans,” group clothing into sections like School, Play, Lounge, and Special. Keep the labels simple and intuitive so they don’t have to guess where something belongs.
Broad categories are easier to maintain than detailed micro-sorting.
Keep each category visually contained: Assign each section a specific part of the rod or shelf. For example, left side for school clothes, right side for play clothes. This physical boundary helps them quickly return items to the correct zone.
3. Use Labeled Bins Instead of Relying on Perfect Folding
Small drawers get overstuffed quickly. Bins simplify everything.
Add low, easy-pull bins under the rod: Place bins on the bottom shelf or floor-level cubbies for socks, underwear, sports gear, or accessories. Make sure they can pull the bin out fully without it catching or tipping.
When storage is simple to access, it’s more likely to be used properly.
Label every bin clearly: Use bold text labels for older kids and picture-plus-word labels for younger children. Keep labels large and visible. The goal is instant recognition, not guesswork.
Labels reduce decision fatigue and eliminate the “I didn’t know where it goes” problem.
4. Install an Adjustable Rod Setup for Growth
Kids grow quickly. Teens grow even faster. Your system needs to keep up.
Leave intentional vertical space: Don’t build the system too tightly. Keep some open space above the rod so it can move upward in the future. Planning ahead prevents major overhauls later.
A little empty space today makes adjustments effortless tomorrow.
5. Keep the Floor Clear With Purposeful Zones
Floor clutter isn’t a behavior issue. It’s usually a design issue.
Create a dedicated hamper area: Place a small laundry basket or bin in a clearly defined spot inside the closet. Make it easy to toss clothes in without precision. If the hamper is hidden or hard to reach, clothes will land on the floor instead.
A visible laundry zone prevents buildup.
Add a “tomorrow” hook or shelf: Install a simple wall hook or small shelf for outfits planned for the next day. This prevents partially worn clothes from ending up in a heap and speeds up busy mornings.
Small systems solve big daily problems.
How to Transition From Child Closet to Teen Closet
As kids grow, their storage needs and preferences change. The closet should evolve with them.
Shift from playful to practical design: Replace bright bins or character labels with neutral bins and simple text labels as they mature. Keep the system structure the same, but update the aesthetic to reflect their age.
This maintains organization while respecting their independence.
Invite them into the decision process: Let teens help define categories or rearrange zones based on how they dress now. When they feel ownership, they’re more likely to maintain the system.
Organization works best when it’s collaborative, not imposed.
How to Maximize Extremely Small Closets
Some rooms have very limited space. That doesn’t mean organization isn’t possible.
Add a double-rod section for short items:Install two rods on one side — one above the other — for shirts and folded pants. This instantly doubles hanging capacity without expanding the footprint.
Shorter garments create opportunity for vertical storage.
Using every surface thoughtfully makes even a tiny closet feel capable.
A well-organized small room closet gives kids and teens something bigger than tidy shelves. It gives them independence.
When they can reach their clothes, understand the categories, and grow with the system, mornings become easier. The room feels more spacious. And the closet stops being a daily frustration.
Easter Flower Arrangements That Feel Luxe Without The Florist Price Tag
Are you all about style, decor and organization? Download a copy of our Clutter Reset Guide.**** Easter flower arrangements set the tone fast. They bring in spring color, soften the […]
6 Small Closet Fixes That Make It Feel Twice the Size
Are you all about style, decor and organization? Download a copy of our Decluttering Workbook.***** Small closet organization isn’t about buying more bins. It’s about fixing the real bottlenecks — volume, layout, […]
Are you all about style, decor and organization? Download a copy of our Clutter Reset Guide. ****
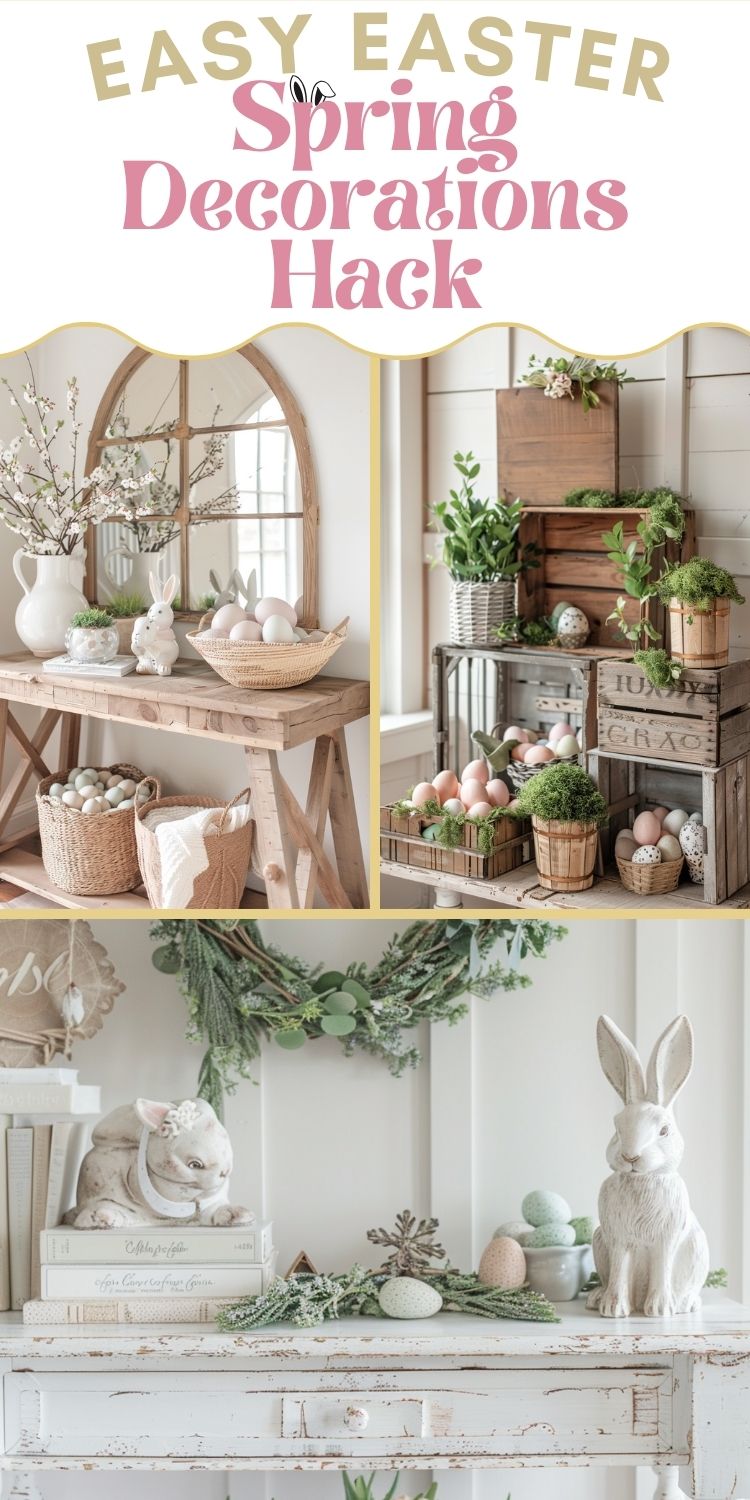
If you love Vintage Easter Decor, you already know the difference. Some porches feel warm, layered, and thoughtfully gathered over time. Others feel like a themed aisle exploded onto the front steps.
The secret isn’t buying more. It’s layering better.
Today I’m walking you through a repeatable vintage layering formula you can use every year. It works for Easter Porch Decor of any size and helps your Easter Spring Decorations feel curated instead of staged.
The formula is simple:
Anchor → Height → Texture → Repeat
We’ll apply it across three porch zones: the door zone, the step zone, and the side vignette zone.
Stick to a tight color story. Soft pastels work beautifully for Easter Spring Decorations, but keep them dusty and muted rather than bright and glossy.
Step 4: Repeat One Element (So It Feels Intentional)
Here’s what separates curated from chaotic: repetition.
Not matching. Repetition.
Choose one element and echo it 2–3 times across zones:
The same ribbon on wreath and basket handles
The same type of greenery in multiple spots
The same woven material in different shapes
The same pastel tone repeated subtly
For example, if you use faded blush ribbon on the wreath, repeat it tied loosely around a lantern handle and tucked into a basket.
That visual echo tells the eye everything belongs together.
Break Your Porch Into 3 Styling Zones
Instead of decorating randomly, divide your porch mentally into zones.
This keeps Easter Porch Decor balanced and prevents over-decorating.
1. Door Zone
Wreath as focal point
Optional small side accent (lantern or crocks)
Keep symmetry relaxed, not strict
Let this be your strongest moment.
2. Step Zone
Grounded cluster
One tall piece, one medium, one soft filler
Negative space around the grouping
Don’t stretch decor across the entire width. Concentrate it.
3. Side Vignette Zone
Smaller scale moment
Stool, basket, or vintage chair
Light greenery and subtle Easter accents
This zone supports the main area rather than competing with it.
What Makes a Porch Look “Themed” (And How to Avoid It)
If your setup feels off, it’s usually one of these:
Too many identical bunny figurines
Bright, shiny finishes
Everything purchased from one collection
No variation in height
No visible wear or age
Every inch filled
Remove one item and reassess. Collected design almost always benefits from subtraction.
How to Thrift for Vintage Easter Decor
The best Easter Porch Decor rarely comes from seasonal shelves.
Look year-round for:
Baskets in varied sizes
Old crates
Crocks and enamelware
Neutral planters
Aged lanterns
Focus on texture and shape rather than holiday labels.
Then when Easter comes, you only need to add small seasonal touches:
A ribbon swap
A nest tucked into greenery
A few muted eggs
A simple bunny silhouette
This keeps your Easter Decoration Ideas flexible and reusable.
The Formula to Use Every Year
Are you all about style, decor and organization? Download a copy of our Clutter Reset Guide.
Are you all about style, decor and organization? Download a copy of our Clutter Reset Guide. ****
If you want your home to feel Easter-ready without decorating every single room, start with your entry.
The entryway is the first impression. It quietly sets the tone for everything that follows. And the best part? You only need one styled surface to shift the entire feel of your home.
This guide will walk you through a simple 3-layer system for Easter Spring Decorations that works even on slim consoles and narrow entry tables.
You don’t need to decorate the whole house. One thoughtfully styled entry table using layered Easter Spring Decorations can shift the entire feel of your home in a single afternoon.
And once you see how much difference three simple layers make, you’ll never go back to scattering decor again.
Are you all about style, decor and organization? Download a copy of our Clutter Reset Guide. ****
If you love farmhouse Easter decor ideas but your mantel keeps feeling crowded, you’re not alone.
Garlands are soft and pretty in theory. But once you add mini wreaths, bunnies, candles, and pastel accents, everything starts fighting for attention. Instead of looking intentional, it feels busy.
The fix is not buying less. It’s spacing better.
This simple layout formula will help your farmhouse Easter decor feel balanced, layered, and calm — without looking themed or overdone.
Think of your mantel like a styling map. Instead of decorating edge to edge, you’re creating zones with space between them.
Step 1: Start With One Strong Anchor
Before you hang the garland, choose your anchor.
This could be:
A large mirror
A vintage farmhouse window frame
A substantial wreath
A wood-framed sign
Your anchor should visually “hold” the entire display. Without it, the garland feels like it’s floating.
In farmhouse Easter decor ideas, natural wood, whitewashed frames, or neutral round mirrors work beautifully because they ground all the softer Easter spring decorations around them.
Step 2: Drape the Garland With Intention
Now add your garland — but don’t just toss it across.
Follow these spacing rules:
Keep the garland 1–2 inches back from the edge
Allow a soft, natural sag (not tight, not dramatic)
Leave 3–4 inches of empty space at each end
That small bit of breathing room instantly prevents crowding.
Whether you’re using greenery, eucalyptus, or pastel egg garland, the goal is softness, not bulk.
Step 3: Use Odd-Number Clusters (The Rule That Changes Everything)
This is where most Easter decoration ideas go wrong.
Instead of spreading small items across the entire mantel, build 2 focused clusters using groups of 3.
Each cluster should include:
One tall piece (candle holder, lantern, tall vase)
One medium piece (bunny figurine, framed art, small wreath)
One grounding piece (stacked books, wooden beads, low ceramic bowl)
Place the clusters slightly overlapping the garland, not sitting completely in front of it.
Then leave 6–10 inches between clusters.
Odd numbers create movement. Even numbers feel stiff and staged.
Step 4: Balance Visual Weight (This Is the Secret Move)
Balance isn’t about symmetry. It’s about weight.
If one side has height, the other side needs density. If one side feels light and airy, the other side may need texture.
Here’s how to check visual weight:
Darker or textured pieces feel heavier.
Taller items pull the eye upward.
Too many small pastel items create clutter.
Farmhouse Easter decor works best when soft pastels are grounded with wood, ceramic, metal, or woven textures.
If your mantel feels “off,” it’s usually a weight issue — not a quantity issue.
Step 5: The “No Crowd” Spacing Guide
Use this quick checklist:
3–4 inches between small items
6–10 inches between clusters
No more than 2 main focal areas
At least one clear patch of visible mantel surface
White space is not empty space. It’s what makes the decor look intentional.
A Balanced Mantel Example
Imagine this setup:
Center anchor: A round wood-framed mirror.
Garland: Soft greenery draped gently across the length.
Left cluster: Tall white candle holder Ceramic bunny Small stack of neutral books
Right cluster: Black lantern Mini wreath leaning behind White vase with light pink stems
Nothing touches edge to edge. There’s breathing room between the clusters. The mirror grounds the entire look.
That’s the balanced garland trick in action.
Common Mantel Mistakes to Avoid
Garland pushed too far forward
Even-number styling
Tiny decor scattered across the full length
Competing focal points
When everything is a focal point, nothing stands out.
The Repeatable Formula You Can Use Every Year
Are you all about style, decor and organization? Download a copy of our Clutter Reset Guide.
Anchor → Drape → Cluster in 3s → Leave space → Check visual weight
You don’t need more decor.
You need a better layout.
Once you follow this formula, your farmhouse Easter decor ideas will look balanced, intentional, and beautifully layered — without crowding your mantel.