

Are you all about style, decor and organization? Download a copy of our Decluttering Workbook.
*****
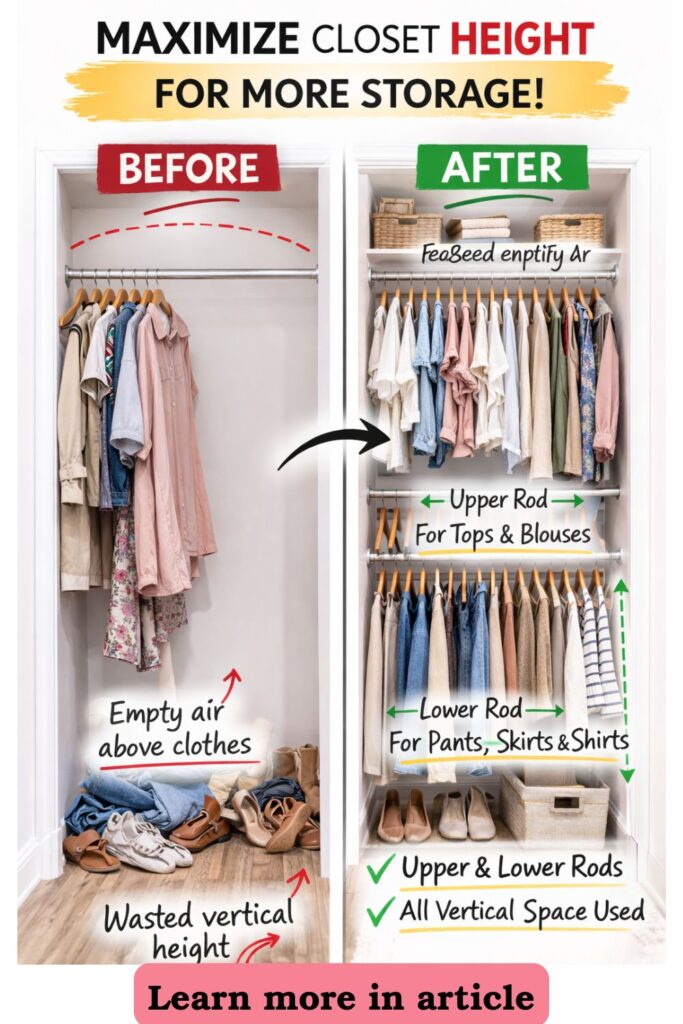
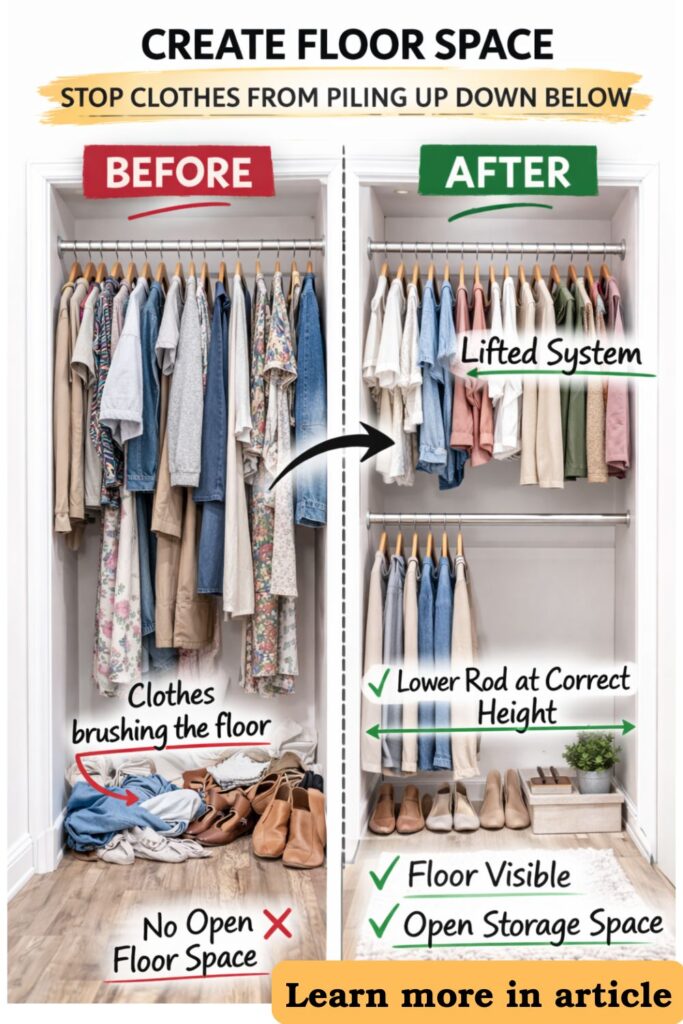
If your small closet feels cramped but you still see empty air above your clothes, you’re not out of space — you’re underusing height.
Adding a second hanging level can nearly double your hanging capacity without expanding the footprint. But it only works when the measurements are right. Install it too low and clothes drag. Too high and you can’t reach it. Too tight and everything bunches.
This guide walks you through the logic step by step so your second rod feels intentional, not crammed.
Need some in depth help with organization and productivity ? Drop on by our directories choc full of productivity coaches, minimalist coaches, and work/life balance coaches to get your life organized! Or click here to have us match you to the best.
1. Measure Your Total Usable Height First
Before you buy a rod or brackets, you need to understand the vertical space you’re working with. Guessing is what leads to sagging rods and shirts brushing the floor.
Measure floor to ceiling and floor to existing rod: Use a tape measure to record the full ceiling height, then measure from the floor to your current rod. Write both numbers down so you can calculate spacing clearly.
Calculate the available vertical gap: Subtract the floor-to-rod measurement from the total ceiling height. If you have at least 72 inches of total usable height, you can usually create two short-hang sections of about 36 inches each.
If you can’t fit two 36-inch sections, double hanging may not be your best option.
2. Sort Clothing by Length Before You Install Anything
Double hanging only works when most of your clothes are short-hang items like tops and folded pants. If you skip this step, you may install a rod that doesn’t suit your wardrobe.
Group your clothing by length category: Separate shirts, blouses, skirts, and folded pants (short-hang) from dresses, coats, and long cardigans (long-hang). Lay them out so you can visually assess the proportions.
Confirm that most items are short-hang: If 60–70% of your wardrobe falls into the short-hang category, adding a second rod makes sense. If most items are long, you may need to keep part of the closet single-hang.
The rod layout should match your clothing reality, not the other way around.
3. Mark Proper Rod Placement on the Wall
Precise placement is what prevents a cramped result. Two rods need breathing room.
Mark the bottom rod height first: Measure approximately 36–40 inches up from the floor and mark that line with painter’s tape. This gives enough clearance for shirts and folded pants.
Mark the upper rod with equal spacing above: Measure another 36–40 inches above the lower rod mark. That becomes the height of your second rod. Use a level to ensure both lines are straight before installing hardware.
This spacing ensures that garments on both rods hang freely without overlapping.
4. Choose the Right Installation Method
Not every closet requires drilling into studs, but stability matters. A second rod holds weight, and weight increases over time.
Select your rod and support system: Choose between a fixed wood or metal rod with brackets (most stable), an adjustable tension rod (renter-friendly), or an add-on rod that attaches beneath your current one.
Secure brackets at the correct anchor points: If installing permanent hardware, locate wall studs for maximum strength. Use anchors if studs aren’t available. Always test the rod with several garments before fully loading it.
The rod should feel solid when you apply gentle downward pressure.
5. Reorganize With Intention After Installation
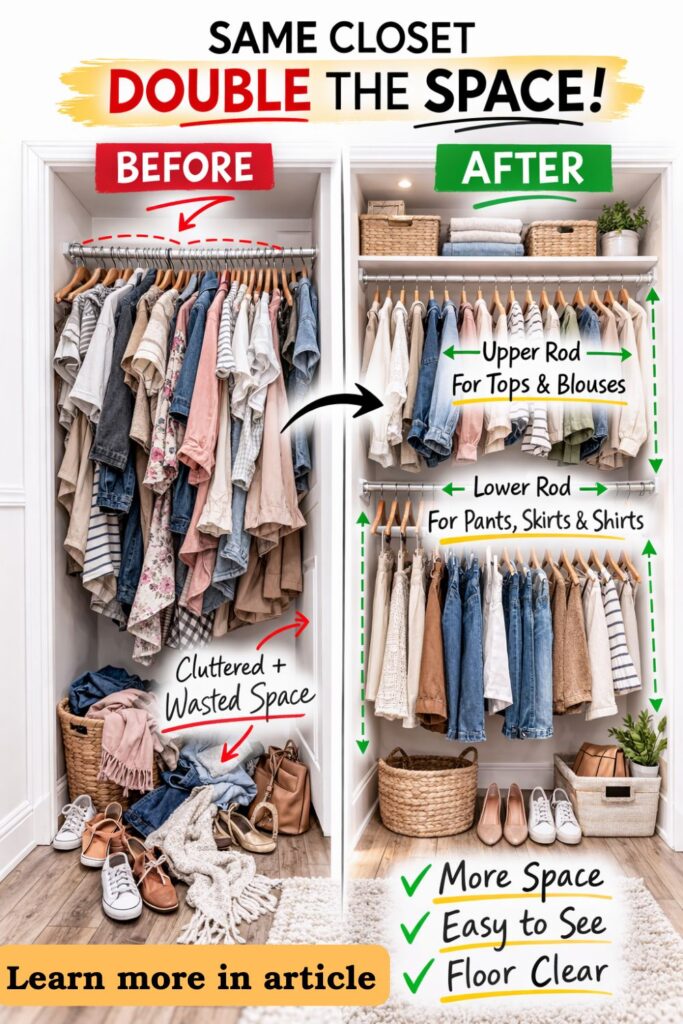
Installing the rod is only half the process. How you distribute clothing determines whether the space feels efficient or chaotic.
Place frequently worn items on the lower rod: Keep daily tops, work shirts, and grab-and-go pieces at eye level for easy access.
Use the upper rod for secondary or seasonal items: Store less frequently worn tops, backups, or off-season pieces above. Keep long garments together in a single-hang section if needed.
Double hanging should reduce friction, not create a visual pile-up.
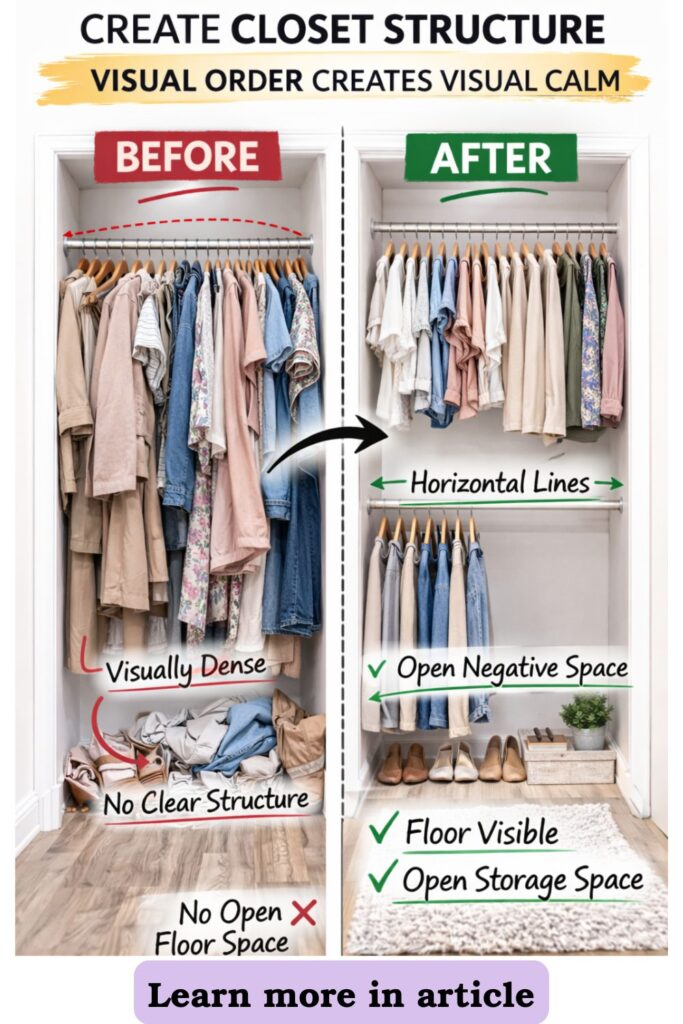
How to Keep the Space From Feeling Crowded
Two rods can look visually busy if not styled carefully.
Switch to slim, uniform hangers: Matching hangers reduce visual noise and free up horizontal inches instantly. Thin hangers also prevent rods from overfilling too quickly.
Leave small gaps between clothing groups: Avoid packing every inch tightly. Allow slight breathing room between categories like workwear and casual pieces. Air space is what keeps a double-hang closet feeling intentional.
The goal is structure, not density.
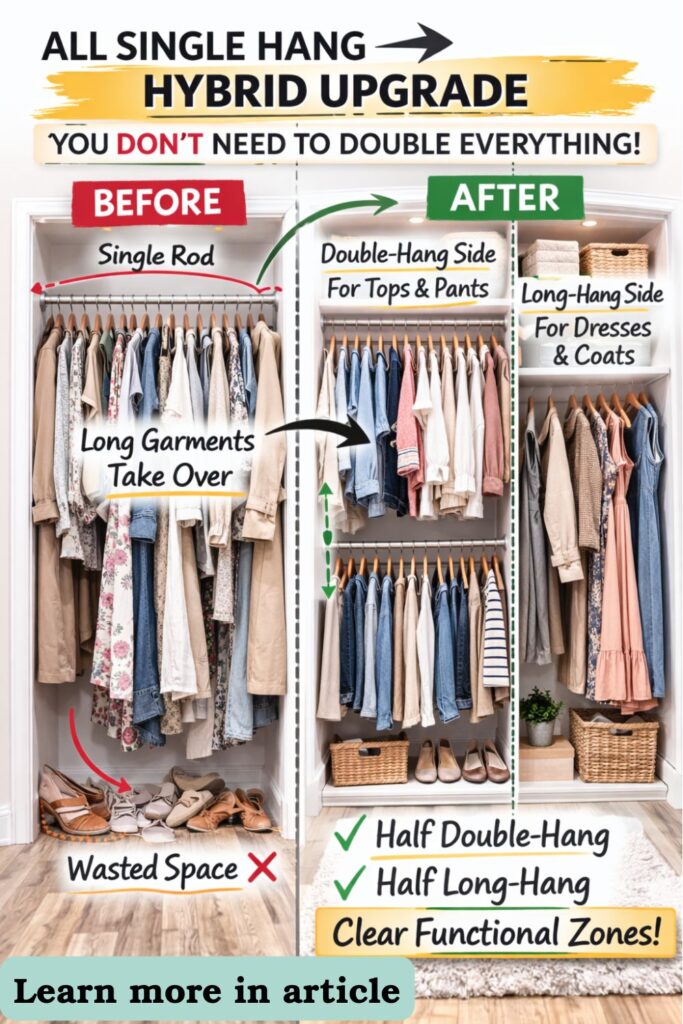
When a Partial Double Rod Makes More Sense
In very small closets, you don’t have to double the entire width. Sometimes a hybrid layout works better.
Convert only half the closet to double hanging: Install two rods on one side for short-hang items and leave the other side single-hang for dresses and coats.
Use upper shelves for the remaining vertical space: If ceiling height is limited, keep one rod and add shelving above instead of forcing two hanging levels.
Flexibility is often more efficient than symmetry.
Adding a second hanging level doesn’t make your closet bigger. It makes your height work smarter.
With accurate measurements and thoughtful spacing, you can nearly double your usable storage — without adding a single square foot.
Are you all about style, decor and organization? Download a copy of our Decluttering Workbook.
*****
Need some in depth help with organization and productivity ? Drop on by our directories choc full of productivity coaches, minimalist coaches, and work/life balance coaches to get your life organized! Or click here to have us match you to the best.
The post How to Add a Second Hanging Level in a Very Small Closet appeared first on Life Coach Hub.
Leave a Reply